Showing posts with label tutorial. Show all posts

November 5, 2015

DIY No-Sew Clutch Purse Tutorial + Be Healthy For Every Part of Life with These Date Night Essentials

This shop has been compensated by Collective Bias, Inc. and its advertiser. All opinions are mine alone. #BeHealthyForEveryPartofLife #CollectiveBias
Learn how you can make an easy no-sew clutch purse quickly! Plus, check out how these simple additions to your purse can help you be healthy for every part of life!

Can you guys even believe it's November? Life just flies by and after the shocking realization that we're smack dab in the middle of autumn, I also realized that hubby and I haven't had a date night in... I don't even really know how long. That's not cool in my book and we immediately decided that fact was going to change, pronto!

Learn how you can make an easy no-sew clutch purse quickly! Plus, check out how these simple additions to your purse can help you be healthy for every part of life!

We've been planning on doing this or that, but with such busy schedules it's hard to coordinate an "official date night out". I'm sure you can relate, life gets in the way of having fun sometimes for most adults... but not for us this week.

Learn how you can make an easy no-sew clutch purse quickly! Plus, check out how these simple additions to your purse can help you be healthy for every part of life!

This week, we made time for a date night. We giggled, we had a good time, and I had the chance to rock some cute new accessories - one of my favorite parts of going out on a date with the hubby is dressing up! Ah, married life!

Learn how you can make an easy no-sew clutch purse quickly! Plus, check out how these simple additions to your purse can help you be healthy for every part of life!

While I love my hubs, I also love fashion, so it comes as no surprise that I love handbags. After updating my main purse to a sturdy and adorable black and white number, I needed a place to keep all my date-night must haves; that's where this DIY No-Sew Clutch comes into the picture.


Learn how you can make an easy no-sew clutch purse quickly! Plus, check out how these simple additions to your purse can help you be healthy for every part of life!

As you probably already know, I'm the crafty type... but I haven't mastered sewing yet. It's on my to-do list, but for now this quick project is easy enough for a little kid to make and that's what makes it fun and perfect for a quick project before a date!

Learn how you can make an easy no-sew clutch purse quickly! Plus, check out how these simple additions to your purse can help you be healthy for every part of life!


So what will you need to make a cute clutch like mine?

You will need:
Scissors
1/2 yard of a sturdy fabric
2 pieces of felt
Washable Fabric Glue

Step one of making this adorable little clutch is deciding on what piece of the pattern you want to use; or in my mind this was the logical first step... I'm going to be transparent here and admit I totally designed this purse based on the beautiful pattern. The size and shape are based purely on getting the full mandala on the backside of the purse... and I didn't take exact measurements until after it was made. With that said, I think that just means this project is that easy - you literally don't even need measurements. Regardless, my purse measures 8 inches x 12 inches.

Learn how you can make an easy no-sew clutch purse quickly! Plus, check out how these simple additions to your purse can help you be healthy for every part of life!

After cutting your fabric, you'll want to make the "felt lining". To add my lining I simply cut about an inch off of each piece to make my purse interior and it's lining the size I desired. Placing the felt and folding the purse as if you were assembling it to make sure it's cut to the correct size.

Learn how you can make an easy no-sew clutch purse quickly! Plus, check out how these simple additions to your purse can help you be healthy for every part of life!

After cutting it down and "testing" it to make sure it was the correct size, I used the fabric glue liberally and stuck the fabric to the felt.

Learn how you can make an easy no-sew clutch purse quickly! Plus, check out how these simple additions to your purse can help you be healthy for every part of life!

The next step in this project is finalizing the outer seams of the purse. You'll want to apply a liberal line of glue down each outer edge and the middle/ bottom of the purse, as if you were using the glue as a sewing machine of sorts, sealing each edge. I allowed my project to dry with clothespins on the top "seam" for about an hour, to make sure no rough edges would show when the purse is closed.

Learn how you can make an easy no-sew clutch purse quickly! Plus, check out how these simple additions to your purse can help you be healthy for every part of life!

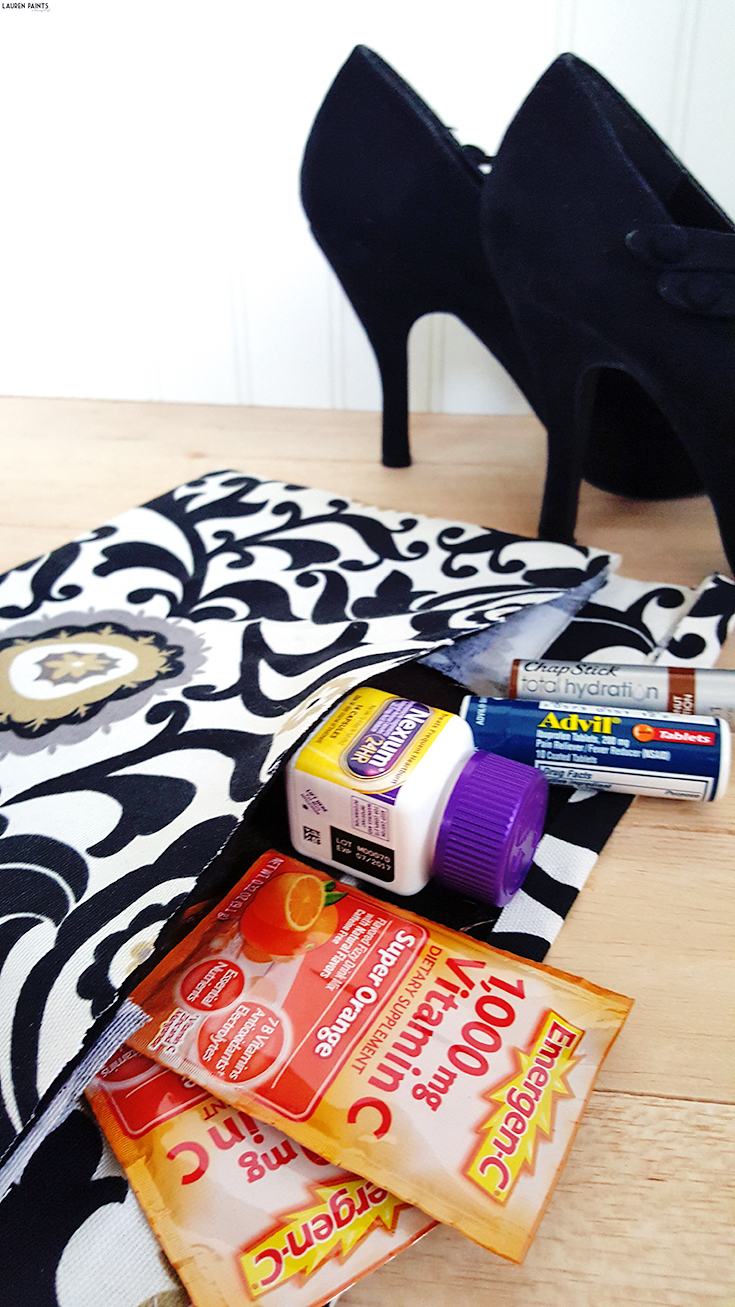
The final step is adding in all of your purse essentials, now your little top-fold clutch is ready for date night!

Learn how you can make an easy no-sew clutch purse quickly! Plus, check out how these simple additions to your purse can help you be healthy for every part of life!

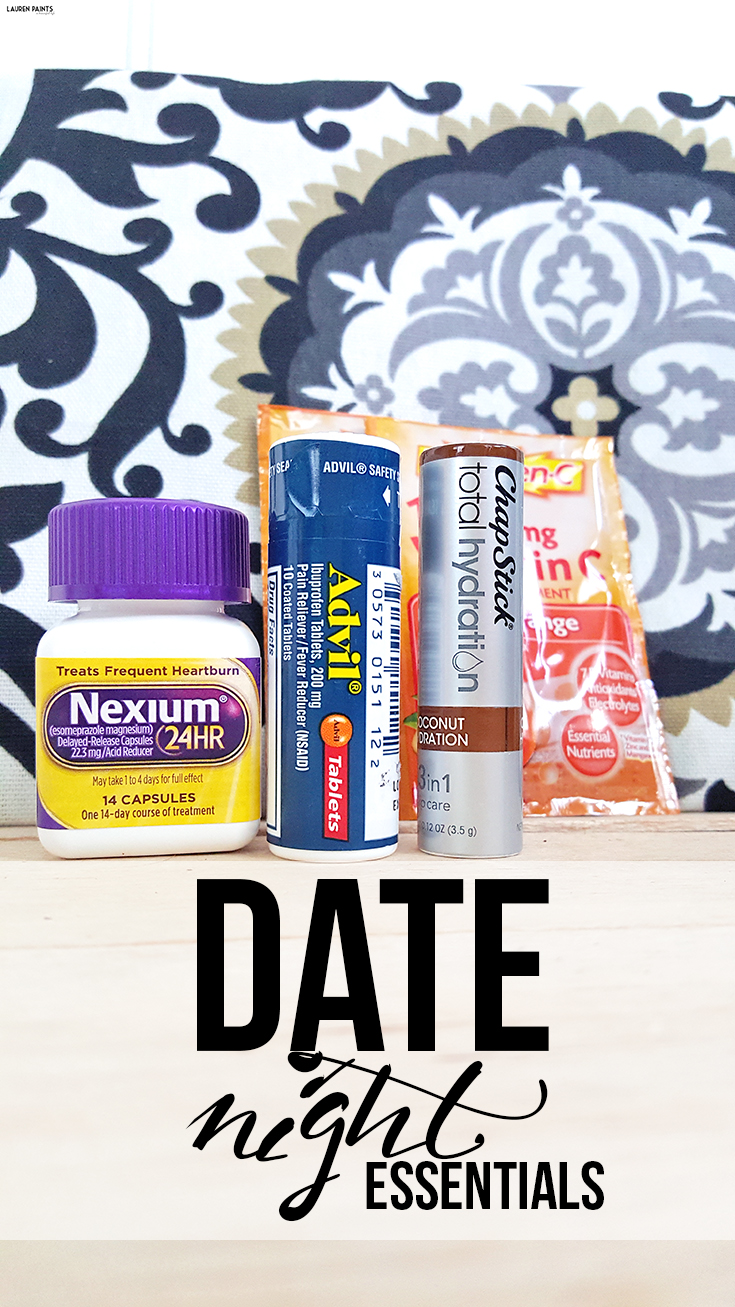
So what are your date night essentials? I guess since I've shared my tutorial to make my cute little clutch, I should share what my date night essentials include... these must-have items are the things every gal should have stashed away in her purse in case of emergency, especially when going out on the town with her man!

Learn how you can make an easy no-sew clutch purse quickly! Plus, check out how these simple additions to your purse can help you be healthy for every part of life!

First we'll start with the item in my clutch I love the most, my Chapstick Total Hydration. This 100% Natural, age defying, advanced nourishing formula with Argan oil, avocado butter, and rosehip oil is the best way to smooth and moisturize my lips! With a noticeable difference within minutes in the way my lips look, I would say that Chapstick Total Hydration is a new favorite for myself (and my hubby)... and just in case you were wondering, it is actually a clinically proven way to get healthier looking lips - not just my own little beauty secret!

Learn how you can make an easy no-sew clutch purse quickly! Plus, check out how these simple additions to your purse can help you be healthy for every part of life!

Speaking of healthy, let's talk about the way we keep our immune systems nice and strong with Emergen-C. Offering more healthier days and more healthier nights, Emergen-C allows everyone to "let [their] healthy out". With a zingy orange flavor (as well as several other flavor options), I'm able to guzzle down over 20 varieties of vitamins in one drink, the perfect way to karate chop illness before it even gets to me and since I want hubby to remain healthy, I'm sure to always have an extra pack for him to sip on as well! No sneezing patrons at nearby tables, nor any adorable sniffling baby with a cold will threaten us with their germs, we'll just use an Emergen-C!

Learn how you can make an easy no-sew clutch purse quickly! Plus, check out how these simple additions to your purse can help you be healthy for every part of life!

Next let's talk about Nexium 24HR, the #1 prescribed acid blocker brand (based on IMS health data: total Nexium® prescriptions 2006 - 2014). It's the answer to heartburn for us ol' married folk and it's been just what we needed more times than I can count. These tiny little pills offer all day, all night heartburn protection. But please note, they do sometimes take 1-4 days to offer the full effect and as always, use as directed.

Learn how you can make an easy no-sew clutch purse quickly! Plus, check out how these simple additions to your purse can help you be healthy for every part of life!

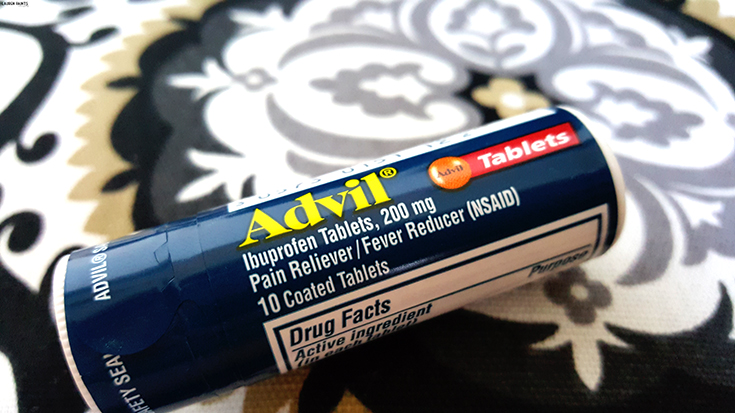
Lastly, let's talk about the pain reliever that's been helping all of us deal with aches and pains for the past 25 years - Advil. I make sure I always have a little Advil Tablet Vial in my clutch at all times, because you never know when a headache or sore muscles will sneak up on you. I don't want hubby or myself to suffer from pain so I'm always stocked up on the strongest OTC pain reliever, because I know Advil is the only way to make sure the aches and pains go away quickly.

Learn how you can make an easy no-sew clutch purse quickly! Plus, check out how these simple additions to your purse can help you be healthy for every part of life!

So as you can expect, our date was awesome. With all of the date night essentials on-hand we were able to ward off chapped lips, a head ache, and hand cramps from paddling too much...

Learn how you can make an easy no-sew clutch purse quickly! Plus, check out how these simple additions to your purse can help you be healthy for every part of life!

Now don't get any ideas, we went out on the kayak for a few hours and just enjoyed spending time together out on the water with the sunshine on our faces. We also spent a little bit of time shopping and then chowed down on a delicious lunch at one of our favorite spots near by the mall. Simple, but the perfect little date with the perfect guy for me.

Learn how you can make an easy no-sew clutch purse quickly! Plus, check out how these simple additions to your purse can help you be healthy for every part of life!

Whether you are planning a date, heading off to the first day on a new job, or just spending the evening in and watching a movie... It's good to be healthy for every part of life, so be sure to stock up on all the essentials for your family at Walmart!

Learn how you can make an easy no-sew clutch purse quickly! Plus, check out how these simple additions to your purse can help you be healthy for every part of life!

So tell me, what do you bring with you on date night with your man? Is there any lipstick shade that you need to have in your bag? Also, if you decide to make one of these adorable little clutches, I'd love to see how it turns out, be to share it with me!

November 3, 2015

DIY Super Simple Fox and Owl Hanging Planter from a Soda Bottle!

This post contains links to Amazon, these are affiliate advertising links designed to provide a means for sites like mean to earn advertising fees by advertising for and linking to Amazon.com.
Who would have thought an old soda bottle could be so green? Check out how you can upcycle your Dew into something you can Do Yourself with this super simple fox and owl hanging planter project!

My house is my little sanctuary. Like most adults, I fill it with the things I love, the items I need, and little trinkets that make me smile. I'm doing my best at making sure I also don't throw too much away, since our planet is so full of stuff.

Who would have thought an old soda bottle could be so green? Check out how you can upcycle your Dew into something you can Do Yourself with this super simple fox and owl hanging planter project!

So that leads me to my DIY project for today. I found a new plant while grocery shopping the other day and I had to have it... but I didn't have anywhere to plant it. Of course, I could have planted it in our yard... But I wanted to plant it in a cute planter. My first thought was that I could buy one. Then I considered the price of the pot that I had looked at when I was shopping at my favorite discount store, it was $7.99; that's $4 more than the plant cost. So I decided I could make one or two...

Who would have thought an old soda bottle could be so green? Check out how you can upcycle your Dew into something you can Do Yourself with this super simple fox and owl hanging planter project!

That's right, I made a planter for my new little pink fuzzy plant... and I actually had a plant from my friend Rachel that I decided to make a pot for as well. So to get technical, I made TWO planters. But how?

Who would have thought an old soda bottle could be so green? Check out how you can upcycle your Dew into something you can Do Yourself with this super simple fox and owl hanging planter project!

Out of an old soda bottle. While we love the taste, soda isn't regularly our beverage of choice around here; so when we had a couple empty bottles, I knew I had to do something creative with them - I blame it on Pinterest.

Who would have thought an old soda bottle could be so green? Check out how you can upcycle your Dew into something you can Do Yourself with this super simple fox and owl hanging planter project!

I turned the Fanta bottle from this post into two adorable little hanging planters and it only took me about an hour to complete the project.

Who would have thought an old soda bottle could be so green? Check out how you can upcycle your Dew into something you can Do Yourself with this super simple fox and owl hanging planter project!

Do you want to make an old soda bottle into something useful and adorable? Here's how I made my little fox and owl:

Who would have thought an old soda bottle could be so green? Check out how you can upcycle your Dew into something you can Do Yourself with this super simple fox and owl hanging planter project!

What you'll need:

1 2 Liter Soda Bottle
Paint Brushes
Hemp String
Exacto Knife
Clear Pebbles
Soil & Plants

Who would have thought an old soda bottle could be so green? Check out how you can upcycle your Dew into something you can Do Yourself with this super simple fox and owl hanging planter project!

To start, I cut the soda bottle in half and then cut the shapes of the animals into each half of the bottle. Making little triangle ears for my foxy friend and little bubbly, rounded eyes for my owl friend.

Who would have thought an old soda bottle could be so green? Check out how you can upcycle your Dew into something you can Do Yourself with this super simple fox and owl hanging planter project!

Next, I painted each animal. Giving the owl an almost all-over coat of grey and the fox a thin line around the top, just giving the top of his head the orange coloring like a fox would have. Let this layer dry.

Who would have thought an old soda bottle could be so green? Check out how you can upcycle your Dew into something you can Do Yourself with this super simple fox and owl hanging planter project!

Who would have thought an old soda bottle could be so green? Check out how you can upcycle your Dew into something you can Do Yourself with this super simple fox and owl hanging planter project!

After that, I added the white paint to each animal. Covering the bottom half of the owl and the fox with a thick white layer of paint.


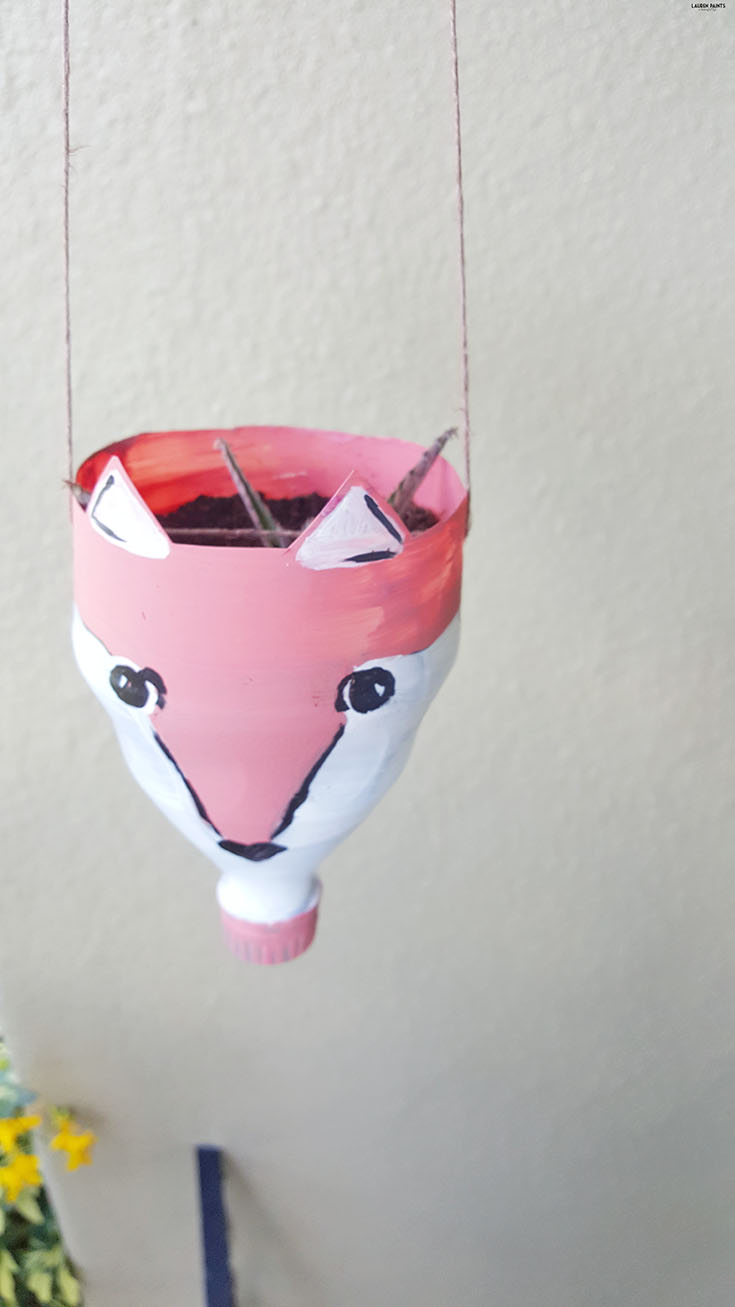
Lastly, I added on the details, little white eyes with black circles and rectangles inside left white for the owl eyes. Tiny little beady eyes for the fox with a heart shaped nose. I added in little detailed lines around the owl, some feathers, a little bit of orange for his beak and he was set to start drying. The fox needed a little white on his ears, a little orange on his "neck" or the bottle cap, and a few little black lines to add some detail and he was also ready to dry.

Who would have thought an old soda bottle could be so green? Check out how you can upcycle your Dew into something you can Do Yourself with this super simple fox and owl hanging planter project!

Who would have thought an old soda bottle could be so green? Check out how you can upcycle your Dew into something you can Do Yourself with this super simple fox and owl hanging planter project!

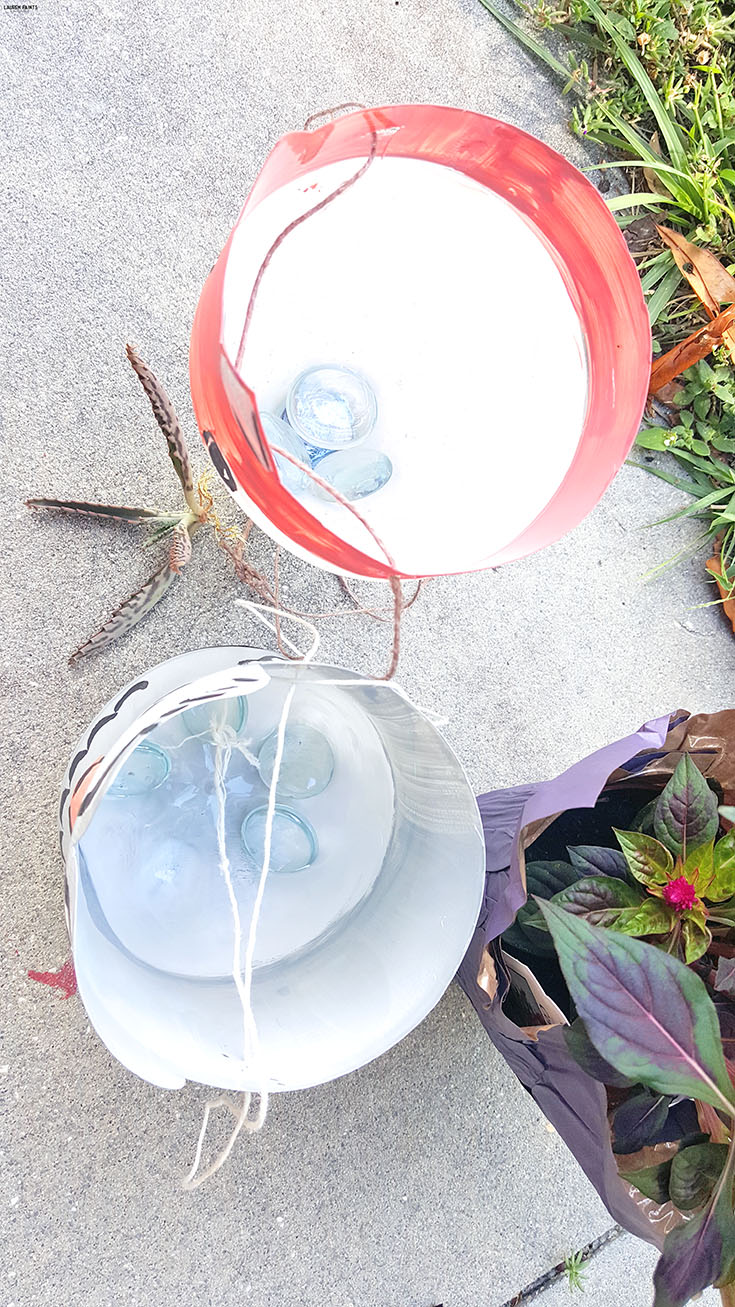
I let both the fox and the owl dry for about 20 minutes and they were dry to the touch and ready to have string added as well as some pretty plants. Using an exacto-blade cut two small holes to each side of your animal face, about 1/3 of inch down. Use a fairly long piece of hemp to hang your planters and tie knots securely on both ends.

Who would have thought an old soda bottle could be so green? Check out how you can upcycle your Dew into something you can Do Yourself with this super simple fox and owl hanging planter project!

Now it's time to add the beautiful greenery, to start I added in a handful of "pebbles" purchased from the $1 store and a thick layer of dirt. Placed the plant properly in the planter and added another layer of dirt.

Who would have thought an old soda bottle could be so green? Check out how you can upcycle your Dew into something you can Do Yourself with this super simple fox and owl hanging planter project!

Lastly, I lifted both planters off the ground and made sure they were sturdy and balanced on the string! They worked perfectly and are now proudly displayed!

Who would have thought an old soda bottle could be so green? Check out how you can upcycle your Dew into something you can Do Yourself with this super simple fox and owl hanging planter project!

My little owl friend has replaced my Halloween wreath and looks fabulous next to my door that is colored almost exactly like the flowers!

Who would have thought an old soda bottle could be so green? Check out how you can upcycle your Dew into something you can Do Yourself with this super simple fox and owl hanging planter project!

My fox is towering over my little reading corner, looking out into the living room and beyond. These little planters are so cute and can be used indoor and outdoor - the perfect new addition to our house, if I don't say so myself!

Who would have thought an old soda bottle could be so green? Check out how you can upcycle your Dew into something you can Do Yourself with this super simple fox and owl hanging planter project!

Whether this is a project you attempt with the kids or it's a way for you to get your crafting fix, I'm sure you'll love the way your planters turn out as well! So simple to make, yet so incredibly cute! If you decide to make a set, be sure to show me how they turn out! Plus, what other animals would you like to see? I'm thinking a hippo will be next on my list... or maybe a little penguin?

October 27, 2015

DIY Kooky Owl Cups

This shop has been compensated by Collective Bias, Inc. and its advertiser. All opinions are mine alone. #CVS4FantaFun#CollectiveBias

You can craft a set of customized owl cups quickly and have a hoot of a time making them!

Halloween is nearly here so you better believe my home is covered in fun, festive fall decor. With plump little pumpkins gracing our TV stand and lovely little leaves decorating our front step, it's officially as close to autumn as Florida seems to get.


You can craft a set of customized owl cups quickly and have a hoot of a time making them!

While I'm craving a bit of a bite in the air, I'm allowing myself to indulge in other fun parts of Fall lately; I've been spending time crafting, snacking on anything orange like pumpkin flavored treats, Fanta Orange Soda, and gummy candy corn, while I'm also spending lots of time blogging...

You can craft a set of customized owl cups quickly and have a hoot of a time making them!

Lucky for you, that means I'm sharing a tutorial today and what we're crafting up makes sipping down a large glass of Fanta Orange Soda a hoot of a time!

You can craft a set of customized owl cups quickly and have a hoot of a time making them!

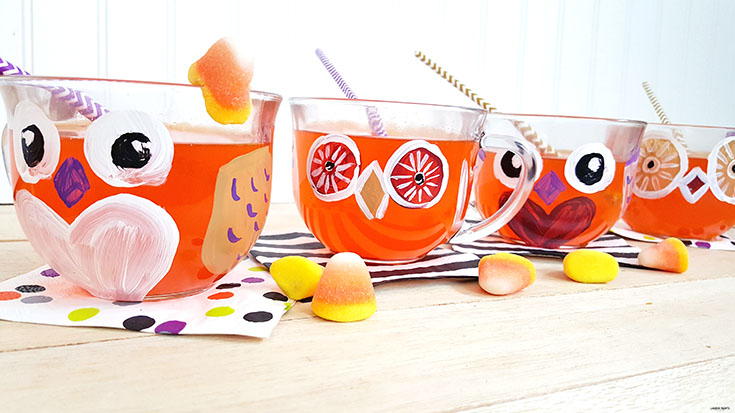
These little owls are an awesome way to add some fall decor to your table setting and since they are hand-crafted, you can personalize each mug for each guest attending your dinner! What's even better, these mugs are top-rack dishwasher safe and so completely perfect to give as a gift when hosting a holiday party! Personalized painted owls for each guest, made with multi-surface paints are the perfect way to treat each guest to something truly unique when you have friends over, fill these cuties up with some Fanta and you're definitely in for a good time!

You can craft a set of customized owl cups quickly and have a hoot of a time making them!

Want to make a set of these adorable little owl mugs for yourself?

You'll need:
4 glass mugs
Multi-surface paint
Paint brushes
Fanta Orange Soda

You can craft a set of customized owl cups quickly and have a hoot of a time making them!


Personalizing these mugs is an easy experience, just keep things basic. Make the front circle on your owl buddies into a heart shape, add eye balls in the shape of circles, add beaks in the shape of diamonds, wings in the shape of an uppercase U. Add a layer of paint to the bottom of each mug for fun...

As you can see in my step-by-step photos below, it's best to keep things as simple as possible!

You can craft a set of customized owl cups quickly and have a hoot of a time making them!


You can even add some tail feathers for your friends that love shaking their tail feathers at holiday get togethers! Whether you customize the owls for friends or make a set to keep for yourself, these cute little buddies are the perfect way to add some fun fall items to any kitchen! You could even get a little wild and host a painting party with friends and you each could customize your own mug, the possibilities are endless and the owls that will be created will be fabulous!

You can craft a set of customized owl cups quickly and have a hoot of a time making them!

Once your owls are finished being personalized, you'll want to place them in an oven at 350 degrees and allow the paint to fully set (about 30 minutes) and then turn off the oven and allow the cups to cool, or follow the instructions on your paint tube to be sure the paint sets correctly!

You can craft a set of customized owl cups quickly and have a hoot of a time making them!

Once the cups are cool to the touch, you are cool to serve up some Fanta Orange Soda! Add some colorful straws and napkins and you've got a party on your hands!

You can craft a set of customized owl cups quickly and have a hoot of a time making them!

You can craft a set of customized owl cups quickly and have a hoot of a time making them!

You can craft a set of customized owl cups quickly and have a hoot of a time making them!

You can craft a set of customized owl cups quickly and have a hoot of a time making them!

Now that I've shared how I crafted up one of my favorite DIY projects ever, I'd love to hear what kind of fall fun you are planning this year...? Will you be attending any parties or hosting any shindigs? Don't forget to add Fanta Orange Soda to the fun - you can grab a bottle at CVS for a great deal, everyday!
You can craft a set of customized owl cups quickly and have a hoot of a time making them!

For all Your Thirsty Lil’ Monsters, save on Fanta 2 Liter Bottles - Get 4/$5 at your local CVS!

October 19, 2015

Make Halloween Snack Time Fun with Cyclops Cookie Monster Pudding Snacks

This shop has been compensated by Collective Bias and its advertiser. All opinions are mine alone. #SnackAndGo #CollectiveBias


Go ahead and have a little bit of tasty fun in the spirit of Halloween! Make some adorable and affordable monsters for snack time with these free printables!

Life has been crazy lately, with a lot of time spent on airplanes, less sleep, more work, and several meals consumed inside airports... but in the middle of the chaos, I've been blessed with the chance to spend a tiny bit of time with my nieces and nephews. Hanging out with the little guys and gals in my family makes me think about how much fun this season is from their perspective. Specifically, I've been thinking about how amazing Halloween is from their point of view, especially after hearing my niece talk about monsters and her favorite princess...

Go ahead and have a little bit of tasty fun in the spirit of Halloween! Make some adorable and affordable monsters for snack time with these free printables!

She has so much imagination, I just felt inspired by her creativity. So today I'm super excited to share a fun and imaginative way for you to treat the little monsters in your family! Everyone loves to laugh a little during snack time so you might as well surprise the little boys and girls in your life with a delicious little cyclops cookie monster pudding treat that will make giggles go on for hours.

Go ahead and have a little bit of tasty fun in the spirit of Halloween! Make some adorable and affordable monsters for snack time with these free printables!


What do you need to make these cute little creatures?

A printer, cardstock, tape or glue, and scissors

Snack Pack® Pudding Cups in Vanilla, Chocolate, Chocolate Vanilla Mix, and Butterscotch

Go ahead and have a little bit of tasty fun in the spirit of Halloween! Make some adorable and affordable monsters for snack time with these free printables!

NABISCO Go-Paks! in all the best cookie varities including TEDDY GRAHAMS Honey Graham Snacks, Mini OREO Chocolate Sandwich Cookies, CHIPS AHOY! Mini Chocolate Chip Cookies, NUTTER BUTTER Bites Sandwich Cookies, and Mini OREO Golden Sandwich Cookies!

Reddi Wip Original

Go ahead and have a little bit of tasty fun in the spirit of Halloween! Make some adorable and affordable monsters for snack time with these free printables!


Toothpicks

Gummy Eyeballs

Go ahead and have a little bit of tasty fun in the spirit of Halloween! Make some adorable and affordable monsters for snack time with these free printables!

These little babies are easy to make, just print off the ghoulish grins printable here and the monster getups (pudding cup wrappers) printable here and here. Take the time to cut all of these little grins and getups out and tape them onto the cups, have fun decorating and combining!

When ready to serve, add a thick layer of Go-Pak cookies to each Snack Pack pudding.

Go ahead and have a little bit of tasty fun in the spirit of Halloween! Make some adorable and affordable monsters for snack time with these free printables!

Add a swirl of Reddi Wip and top off your monster creation with a creepy cyclops eyeball or make your monster into a true freak of nature with three instead of one!

Go ahead and have a little bit of tasty fun in the spirit of Halloween! Make some adorable and affordable monsters for snack time with these free printables!

Now it's time to gobble up your cookie monsters before they get you! Enjoy!

Go ahead and have a little bit of tasty fun in the spirit of Halloween! Make some adorable and affordable monsters for snack time with these free printables!

Don't you think these adorable little creatures are the perfect way to surprise a little monster in your life? You'll be happy to find out they are a super affordable way to spread some Halloween cheer as well and you can grab everything you'll need in one quick trip to Walmart!

Go ahead and have a little bit of tasty fun in the spirit of Halloween! Make some adorable and affordable monsters for snack time with these free printables!
With a delicious combination of ingredients, each only costing a $1, you can't go wrong; plus, if you grab this coupon you'll really be racking in the savings!

Go ahead and have a little bit of tasty fun in the spirit of Halloween! Make some adorable and affordable monsters for snack time with these free printables!

Plus these cute little creatures can be made into the perfect size by mixing two pudding cups into the Go-Pak container as well. The printables fit around the NABISCO Go-Paks! well and they still look absolutely adorable, but now you can eat even more of the deliciousness!

Go ahead and have a little bit of tasty fun in the spirit of Halloween! Make some adorable and affordable monsters for snack time with these free printables!

Maybe you plan on hosting a Halloween get-together or you're a teacher with a class of 30? Surprise everyone with something delicious and adorable, without spending much at all! Kids of all ages will love these little monsters and since everyone will turn into a cookie monster after eating one of these delicious treats, make sure you make enough for everyone to have seconds - including yourself!

Go ahead and have a little bit of tasty fun in the spirit of Halloween! Make some adorable and affordable monsters for snack time with these free printables!


So tell me, how do you spread Halloween cheer? Are you the type to play a trick or do you love to treat your family to terribly terrific treats? Tell me all about your Halloween festivities in the comments below...

Go ahead and have a little bit of tasty fun in the spirit of Halloween! Make some adorable and affordable monsters for snack time with these free printables!


October 18, 2015

Monster Magnets for Halloween - Decorate Your Fridge with These Frightful Creatures!

Keep things cute (and a little creepy) around Halloween this year with these adorable monster magnets! These perfect little creatures are an easy DIY project...

Sometimes I like to make silly little things, I guess because it makes celebrating the holidays a little more fun... or maybe it's because I'm truly a kid at heart. Regardless, there are a few holidays I get a little bit more excited about than others; I bet you can guess which holiday I'm super excited about currently though... With Halloween just right around the corner, we are getting the house in the spirit. Bowls of candy and little crafty pumpkin decor are littering my house currently and I love every bit of it.

Keep things cute (and a little creepy) around Halloween this year with these adorable monster magnets! These perfect little creatures are an easy DIY project...

Are you ready to get your house into the holiday spirit? Today, I want to share a super simple craft that definitely will bring joy to your home. Who knows? Maybe you can even spread the joy and share a few of these little monsters with your friends and family!

Keep things cute (and a little creepy) around Halloween this year with these adorable monster magnets! These perfect little creatures are an easy DIY project...

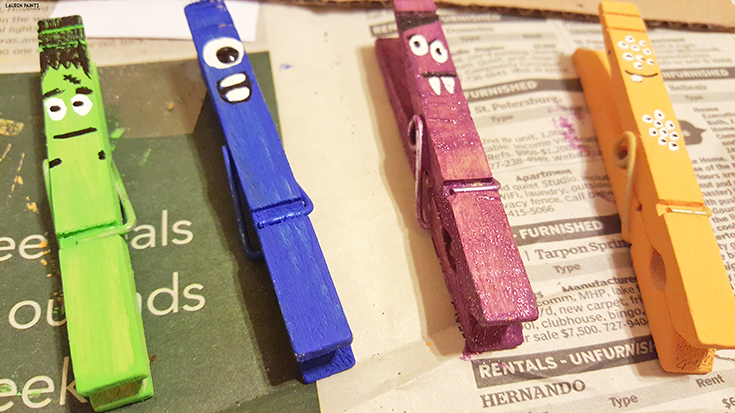
That's right, I said little monsters! I made little Monster Magnets to decorate our fridge for Halloween and you can make a set too! Don't fret if you aren't the crafty type, they are super easy to make and actually functional since they are made with clothes pins!

Keep things cute (and a little creepy) around Halloween this year with these adorable monster magnets! These perfect little creatures are an easy DIY project...

What will you need to make these? A Handful of clothes pins, a rainbow of acrylic paints, paint brushes, and magnetic tape.

Keep things cute (and a little creepy) around Halloween this year with these adorable monster magnets! These perfect little creatures are an easy DIY project...

You'll start this project by painting a base coat on each of your little monsters (clothes pins). Primary colors, funky Halloween colors, girly pink shades, whatever you prefer - be sure to paint every nook and cranny on the clothes pin. Let your base coat dry for at least 30 minutes.

Keep things cute (and a little creepy) around Halloween this year with these adorable monster magnets! These perfect little creatures are an easy DIY project...

Next you'll want to add the details to your monster. Make one with tons of tiny little eyeballs, make a few with googly eyes, or make them all into cyclops'... it doesn't matter where their mouths, noses, eyes, etc are because they are supposed to be goofy and silly. The wilder and sillier, the better, in my opinion. Once all the monster details are completed, let the paint dry for at least another 30 minutes.

Keep things cute (and a little creepy) around Halloween this year with these adorable monster magnets! These perfect little creatures are an easy DIY project...

This last step in the monster creation process is the easiest. Paint a thin layer of modpodge in either gloss or matte to seal the paint on your clips and then cut a small piece of magnet tape off of the roll. Cut that piece in half longways and stick it to the back of your clothes pin.

Keep things cute (and a little creepy) around Halloween this year with these adorable monster magnets! These perfect little creatures are an easy DIY project...

Now your creation is complete and ready to hang in the kitchen, not only around Halloween, but all year long - especially if you have a few little monsters running around your home! Hang good grades, amazing drawings, reminders for upcoming events, and more from these cute little creatures!

Keep things cute (and a little creepy) around Halloween this year with these adorable monster magnets! These perfect little creatures are an easy DIY project...

Now that I've shared a super simple and fun way to add some monstrous fun to your home, I'd love to hear what your favorite part of Halloween has been so far this season! Tell me all about your favorite recipe, costume idea, or anything else that comes to mind int he comments below! I can't wait to hear about it...

Keep things cute (and a little creepy) around Halloween this year with these adorable monster magnets! These perfect little creatures are an easy DIY project...