March 30, 2019

7 Unexpected Ways You SHOULD Be Deep Cleaning Your Home

This post is sponsored by The Libman Company but the content and opinions expressed here are my own.


Let's face it, life is messy. It's especially messy with a adventuresome toddler, a creative hubby, and a couple of wild pups running through your house. Between the canines tracking in mud from playing out in the Florida sun showers to the collections of leaves and dirt my two favorite people bring back from their adventures in the park - our house is constantly whirling with a little bit of a mess inside, that I'm always trying to tackle.

https://ooh.li/b9db850

While we haven't necessarily mastered how to rid our house of every 'mess' made, we have learned to embrace the mess some... and recently, after realizing how grimey parts of my home were looking, I decided to really DEEP clean. From scrubbing our cabinets til they were sparkling to making sure our tile floor looked superb in our sunroom, I've actually mastered how to deep clean - easily.

I'm not trying to brag or anything, but our house was getting to a state of emergency.. and something had to be done about it. So this year spring cleaning isn't just about Marie Kondo'ing our closets, it's about deep cleaning our digs and making sure we all can breathe a little easier. I mean, I'm not going over everything with a white glove, but I am making sure everything is clean and comfortable so we all feel more cozy in our little abode.


https://ooh.li/b9db850

With that said, here's 7 ways you should be deep cleaning your house that you may not have considered yet:


1. Wipe your blinds - This is something that I literally have neglected since we moved in a few years ago and while it isn't a "pressing" matter, it's something I realized had to be done. I use an old sock and a vinegar and water mixture in our Libman mop bucket to wipe these babies down. They air dry quickly and the grime and dust that I was able to remove was astonishing.

https://ooh.li/b9db850


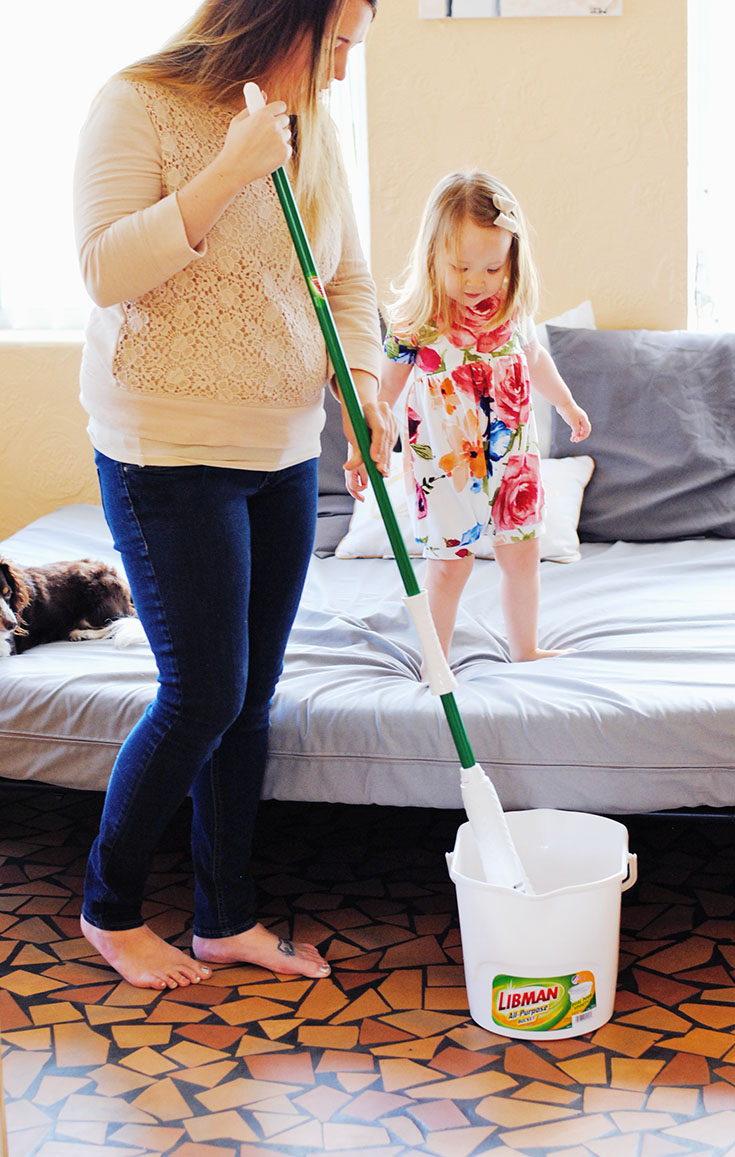
2. Deep clean your floors with a Libman Wonder Mop - So, this is embarassing to admit, but I have a feeling I'm not the only one; I've always thought sweeping and a quick mop was all my tile floors needed, but when I took a closer look at the tile in our sun room I realized my thoughts were incorrect and this just wasn't cutting it.


https://ooh.li/b9db850

So I grabbed an upgrade to the traditional "mop", a Libman Wonder Mop, plus a bucket and their powerful cleaner, while grocery shopping last week and decided to tackle our floors with what I thought was going to be a long, tedious process. But mopping with our Wonder Mop was actually super easy and quick to dry and it left our floor looking luminous - a word I would never have used to describe our tile floors previously.

https://ooh.li/b9db850


With the power wringer to quickly remove water from the mop, my floor dried so much faster than if I used a "regular mop" and the microfiber Grip Strips helped clean the floor so much deeper than a little mop pad can. What to test out an upgrade on the "traditional"? Find a Libman mop at your local retailer and check out their website to score $3 off your super awesome new mop!

3. Take your vent covers outside and hose them down- This may sound too easy, but it's a sure fire way to make sure your breathing in clean air. Just simply remove your vents from their proper places and spray them down outside, wipe each one down with a clean cloth and replace. This removes any built up dirt and makes sure dust isn't gathering on the vent, so it's a must-do each spring!

4. Scrub down your cabinets with a heavy-duty dish brush - While this isn't a must, it's something that is so rewarding if you have the time. Use a heavy-duty dish brush, you know the kind that you fill with soap within the brush, and SCRUB those cabinets. Wipe down with a wet wash cloth and your cabinets will literally sparkle.

5. Use your Libman Wonder Mop to clean your baseboards - This may seem crazy, but it's so much easier than getting on your hands and knees to get that dust and dirt off the boards on your floor. I get my Wonder Mop slightly damp, with a little bit of cleaner in the water,  then gently and carefully run it along each baseboard to clean off any sign of dust, it takes about 10 minutes to get every baseboard in my whole house and we all breathe a little easier with that hidden dust gone.

6. Change your air filter monthly - This is literally SO obvious, yet it's something that I think a lot of us forget to do. Change your air filter for your a/c monthly and we actually have a super old central a/c in our rental and have to add bleach into a part of it to make sure it runs as cleanly as it can. I don't suggest blindly pouring bleach, but if you have an older unit maybe ask a tech about doing this to ensure it's running as efficiently as possible.


7. Clean your mattress - This may sound crazy but make a mixture of lavender essential oils and baking soda and use a strainer to sprinkle the concoction over the top of your mattress, let sit for about 15 minutes and then vacuum it all up and make your bed. This will help remove odors and leave your bed feeling heavenly.

https://ooh.li/b9db850


That's all the deep cleaning advice I have to share with you today, but I'd love to hear your tips and tricks to a tidy home - leave a comment & fill me in!

March 17, 2019

7 Unexpected Items You'll NEED When You Adopt a Dog


I just realized, I never officially announced some big news, but I think it's worth sharing - we got a new dog last month & he's basically the bee's knees. We're now a two-dog family and while some may think our house feels like a zoo, I think we all love our new addition.

https://ooh.li/d05f83c

The funny thing is, we actually had decided against adopting another dog... but when I saw those googly eyes, I fell in love and said I wanted him - the rest is history. I'm excited to say, he is a perfect fit for our home, with just the right amount of crazy pup left in him to keep up with my toddler. We aren't 100% on his breed, but we're thinking a Dachshund and King Charles Cavalier mix - some day maybe we'll do a doggie DNA test. Regardless of his breed or his history, Dax is the perfect dog for us.

https://ooh.li/d05f83c

The one thing that I had forgotten about when adopting a new dog is all the ways your family has to adjust.

https://ooh.li/d05f83c

From teaching Delainey proper dog manners to keeping our house clean with two fuzzy mutts running around, we've all had to learn something from the new furry family member.

Wondering what unexpected items you'll need if you decide to adopt a dog?

https://ooh.li/d05f83c


Here's my list of must-haves after recently bringing Daxy-boy home:

1. Training treats - Pretty self explanatory, these treats help initiate a bond with your animal and form trust from the get-go, especially if your pooch is a food oriented pup. We used itty bitty treats and "bribe" Dax to do anything from sit & stay to showing him how to use his puppy stairs. We've always loved using these to practice tricks with Miley and highly recommend them for all dog owners, they literally motivate our old doggy to learn new tricks!

https://ooh.li/d05f83c

2. Bona Hardwood Premium Spray Mop - Speaking of tricks, my Bona Spray Mop is literally the only reason I'm able to kick back and relax with my mutt-ley crew. Between two adorable, but CONSTANTLY shedding dogs, my wild child, and their crazy adventures, my house and these beautiful vintage wood floors are constantly screaming for a cleaning - luckily I can quickly sweep & mop in one swoop with my Bona Hardwood Premium Spray Mop.

https://ooh.li/d05f83c

This quick and easy gadget comes ready to use & easily picks up the dust & grime that seems to accumulate when you add kids to your home. If you're a fellow mom (or mama to furr babies), you'll need a Bona Spray Mop to keep your floors clean.

https://ooh.li/d05f83c

3. Leash & Collar Ready-to-Go - I'm not sure this one is so unexpected, but it's not something everyone thinks about when heading to the pound to adopt an animal. I highly recommend bringing your own leash and collar when picking up your new friend. I feel like our pups treat their collars like it's their way to "claim" a spot in our pack, so I made sure Dax had a collar that suited him immediately.

4. The same dog food - Speaking of things suiting our furry friends, making sure you transition their food is important. It can cause upset bellies if you suddenly switch foods, especially with the sudden switch in homes causing anxiety too. We actually HATE the brand of food Dax's previous owner was feeding him but we transitioned him to his new food by feeding him less and less of the "bad" food while introducing him to the food we believe is best - simply because it's better for him to adjust like this.

5. Clothing that has your 'scent' - We actually have "couch blankets" we let the dogs cuddle with when we leave, because they are spoiled. If you don't have said blankets, adding a t-shirt you slept in to their crate or putting it on a decorative pillow before you leave could tremendously help your pup.

6. New toys - Another way to help your pup adjust is buying the new furry friend new toys. We had PLENTY of toys before Dax's arrival but making sure he had some toys of his own was really important, in my mind. I wanted Miley to feel as though she still had control over her toys but to recognize that he had his own. So far, they both understand that and get along just fine.

7. Air Freshener - Last, but not least - You're certain to want a quick way to freshen the air - especially if you're pup loves to get crazy as much as ours.

https://ooh.li/d05f83c


So tell me, have you adopted a dog before? What items do you consider must-haves when bringing home a new canine companion?


March 1, 2019

10 Super Fun Dr. Seuss Inspired Activities

**This post may contain affiliate links.**


I've always been a bookworm, so it probably comes as no surprise that I'm also a HUGE Dr. Seuss fan and while I can't force Delainey to have the same likes as me, I will say that I have taken the time to read Cat in the Hat, One Fish, Two Fish, & Green Eggs & Ham about once a week - just to be sure she knows them, by word. Haha.

All jokes aside, Dr. Seuss and his gift for writing have always been a true inspiration to me -  lessons like "a person's a person - no matter how small" just don't come from books now-a-days.

On that note, I wanted to put together a list of super fun Dr. Seuss inspired activities & crafts in honor of the creative genius' birthday-


1. Green Eggs & Ham Letter Recognition printable from StillPlayings.com

2. One Fish, Two Fish Counting Game - with free printables to create it! from mamamiss.com

3. Dr. Seuss Shadow Puppet Printables from ThePinterestedParent.com

4. Dr. Seuss Cat in The Hat patterning Hat (or Math Hat) from JDaniel4sMom.com

5. Easy Thing 1 & Thing 2 Hand Print Craft from intheplayroom.co.uk

6. Easy Cat in The Hat Hand Print Craft from KidsCraftRoom.com

7. Lorax Windsock Craft from NonToyGifts.com

8. Thing 1 & Thing 2 Recycled Planters also from NonToyGifts.com

9. The Cutest Little Cat in The Hat Photo Keepsake

10. Dr. Seuss Bingo Printables from aSparkleofGenius.com

Need to add to your Dr. Seuss collection?

February 22, 2019

How to Create a Flat lay with Your Phone!


You've seen those posts on Instagram, right? You know the ones - perfectly placed items, all laying together, glowing on a white surface - enticing you to buy whatever small shop item you happen to be scrolling by.


Flat lays are seriously gold to me as a small shop owner, they look amazing as a way to break up a "brand rep" feed, and they are a great way to show off your favorite small shop items as a customer and gain recognition from the shop!

But here's the thing, we don't all have the perfect accessories to build the most epic flat lay each time - I have the solution to that issue - the "photoshopped" flat lay or you can also call it a digital flat lay!

Want to master the art of sharing your favorite toddler fashions, capture product photography that makes companies seek collabs, or maybe you're hoping to up the quality of your fashion blogger instagram feed? Here's how I make our digital flat lays in just a few steps.


Let's start with the apps, you'll want to download both the "PhotoLayers" app and the "Background Eraser" app - as an android user. Both are fairly basic apps, but they obviously pack a lot of power when it comes to a achieving a clean & beautiful "digital flat lay" look!


Next, you'll search for your products you'll want to include. I went with a romper I found on the Macy Kate Boutique, a pair of denim from Roses in December, a bracelet from TR tidbits, a pair of Baseball Moccs from Monkey Feet and lastly, a bow made out of a real baseball from my shop - Bloomology!


The one thing that's most important when selecting items to include is the lighting and the angle of the photo. Backgrounds will be erased but bad lighting won't be. If you have trouble finding items to include check out a hashtag on instagram that is similar to what you are seeking such as 'baseballbracelet' or search on facebook! If you are a member of Together We Rep, I highly suggest searching in there for items to include as well!


Once you've selected what items you want to include in your flat lay, go ahead and start erasing all the backgrounds in the background eraser app. You start by loading your image and then cropping, then your on the page to begin erasing. This is the most time consuming part of creating a flat lay but I promise it's a skill you'll pick up quickly!


I've found a recent love for the "magic" setting, I just go around the edges of whatever I want to crop out and then going back through and touching up any areas I accidentally erased with the "relief" tool. You can also use the manual tool to go over the edges of your items or use the auto tool whenever you see it'll be an "easier" crop (this tool works amazing on white background photos).
Be sure to thoroughly go over each edge on an item, then when saving I usually save as a level 2 smooth edge blend! Select whichever looks best for your edit! Repeat for each item.


Now that you have all of your items 'cropped', it's time to assemble them in the 'photo layers' app. You'll want to find a "plain white background" or whatever you prefer to use to upload first. Next you'll 'add photo' and include each item, first 'cropping', then placing it on the white background!


While clicked on each item, you can adjust size and even edit the photo some(notice the bottom bar - select color or shadow).


Situate each item where you think it looks best and save!


Now your flat lay is ready to go, it's that easy!


After making this tutorial, I've actually found other apps that work just as well!

Check out PicsArt, it's one that actually combines both apps abilities and works perfectly! The idea behind creating a flat lay is still the same but you only have to use one app to do it!