Showing posts with label tutorial. Show all posts

November 3, 2015

DIY Super Simple Fox and Owl Hanging Planter from a Soda Bottle!

This post contains links to Amazon, these are affiliate advertising links designed to provide a means for sites like mean to earn advertising fees by advertising for and linking to Amazon.com.
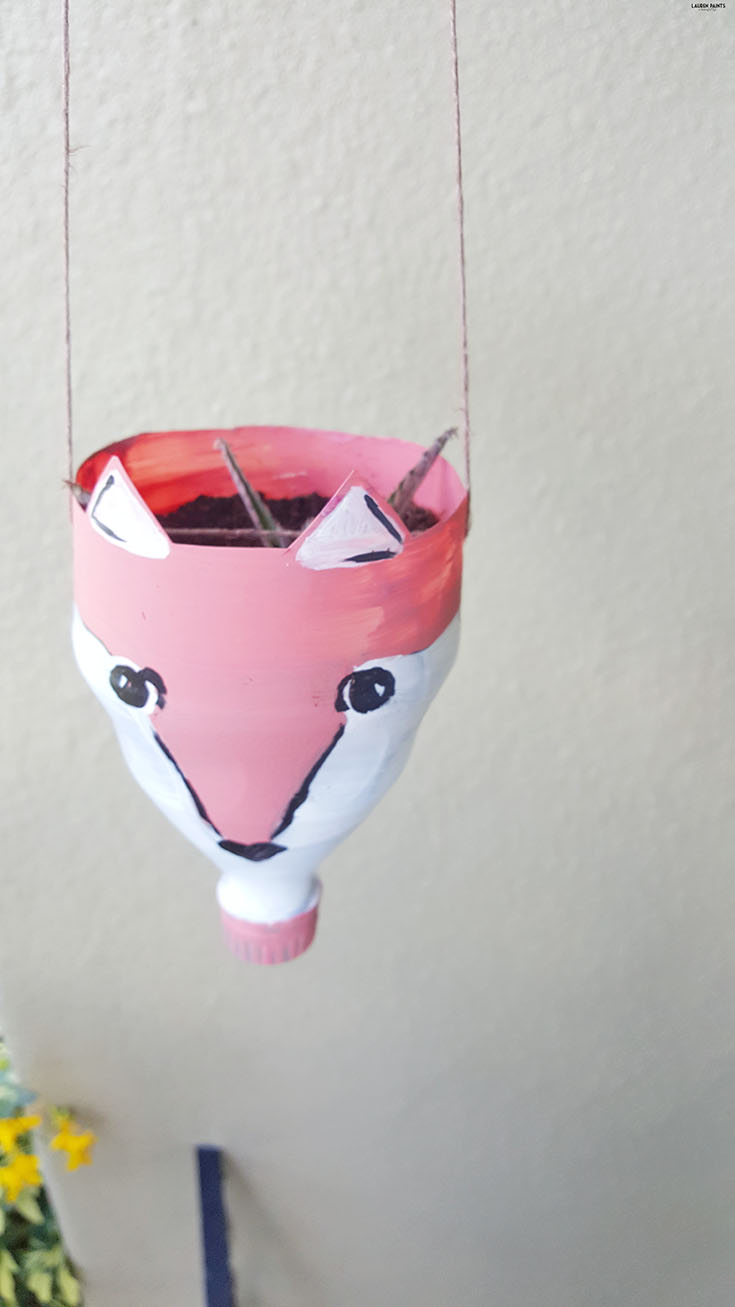
Who would have thought an old soda bottle could be so green? Check out how you can upcycle your Dew into something you can Do Yourself with this super simple fox and owl hanging planter project!

My house is my little sanctuary. Like most adults, I fill it with the things I love, the items I need, and little trinkets that make me smile. I'm doing my best at making sure I also don't throw too much away, since our planet is so full of stuff.

Who would have thought an old soda bottle could be so green? Check out how you can upcycle your Dew into something you can Do Yourself with this super simple fox and owl hanging planter project!

So that leads me to my DIY project for today. I found a new plant while grocery shopping the other day and I had to have it... but I didn't have anywhere to plant it. Of course, I could have planted it in our yard... But I wanted to plant it in a cute planter. My first thought was that I could buy one. Then I considered the price of the pot that I had looked at when I was shopping at my favorite discount store, it was $7.99; that's $4 more than the plant cost. So I decided I could make one or two...

Who would have thought an old soda bottle could be so green? Check out how you can upcycle your Dew into something you can Do Yourself with this super simple fox and owl hanging planter project!

That's right, I made a planter for my new little pink fuzzy plant... and I actually had a plant from my friend Rachel that I decided to make a pot for as well. So to get technical, I made TWO planters. But how?

Who would have thought an old soda bottle could be so green? Check out how you can upcycle your Dew into something you can Do Yourself with this super simple fox and owl hanging planter project!

Out of an old soda bottle. While we love the taste, soda isn't regularly our beverage of choice around here; so when we had a couple empty bottles, I knew I had to do something creative with them - I blame it on Pinterest.

Who would have thought an old soda bottle could be so green? Check out how you can upcycle your Dew into something you can Do Yourself with this super simple fox and owl hanging planter project!

I turned the Fanta bottle from this post into two adorable little hanging planters and it only took me about an hour to complete the project.

Who would have thought an old soda bottle could be so green? Check out how you can upcycle your Dew into something you can Do Yourself with this super simple fox and owl hanging planter project!

Do you want to make an old soda bottle into something useful and adorable? Here's how I made my little fox and owl:

Who would have thought an old soda bottle could be so green? Check out how you can upcycle your Dew into something you can Do Yourself with this super simple fox and owl hanging planter project!

What you'll need:

1 2 Liter Soda Bottle
Paint Brushes
Hemp String
Exacto Knife
Clear Pebbles
Soil & Plants

Who would have thought an old soda bottle could be so green? Check out how you can upcycle your Dew into something you can Do Yourself with this super simple fox and owl hanging planter project!

To start, I cut the soda bottle in half and then cut the shapes of the animals into each half of the bottle. Making little triangle ears for my foxy friend and little bubbly, rounded eyes for my owl friend.

Who would have thought an old soda bottle could be so green? Check out how you can upcycle your Dew into something you can Do Yourself with this super simple fox and owl hanging planter project!

Next, I painted each animal. Giving the owl an almost all-over coat of grey and the fox a thin line around the top, just giving the top of his head the orange coloring like a fox would have. Let this layer dry.

Who would have thought an old soda bottle could be so green? Check out how you can upcycle your Dew into something you can Do Yourself with this super simple fox and owl hanging planter project!

Who would have thought an old soda bottle could be so green? Check out how you can upcycle your Dew into something you can Do Yourself with this super simple fox and owl hanging planter project!

After that, I added the white paint to each animal. Covering the bottom half of the owl and the fox with a thick white layer of paint.


Lastly, I added on the details, little white eyes with black circles and rectangles inside left white for the owl eyes. Tiny little beady eyes for the fox with a heart shaped nose. I added in little detailed lines around the owl, some feathers, a little bit of orange for his beak and he was set to start drying. The fox needed a little white on his ears, a little orange on his "neck" or the bottle cap, and a few little black lines to add some detail and he was also ready to dry.

Who would have thought an old soda bottle could be so green? Check out how you can upcycle your Dew into something you can Do Yourself with this super simple fox and owl hanging planter project!

Who would have thought an old soda bottle could be so green? Check out how you can upcycle your Dew into something you can Do Yourself with this super simple fox and owl hanging planter project!

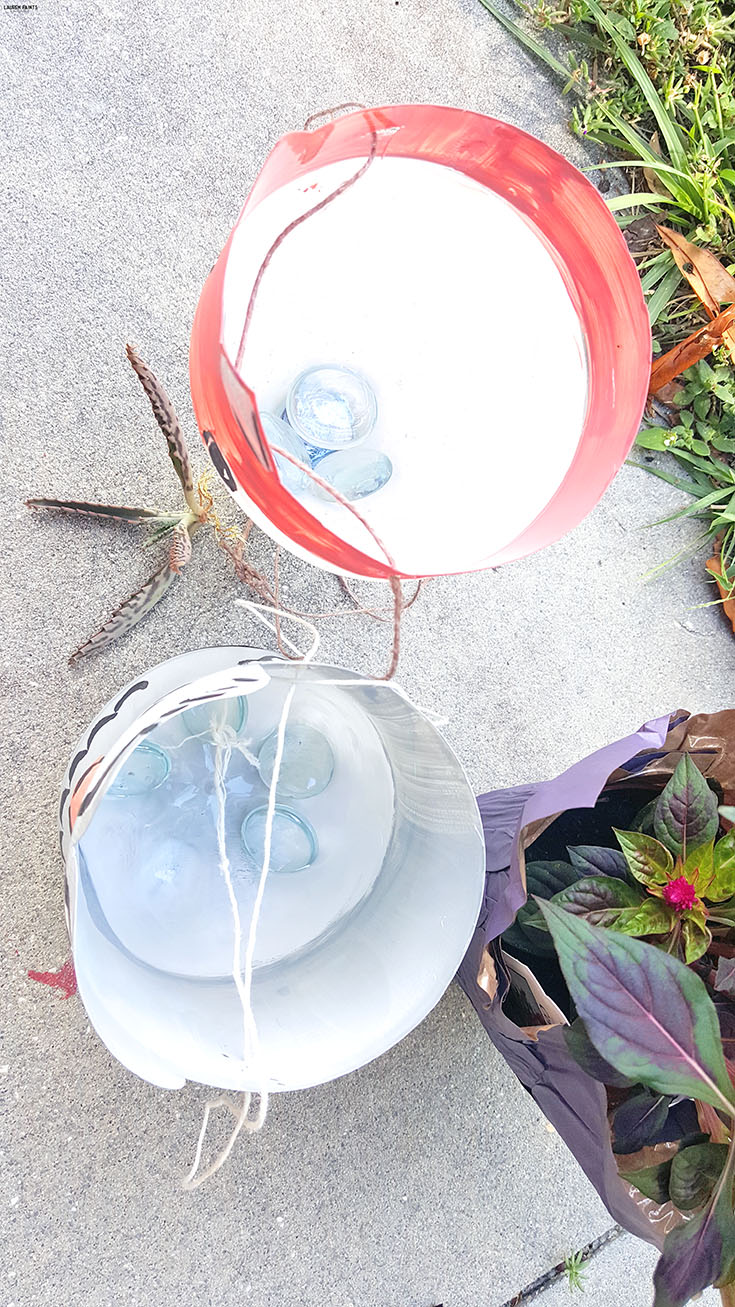
I let both the fox and the owl dry for about 20 minutes and they were dry to the touch and ready to have string added as well as some pretty plants. Using an exacto-blade cut two small holes to each side of your animal face, about 1/3 of inch down. Use a fairly long piece of hemp to hang your planters and tie knots securely on both ends.

Who would have thought an old soda bottle could be so green? Check out how you can upcycle your Dew into something you can Do Yourself with this super simple fox and owl hanging planter project!

Now it's time to add the beautiful greenery, to start I added in a handful of "pebbles" purchased from the $1 store and a thick layer of dirt. Placed the plant properly in the planter and added another layer of dirt.

Who would have thought an old soda bottle could be so green? Check out how you can upcycle your Dew into something you can Do Yourself with this super simple fox and owl hanging planter project!

Lastly, I lifted both planters off the ground and made sure they were sturdy and balanced on the string! They worked perfectly and are now proudly displayed!

Who would have thought an old soda bottle could be so green? Check out how you can upcycle your Dew into something you can Do Yourself with this super simple fox and owl hanging planter project!

My little owl friend has replaced my Halloween wreath and looks fabulous next to my door that is colored almost exactly like the flowers!

Who would have thought an old soda bottle could be so green? Check out how you can upcycle your Dew into something you can Do Yourself with this super simple fox and owl hanging planter project!

My fox is towering over my little reading corner, looking out into the living room and beyond. These little planters are so cute and can be used indoor and outdoor - the perfect new addition to our house, if I don't say so myself!

Who would have thought an old soda bottle could be so green? Check out how you can upcycle your Dew into something you can Do Yourself with this super simple fox and owl hanging planter project!

Whether this is a project you attempt with the kids or it's a way for you to get your crafting fix, I'm sure you'll love the way your planters turn out as well! So simple to make, yet so incredibly cute! If you decide to make a set, be sure to show me how they turn out! Plus, what other animals would you like to see? I'm thinking a hippo will be next on my list... or maybe a little penguin?

October 27, 2015

DIY Kooky Owl Cups

This shop has been compensated by Collective Bias, Inc. and its advertiser. All opinions are mine alone. #CVS4FantaFun#CollectiveBias

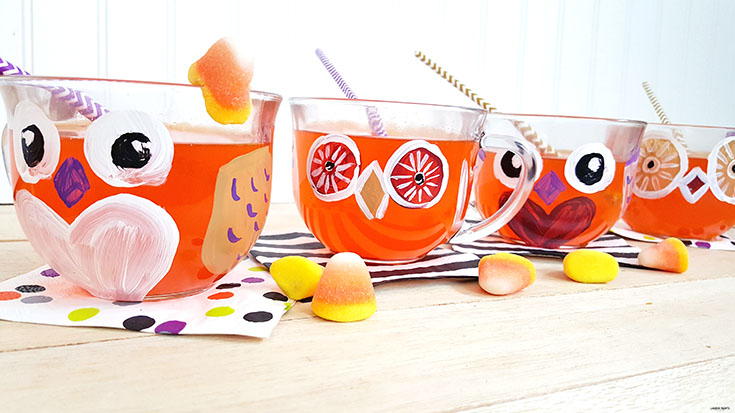
You can craft a set of customized owl cups quickly and have a hoot of a time making them!

Halloween is nearly here so you better believe my home is covered in fun, festive fall decor. With plump little pumpkins gracing our TV stand and lovely little leaves decorating our front step, it's officially as close to autumn as Florida seems to get.


You can craft a set of customized owl cups quickly and have a hoot of a time making them!

While I'm craving a bit of a bite in the air, I'm allowing myself to indulge in other fun parts of Fall lately; I've been spending time crafting, snacking on anything orange like pumpkin flavored treats, Fanta Orange Soda, and gummy candy corn, while I'm also spending lots of time blogging...

You can craft a set of customized owl cups quickly and have a hoot of a time making them!

Lucky for you, that means I'm sharing a tutorial today and what we're crafting up makes sipping down a large glass of Fanta Orange Soda a hoot of a time!

You can craft a set of customized owl cups quickly and have a hoot of a time making them!

These little owls are an awesome way to add some fall decor to your table setting and since they are hand-crafted, you can personalize each mug for each guest attending your dinner! What's even better, these mugs are top-rack dishwasher safe and so completely perfect to give as a gift when hosting a holiday party! Personalized painted owls for each guest, made with multi-surface paints are the perfect way to treat each guest to something truly unique when you have friends over, fill these cuties up with some Fanta and you're definitely in for a good time!

You can craft a set of customized owl cups quickly and have a hoot of a time making them!

Want to make a set of these adorable little owl mugs for yourself?

You'll need:
4 glass mugs
Multi-surface paint
Paint brushes
Fanta Orange Soda

You can craft a set of customized owl cups quickly and have a hoot of a time making them!


Personalizing these mugs is an easy experience, just keep things basic. Make the front circle on your owl buddies into a heart shape, add eye balls in the shape of circles, add beaks in the shape of diamonds, wings in the shape of an uppercase U. Add a layer of paint to the bottom of each mug for fun...

As you can see in my step-by-step photos below, it's best to keep things as simple as possible!

You can craft a set of customized owl cups quickly and have a hoot of a time making them!


You can even add some tail feathers for your friends that love shaking their tail feathers at holiday get togethers! Whether you customize the owls for friends or make a set to keep for yourself, these cute little buddies are the perfect way to add some fun fall items to any kitchen! You could even get a little wild and host a painting party with friends and you each could customize your own mug, the possibilities are endless and the owls that will be created will be fabulous!

You can craft a set of customized owl cups quickly and have a hoot of a time making them!

Once your owls are finished being personalized, you'll want to place them in an oven at 350 degrees and allow the paint to fully set (about 30 minutes) and then turn off the oven and allow the cups to cool, or follow the instructions on your paint tube to be sure the paint sets correctly!

You can craft a set of customized owl cups quickly and have a hoot of a time making them!

Once the cups are cool to the touch, you are cool to serve up some Fanta Orange Soda! Add some colorful straws and napkins and you've got a party on your hands!

You can craft a set of customized owl cups quickly and have a hoot of a time making them!

You can craft a set of customized owl cups quickly and have a hoot of a time making them!

You can craft a set of customized owl cups quickly and have a hoot of a time making them!

You can craft a set of customized owl cups quickly and have a hoot of a time making them!

Now that I've shared how I crafted up one of my favorite DIY projects ever, I'd love to hear what kind of fall fun you are planning this year...? Will you be attending any parties or hosting any shindigs? Don't forget to add Fanta Orange Soda to the fun - you can grab a bottle at CVS for a great deal, everyday!
You can craft a set of customized owl cups quickly and have a hoot of a time making them!

For all Your Thirsty Lil’ Monsters, save on Fanta 2 Liter Bottles - Get 4/$5 at your local CVS!

October 19, 2015

Make Halloween Snack Time Fun with Cyclops Cookie Monster Pudding Snacks

This shop has been compensated by Collective Bias and its advertiser. All opinions are mine alone. #SnackAndGo #CollectiveBias


Go ahead and have a little bit of tasty fun in the spirit of Halloween! Make some adorable and affordable monsters for snack time with these free printables!

Life has been crazy lately, with a lot of time spent on airplanes, less sleep, more work, and several meals consumed inside airports... but in the middle of the chaos, I've been blessed with the chance to spend a tiny bit of time with my nieces and nephews. Hanging out with the little guys and gals in my family makes me think about how much fun this season is from their perspective. Specifically, I've been thinking about how amazing Halloween is from their point of view, especially after hearing my niece talk about monsters and her favorite princess...

Go ahead and have a little bit of tasty fun in the spirit of Halloween! Make some adorable and affordable monsters for snack time with these free printables!

She has so much imagination, I just felt inspired by her creativity. So today I'm super excited to share a fun and imaginative way for you to treat the little monsters in your family! Everyone loves to laugh a little during snack time so you might as well surprise the little boys and girls in your life with a delicious little cyclops cookie monster pudding treat that will make giggles go on for hours.

Go ahead and have a little bit of tasty fun in the spirit of Halloween! Make some adorable and affordable monsters for snack time with these free printables!


What do you need to make these cute little creatures?

A printer, cardstock, tape or glue, and scissors

Snack Pack® Pudding Cups in Vanilla, Chocolate, Chocolate Vanilla Mix, and Butterscotch

Go ahead and have a little bit of tasty fun in the spirit of Halloween! Make some adorable and affordable monsters for snack time with these free printables!

NABISCO Go-Paks! in all the best cookie varities including TEDDY GRAHAMS Honey Graham Snacks, Mini OREO Chocolate Sandwich Cookies, CHIPS AHOY! Mini Chocolate Chip Cookies, NUTTER BUTTER Bites Sandwich Cookies, and Mini OREO Golden Sandwich Cookies!

Reddi Wip Original

Go ahead and have a little bit of tasty fun in the spirit of Halloween! Make some adorable and affordable monsters for snack time with these free printables!


Toothpicks

Gummy Eyeballs

Go ahead and have a little bit of tasty fun in the spirit of Halloween! Make some adorable and affordable monsters for snack time with these free printables!

These little babies are easy to make, just print off the ghoulish grins printable here and the monster getups (pudding cup wrappers) printable here and here. Take the time to cut all of these little grins and getups out and tape them onto the cups, have fun decorating and combining!

When ready to serve, add a thick layer of Go-Pak cookies to each Snack Pack pudding.

Go ahead and have a little bit of tasty fun in the spirit of Halloween! Make some adorable and affordable monsters for snack time with these free printables!

Add a swirl of Reddi Wip and top off your monster creation with a creepy cyclops eyeball or make your monster into a true freak of nature with three instead of one!

Go ahead and have a little bit of tasty fun in the spirit of Halloween! Make some adorable and affordable monsters for snack time with these free printables!

Now it's time to gobble up your cookie monsters before they get you! Enjoy!

Go ahead and have a little bit of tasty fun in the spirit of Halloween! Make some adorable and affordable monsters for snack time with these free printables!

Don't you think these adorable little creatures are the perfect way to surprise a little monster in your life? You'll be happy to find out they are a super affordable way to spread some Halloween cheer as well and you can grab everything you'll need in one quick trip to Walmart!

Go ahead and have a little bit of tasty fun in the spirit of Halloween! Make some adorable and affordable monsters for snack time with these free printables!
With a delicious combination of ingredients, each only costing a $1, you can't go wrong; plus, if you grab this coupon you'll really be racking in the savings!

Go ahead and have a little bit of tasty fun in the spirit of Halloween! Make some adorable and affordable monsters for snack time with these free printables!

Plus these cute little creatures can be made into the perfect size by mixing two pudding cups into the Go-Pak container as well. The printables fit around the NABISCO Go-Paks! well and they still look absolutely adorable, but now you can eat even more of the deliciousness!

Go ahead and have a little bit of tasty fun in the spirit of Halloween! Make some adorable and affordable monsters for snack time with these free printables!

Maybe you plan on hosting a Halloween get-together or you're a teacher with a class of 30? Surprise everyone with something delicious and adorable, without spending much at all! Kids of all ages will love these little monsters and since everyone will turn into a cookie monster after eating one of these delicious treats, make sure you make enough for everyone to have seconds - including yourself!

Go ahead and have a little bit of tasty fun in the spirit of Halloween! Make some adorable and affordable monsters for snack time with these free printables!


So tell me, how do you spread Halloween cheer? Are you the type to play a trick or do you love to treat your family to terribly terrific treats? Tell me all about your Halloween festivities in the comments below...

Go ahead and have a little bit of tasty fun in the spirit of Halloween! Make some adorable and affordable monsters for snack time with these free printables!


October 18, 2015

Monster Magnets for Halloween - Decorate Your Fridge with These Frightful Creatures!

Keep things cute (and a little creepy) around Halloween this year with these adorable monster magnets! These perfect little creatures are an easy DIY project...

Sometimes I like to make silly little things, I guess because it makes celebrating the holidays a little more fun... or maybe it's because I'm truly a kid at heart. Regardless, there are a few holidays I get a little bit more excited about than others; I bet you can guess which holiday I'm super excited about currently though... With Halloween just right around the corner, we are getting the house in the spirit. Bowls of candy and little crafty pumpkin decor are littering my house currently and I love every bit of it.

Keep things cute (and a little creepy) around Halloween this year with these adorable monster magnets! These perfect little creatures are an easy DIY project...

Are you ready to get your house into the holiday spirit? Today, I want to share a super simple craft that definitely will bring joy to your home. Who knows? Maybe you can even spread the joy and share a few of these little monsters with your friends and family!

Keep things cute (and a little creepy) around Halloween this year with these adorable monster magnets! These perfect little creatures are an easy DIY project...

That's right, I said little monsters! I made little Monster Magnets to decorate our fridge for Halloween and you can make a set too! Don't fret if you aren't the crafty type, they are super easy to make and actually functional since they are made with clothes pins!

Keep things cute (and a little creepy) around Halloween this year with these adorable monster magnets! These perfect little creatures are an easy DIY project...

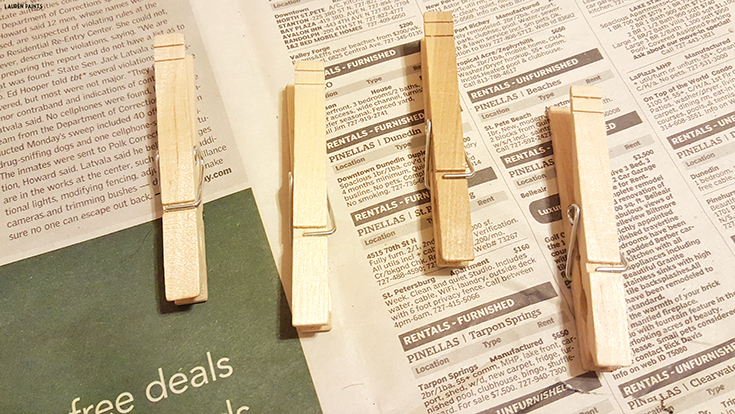
What will you need to make these? A Handful of clothes pins, a rainbow of acrylic paints, paint brushes, and magnetic tape.

Keep things cute (and a little creepy) around Halloween this year with these adorable monster magnets! These perfect little creatures are an easy DIY project...

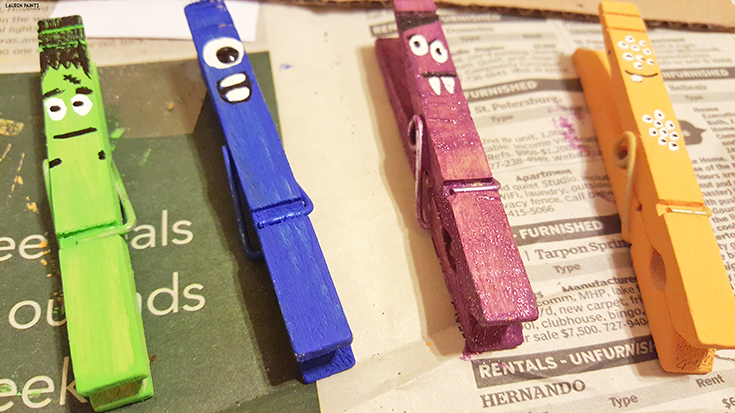
You'll start this project by painting a base coat on each of your little monsters (clothes pins). Primary colors, funky Halloween colors, girly pink shades, whatever you prefer - be sure to paint every nook and cranny on the clothes pin. Let your base coat dry for at least 30 minutes.

Keep things cute (and a little creepy) around Halloween this year with these adorable monster magnets! These perfect little creatures are an easy DIY project...

Next you'll want to add the details to your monster. Make one with tons of tiny little eyeballs, make a few with googly eyes, or make them all into cyclops'... it doesn't matter where their mouths, noses, eyes, etc are because they are supposed to be goofy and silly. The wilder and sillier, the better, in my opinion. Once all the monster details are completed, let the paint dry for at least another 30 minutes.

Keep things cute (and a little creepy) around Halloween this year with these adorable monster magnets! These perfect little creatures are an easy DIY project...

This last step in the monster creation process is the easiest. Paint a thin layer of modpodge in either gloss or matte to seal the paint on your clips and then cut a small piece of magnet tape off of the roll. Cut that piece in half longways and stick it to the back of your clothes pin.

Keep things cute (and a little creepy) around Halloween this year with these adorable monster magnets! These perfect little creatures are an easy DIY project...

Now your creation is complete and ready to hang in the kitchen, not only around Halloween, but all year long - especially if you have a few little monsters running around your home! Hang good grades, amazing drawings, reminders for upcoming events, and more from these cute little creatures!

Keep things cute (and a little creepy) around Halloween this year with these adorable monster magnets! These perfect little creatures are an easy DIY project...

Now that I've shared a super simple and fun way to add some monstrous fun to your home, I'd love to hear what your favorite part of Halloween has been so far this season! Tell me all about your favorite recipe, costume idea, or anything else that comes to mind int he comments below! I can't wait to hear about it...

Keep things cute (and a little creepy) around Halloween this year with these adorable monster magnets! These perfect little creatures are an easy DIY project...

October 9, 2015

DIY Painting Inspired by MARVEL's The Avengers: Age of Ultron

This shop has been compensated by Collective Bias, Inc. and its advertiser. All opinions are mine alone. #AvengersUnite #CollectiveBias


I was so inspired by MARVEL's The Avengers: Age of Ultron that I decided to share an awesome DIY Painting! Want to make one for your home? Follow the tutorial! http://cbi.as/7afs

When I heard that MARVEL's The Avengers: Age of Ultron is now out on disc, I knew I had to go out and buy a copy ASAP. See, if you didn't already know, we are pretty big fans of The Avengers in this house.
I was so inspired by MARVEL's The Avengers: Age of Ultron that I decided to share an awesome DIY Painting! Want to make one for your home? Follow the tutorial! http://cbi.as/7afs
While we were hunting down The Avengers: Age of Ultron on Blu-Ray, we ran into the costume section at Walmart! With every costume you can think of for so many different age groups, my hubby and I were like kids picking out candy! We saw all kinds of MARVEL character costumes at great prices but we finally decided that it'd be super fun to have Hubby dress up as the Hulk!

I was so inspired by MARVEL's The Avengers: Age of Ultron that I decided to share an awesome DIY Painting! Want to make one for your home? Follow the tutorial! http://cbi.as/7afs

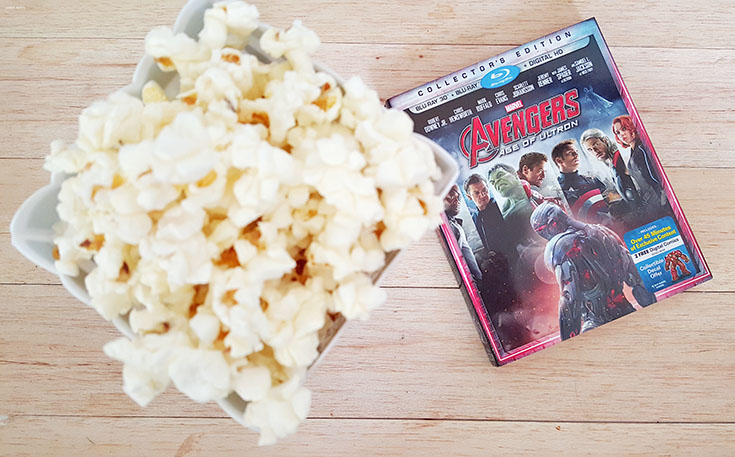
Once we chose a costume for him, we were on our way to the back of the store where we were able to buy a Blu-Ray 3D, DVD combo of The Avengers: Age of Ultron! We grabbed a few snacks on our way out the door and we were on our way home!

I was so inspired by MARVEL's The Avengers: Age of Ultron that I decided to share an awesome DIY Painting! Want to make one for your home? Follow the tutorial! http://cbi.as/7afs

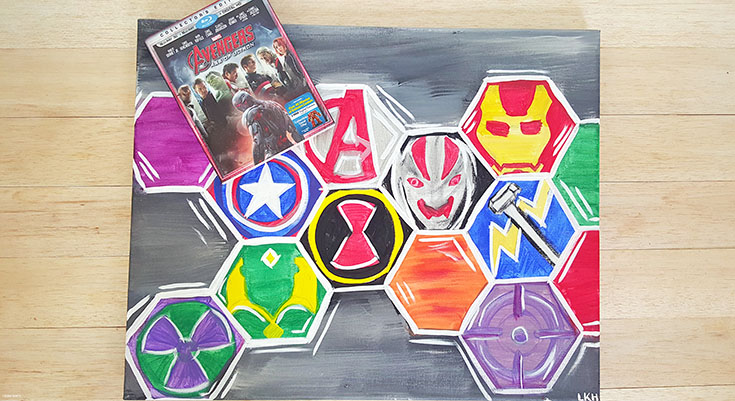
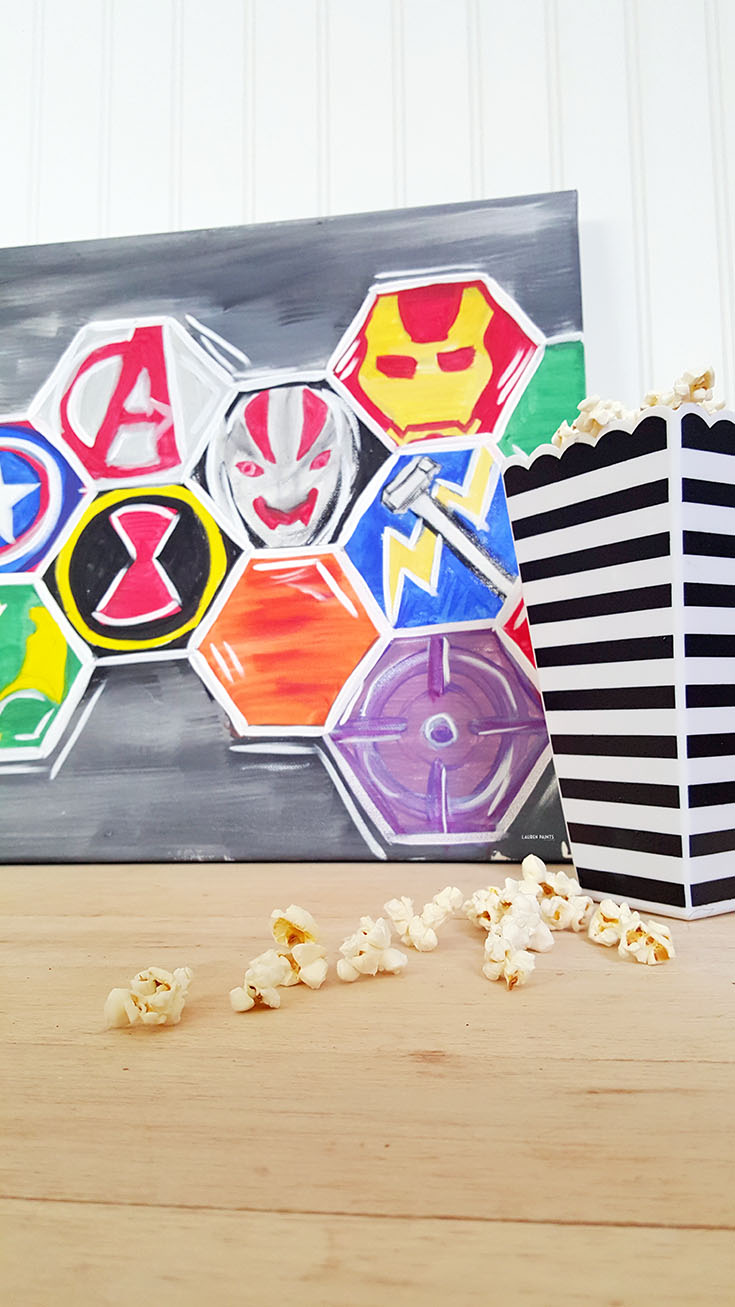
On the way home, I was having a closer look at the cover of the movie and I was inspired. Such great talent, such fun colors - I don't normally paint things like this, but I knew I had to let my creative juices flow... That's when my mind was made up, I wanted to make minimalist versions of "shields" for each of my favorite Marvel Characters!

I was so inspired by MARVEL's The Avengers: Age of Ultron that I decided to share an awesome DIY Painting! Want to make one for your home? Follow the tutorial! http://cbi.as/7afs

Good news, though! Not only did I decide to paint a MARVEL inspired piece of art for my home, I know there are other Avengers fans out there so I decided to share a step-by-step painting tutorial! Now you can make a MARVEL's The Avengers: Age of Ultron shield painting of your own!

I was so inspired by MARVEL's The Avengers: Age of Ultron that I decided to share an awesome DIY Painting! Want to make one for your home? Follow the tutorial! http://cbi.as/7afs

The first step is tracing a hexagon onto a canvas in pencil, with however many "shields" you want to make and maybe a few extra spots for color shields.

I was so inspired by MARVEL's The Avengers: Age of Ultron that I decided to share an awesome DIY Painting! Want to make one for your home? Follow the tutorial! http://cbi.as/7afs

Once your hexagons are traced, it's time to start sketching the minimalist versions of each character.
I chose to work with Hulk, Vision, Captain America, Black Widow, Ultron, Iron Man, Thor, and Hawkeye - basically the best characters!

I was so inspired by MARVEL's The Avengers: Age of Ultron that I decided to share an awesome DIY Painting! Want to make one for your home? Follow the tutorial! http://cbi.as/7afs

In case your wondering how I sketched each item, here's an example:
I was so inspired by MARVEL's The Avengers: Age of Ultron that I decided to share an awesome DIY Painting! Want to make one for your home? Follow the tutorial! http://cbi.as/7afs
Once each character is roughly sketched, apply a background layer of paint. I went with silver, black, and white and blended slightly - allowing for a tonal, textured background.

I was so inspired by MARVEL's The Avengers: Age of Ultron that I decided to share an awesome DIY Painting! Want to make one for your home? Follow the tutorial! http://cbi.as/7afs

After the background is painted, it's time to grab a smaller brush and work on the details of each character. Painting the simple Hulk sketch purple and green, making sure the Black Widow circle is painted around the logo, Captain America's shield needs to have a white star in the middle, etc. Slowly filling in each characters logo with the correct colors. Here's a collage of my step-by-step process...

I was so inspired by MARVEL's The Avengers: Age of Ultron that I decided to share an awesome DIY Painting! Want to make one for your home? Follow the tutorial! http://cbi.as/7afs
Once the entire painting is filled with color, you'll want to outline each shield with white and/or silver and add little details with white and silver paint. Adding little lines to make things feel textured, like the outside of the hexagon shields.

I was so inspired by MARVEL's The Avengers: Age of Ultron that I decided to share an awesome DIY Painting! Want to make one for your home? Follow the tutorial! http://cbi.as/7afs

Sign your name to the bottom of the painting and your creation is complete.

I was so inspired by MARVEL's The Avengers: Age of Ultron that I decided to share an awesome DIY Painting! Want to make one for your home? Follow the tutorial! http://cbi.as/7afs

Now sit back and re-watch The Avengers: Age of Ultron and feel free to admire your artwork anytime you please! 

I was so inspired by MARVEL's The Avengers: Age of Ultron that I decided to share an awesome DIY Painting! Want to make one for your home? Follow the tutorial! http://cbi.as/7afs

I was so inspired by MARVEL's The Avengers: Age of Ultron that I decided to share an awesome DIY Painting! Want to make one for your home? Follow the tutorial! http://cbi.as/7afs

August 28, 2015

A Simple Date Night at Home: A Starbucks Picnic & A Paired Painting!

A Big thanks to Starbucks for sending over a box full of goodies to help make this post possible.

Have a blast and drink some java with your bestie or your boyfriend with this super fun Starbucks Picnic & Paired Painting!

With school back in session, my blog and all kinds of fun projects in full swing, and my hubby working full time, things have been super busy lately and that means we've been neglecting date night. Since we haven't had the chance to spoil each other with a night out on the town recently, I decided to spoil hubby with my most recent package from Starbucks and a little impromptu date day inspired by the contents.

Have a blast and drink some java with your bestie or your boyfriend with this super fun Starbucks Picnic & Paired Painting!

You may remember me talking about becoming a Starbucks blogger a few months back and I was blessed enough to receive another awesome package full of goodies to share with you. This time my box included some of my favorite Starbucks items, frappuccino, espresso, coffee to-go; all of the essentials for a busy gal, as well as a picnic basket and a blanket perfect for picnicking. It's like the people over at Starbucks knew we needed a date and sent it to us in a box.

Have a blast and drink some java with your bestie or your boyfriend with this super fun Starbucks Picnic & Paired Painting!

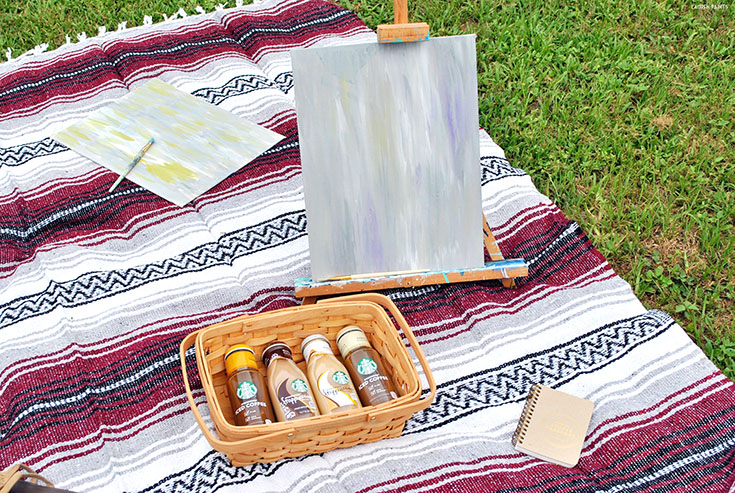
So I gathered our little picnic basket and all of our coffee together. I also grabbed my painting supplies and a few canvas' to paint on and lugged it all out in the backyard. I told hubby to take a break from studying for a few minutes; he needed some fresh air, so I decided to be a "good influence" and asked him to take a second to calm his mind while he drank some java and painted with me.

Have a blast and drink some java with your bestie or your boyfriend with this super fun Starbucks Picnic & Paired Painting!

A few hours later, we were finished painting the background for my upcoming creation, we just simply blended a few neutral-ish colors together and did short brush strokes.

Have a blast and drink some java with your bestie or your boyfriend with this super fun Starbucks Picnic & Paired Painting!

When it came time to painting a subject on the canvas, I knew I wanted to make a painting that depicts one of my favorite things in the world, other than my family - Starbucks s'mores frappuccino!

Have a blast and drink some java with your bestie or your boyfriend with this super fun Starbucks Picnic & Paired Painting!

You can see the step my step process in the photo below and I tried to make it easy enough that anyone can follow along and make this painting in just a few strokes of a brush! Follow the steps below and you'll have an artsy Starbucks painting of your own:

Have a blast and drink some java with your bestie or your boyfriend with this super fun Starbucks Picnic & Paired Painting!


Who doesn't love the little green mermaid and her magical frappuccinos though? If you love her as much as I do, then this painting is perfect for your home... I'm debating between hanging my painting in my kitchen or office, which do you think?

http://goo.gl/oKnrBV

Regardless of whether you love my art and decide to make your own, you'll want to grab a frappuccino, an iced coffee, or maybe one or two of each! Which flavor is your favorite? I think I'd go with a s'mores frappuccino or maybe the caramel iced coffee... it's a hard choice to make every time I'm grabbing for my caffeine fix!

http://goo.gl/oKnrBV


July 24, 2015

Share Funshine + Make DIY Designer Dog Shirt Collars

This shop has been compensated by Collective Bias, Inc. and its advertiser. All opinions are mine alone. #ShareFunshine #CollectiveBias

Share a little Funshine and make an adorable DIY designer dog shirt collar in minutes! #ShareFunshine

This summer I've been browsing thrift stores like crazy, I'm looking for new basic pieces to add to my wardrobe since I'm in a smaller size (YAY!) and I'm also looking for fun DIY projects.

Share a little Funshine and make an adorable DIY designer dog shirt collar in minutes! #ShareFunshine

I absolutely love turning something old into something new; whether it's a restored piece of furniture or a funky, inventive way to upcycle fabric, I can always come up with some crazy idea to make these thrifty finds into treasures!

Share a little Funshine and make an adorable DIY designer dog shirt collar in minutes! #ShareFunshine

So the other day when we were browsing one of my favorite places to shop second hand, we casually were walking by the children's section and I spotted some of the cutest collared shirts.We don't have any little one's (yet), but I brilliantly came up with the an idea that involved my furry children.

Share a little Funshine and make an adorable DIY designer dog shirt collar in minutes! #ShareFunshine

I wasn't going to subject them to wearing children's clothes, putting a collared button up shirt on my dog would be kind of funny but I don't think they would like that much. So I decided to spice up their current collars with a much more fun, fashionable spin on a collar.

Share a little Funshine and make an adorable DIY designer dog shirt collar in minutes! #ShareFunshine

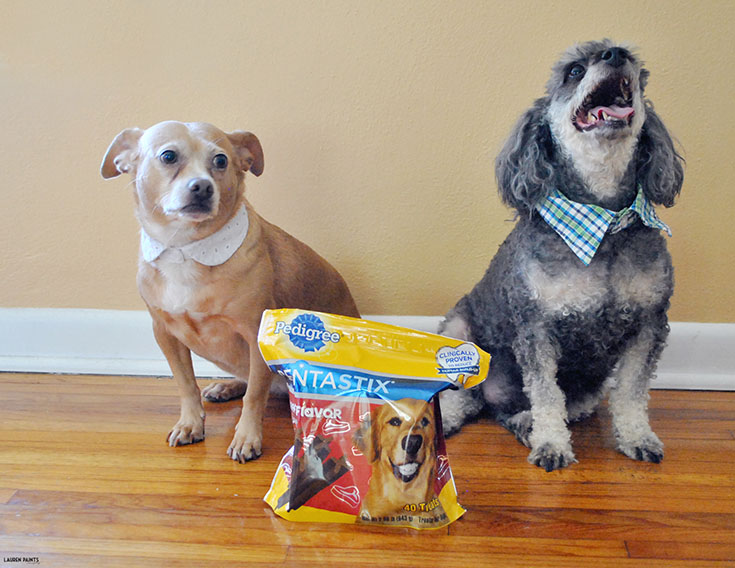
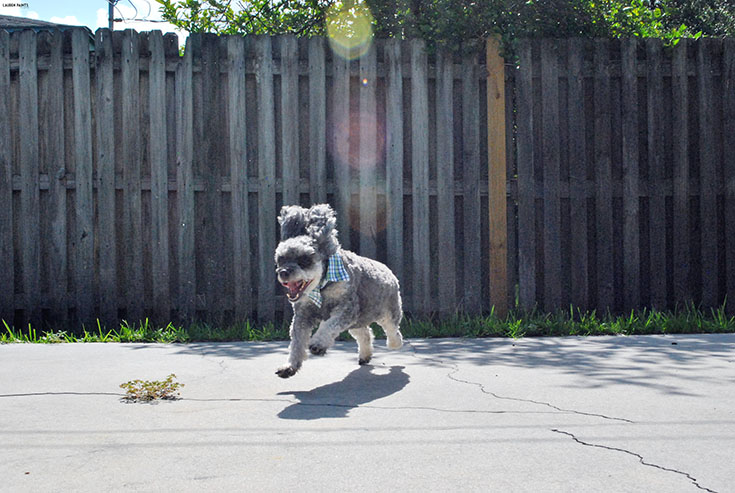
I call my creation DIY Designer Dog Shirt Collars, my little pooches seem to love their new cotton collars and they look absolutely adorable (and a little hilarious) on them!

Share a little Funshine and make an adorable DIY designer dog shirt collar in minutes! #ShareFunshine


Right after we made these cute new collars we had some friends come over (to share our delicious snack with) and we all agreed that these look like they were made for my dogs.

Share a little Funshine and make an adorable DIY designer dog shirt collar in minutes! #ShareFunshine

Well, they were made for my dogs, but they just fit them so well it looks as though they should have always worn shirt collars instead of "dog collars". I suppose you could say my dogs and I have elevated the idea of a collar, at least until it's time to put their harnesses on to go for a walk. 

Share a little Funshine and make an adorable DIY designer dog shirt collar in minutes! #ShareFunshine

If you want to elevate your dog's sense of fashion, it's super easy to make one of these cute new collars! Follow the directions below and if you need any help, feel free to ask me via social media or email!

Share a little Funshine and make an adorable DIY designer dog shirt collar in minutes! #ShareFunshine

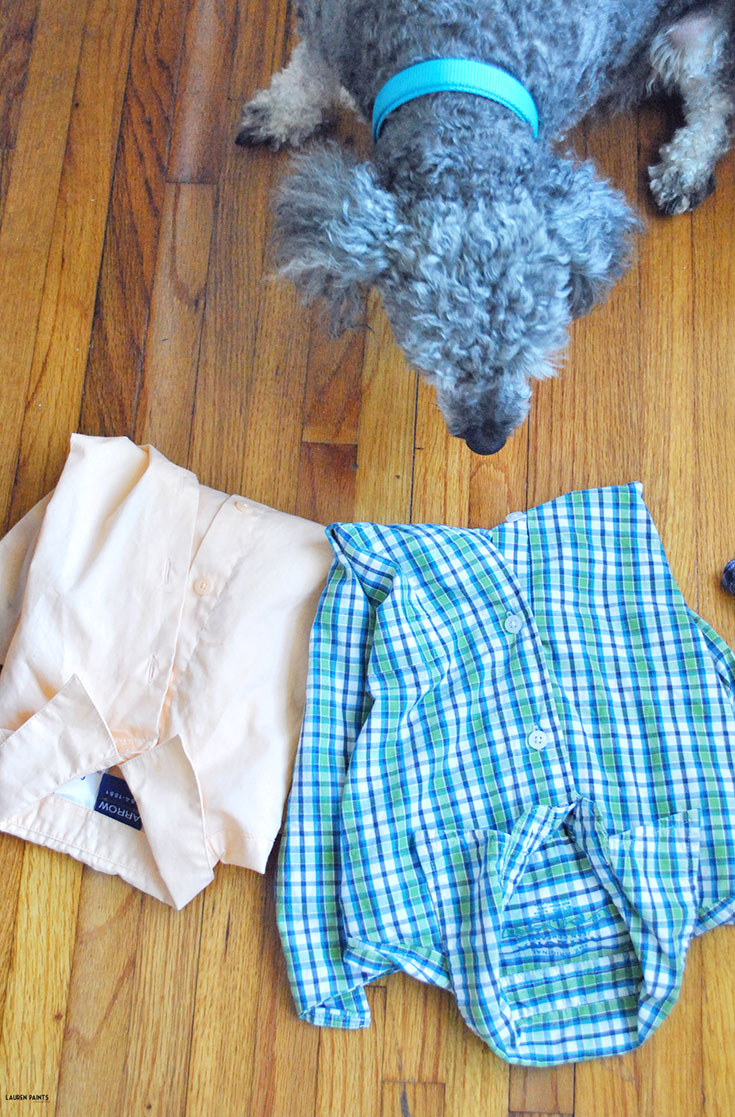
Step 1: Choose shirts that will fit your dog's neck and personality. It was easy to pick out a couple of shirts with collars for my pooches and I bought them for 50 cents a piece. I'm sure if you hit your local thrift store you'll be able to find some collared shirts that will fit your little fuzzy friends as well.

Share a little Funshine and make an adorable DIY designer dog shirt collar in minutes! #ShareFunshine

I suggest measuring your dogs neck before you go (or taking their current collar with you), so you know approximately what size shirt you should be looking for. You'll also want to look for collared shirts that have a button actually on the collar, this will actually be the clasp for your dogs collar!

Share a little Funshine and make an adorable DIY designer dog shirt collar in minutes! #ShareFunshine

Step 2: Wash all of the clothes you bought, just because a little clean laundry never hurt anyone. Plus, you are ensuring your dogs new collar is super clean and fresh! During this time, I highly suggest you all allow yourself, and your dogs, some delicious treats.

Share a little Funshine and make an adorable DIY designer dog shirt collar in minutes! #ShareFunshine

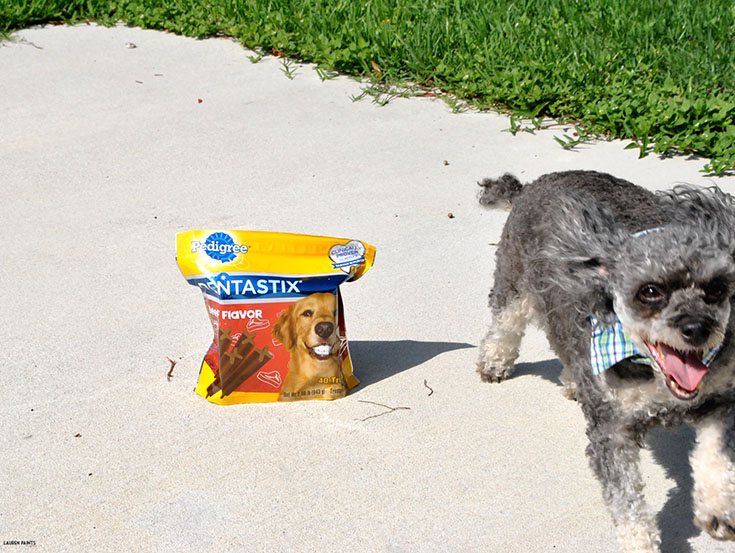
///Side note: We stopped at Walmart for a few things after we hit the thrift store and I saw a whole bunch of delicious candy and my dogs favorite treat, Pedigree Dentastix® Original.

Share a little Funshine and make an adorable DIY designer dog shirt collar in minutes! #ShareFunshine


That's when the decision was made, the rest of the day was all about crafting and treating the dogs and ourselves to all of our favorite things!

Share a little Funshine and make an adorable DIY designer dog shirt collar in minutes! #ShareFunshine

After all it's rained here almost every day in July, we all deserved a fun day and decided we would make our own "Funshine"!

Share a little Funshine and make an adorable DIY designer dog shirt collar in minutes! #ShareFunshine

I bought all my favorite candies: Starburst® Minis Unwrapped, Life Savers® Hard Candy, Skittles®, and M&M's® Peanut and we were on our way home to start crafting! Before you start crafting again, you should definitely enter to win the Share a Little Funshine Sweeps:

///

Share a little Funshine and make an adorable DIY designer dog shirt collar in minutes! #ShareFunshine

Step 3. After your the collared shirts are clean, you'll want to grab a pair of scissors and cut along the seam of the collar. Make sure to trim any remaining threads and then it's time to try your dog's new collar out for the first time.

Share a little Funshine and make an adorable DIY designer dog shirt collar in minutes! #ShareFunshine


Step 4. If you are anything like me, you'll want to share your new creation with the world and if your dogs are anything like mine they won't let you take a picture easily.

Share a little Funshine and make an adorable DIY designer dog shirt collar in minutes! #ShareFunshine

I don't have the most perfectly behaved dogs in the world, it's true. They get a bit wild and are like toddlers when I try to take pictures of them, they literally can't sit still.

Share a little Funshine and make an adorable DIY designer dog shirt collar in minutes! #ShareFunshine

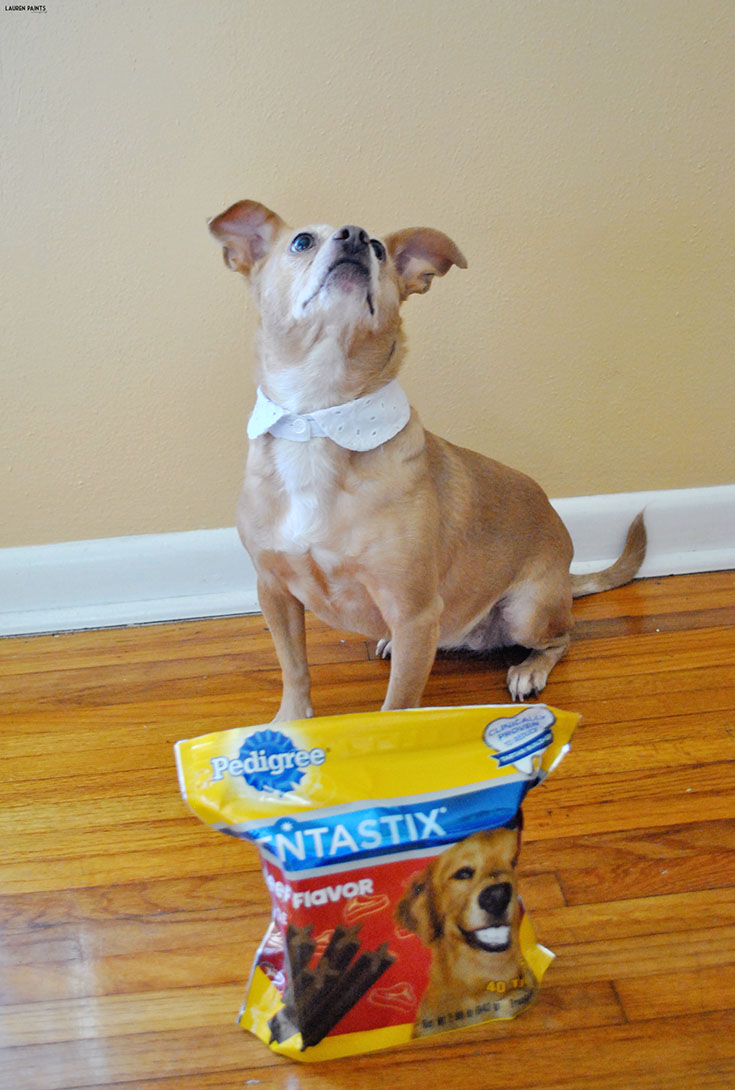
I've learned to snag photos to share, I need a little help from Pedigree Dentastix® Original and Pedigree Dentastix® Beef Flavor. All I have to do is show them that they'll get a Pedigree Dentastix® right after they pose and they are all set and ready to model!

Share a little Funshine and make an adorable DIY designer dog shirt collar in minutes! #ShareFunshine

Who knew it was so  I easy to convince "models" to pose properly?!

Share a little Funshine and make an adorable DIY designer dog shirt collar in minutes! #ShareFunshine

Share a little Funshine and make an adorable DIY designer dog shirt collar in minutes! #ShareFunshine

If you decide to make one of these adorable collars for your pooch, you must show me photo evidence! I'd love to hear how you plan on sharing "funshine" through out the summer?  I'd love to hear if you have any creative activities planned with your kids, dogs, husband this summer? Tell me all about it in the comments below! If you want to treat your dog and yourself, click here to save on M&M's®, SNICKERS® Ice Cream Bars, Dr Pepper® Cherry, Skittles®, Pedigree Dentastix®, and more!  Download the Blippar app from your Apple or Android store to scan your package and receive exclusive content.