October 24, 2014

Messy Monster Pumpkin Ice Cream Cake - The Perfect Fall Treat {Gluten Free + Delicious}

This super fun recipe was a mash up of ideas between me and a great friend that is in town visiting, he suggested an ice cream cake, I decided it should be a pumpkin cake, and the rest is history. This gluten-free cake is fairly easy to make and tastes SO rich and delicious it's absolutely mind blowing! This Messy Monster cake has a cheesecake-like density, a super velvety ice cream center, and an icing that has a creamy sweet kick to it... all covered with a caramel and chocolate syrup drizzle and chopped almonds - you're going to love this. Get ready to giggle with your family while serving this Messy Monster Pumpkin Ice Cream Cake.


Ingredients:

Cake:
3 cups gluten-free all purpose flour
1 1/2 teaspoons baking soda
1/2 teaspoon salt
3/4 cup unsalted butter, softened
2 cups granulated sugar
3 large eggs
1 can of pumpkin (15oz)
1 tablespoon vanilla extract
1/4 cup olive oil
1 cup almond milk
1 tsp pumpkin spice

Ice cream layer:
Vanilla Ice Cream (or whatever you prefer)

Frosting:
Red & Yellow food coloring - about 6 drops yellow, 4-5 drops red
1 package Neufchâtel cheese, softened
2 cups confectioners suger
1/2 teaspoon vanilla
1/2 cup butter, softened

Toppings:
Caramel Syrup
Chocolate Syrup
Chopped Pecans

Eyes:
Crackers
Peanut Butter
Vanilla Almond Bark
Chocolate Chip


Let me start by saying, you can substitute any ice cream, cake, or whatever your heart desires - but this recipe is to-die-for just the way it is... I mean really, it's SO good!

Begin by preheating your oven to 300 degrees. I baked my base cake in a spring form pan, it just makes it easier to move the cakes around (and applying the ice cream easier) so I highly recommend using one, but you don't need one. I also baked the top layer in a normal pan and a few mini-muffins because I had extra batter - this recipe is enough batter for THREE 8-inch cake pans technically - just so you know!

In a medium bowl, mix flour, baking soda and salt. Set aside. 

In a large bowl, mix together with an electric mixer (I'm old school and use my hand mixer and it works fine but FYI - the batter gets deep) the sugar and butter until perfectly fluffy. Beat in each egg one at a time. Then stir in vanilla, pumpkin, and olive oil. Next you'll mix in the flour mixture, alternating between it and the almond milk - while doing this throw in the pumpkin spice as well to make sure it's mixed in well. The batter will be very dense, this is the perfect consistency.


Divide batter evenly into greased pans. Bake cakes for 40-45 minutes and muffins for 25-30 minutes or until a toothpick stuck into the center of the cake comes out clean, I suggest you begin checking both at about 25 minutes to be sure. Remove pans from oven and put them into your freezer (this helps to cool the cake and keep it super dense and moist)!

For the frosting: Soften both Neufchâtel cheese and butter, mix in confectioners sugar about a cup at a time, add in vanilla. Now color to your liking, I suggest starting at about 6 drops yellow, 4-5 drops red and continuing to add from there.

For the eyes: You can use either oreo cookies OR crackers with peanut butter in the center, I used one of each because I'm kooky like that. Heat almond bark to a liquid consistency (based on package directions). Stick a lollipop stick into the cookies and dip cookie (or cracker sandwich) into almond bark and coat completely. Stick in a chocolate chip and your done, just allow these to cool and you have some kooky eyes for your cake.

Now the fun part: You need to assemble this wonderful monster. I put my cake into the spring loaded pan again (after allowing it to cool outside of it). I ripped the ice cream container apart and used a knife to cut large slice of it and placed it onto the cake, using a spatula I spread the ice cream and stuck the smaller cake on top of the ice cream. This needs to be a QUICK process so have everything prepared and try to get this completed within a 3-5 minute time frame. Allow the ice cream and cake to sit in the freezer for about 3 hours or so... you can leave it over night but the cake will be a little tougher to cut through.

Icing the cake can get a little tricky, that's why this is a messy monster cake after all. I spread the icing on with a spatula and wanted it to be sloppy to match my theme, you can get more neat but what's the fun in that? The ice cream started melting on me so my cake has a wonky factor to it that you may not want to recreate, if you want a more structured little monster - I suggest deep freezing your ice cream cake before icing it.

Now drizzle caramel syrup over the top, followed by drizzling the chocolate, and adding the chopped pecans on top. Stick in your monsters eyes and serve.


Just a reminder, you can remove the eye balls and this delicious creation could do double duty and could be served at a Thanksgiving bash as well!
Hoppin' Halloween: $50 Paypal Giveaway!

Welcome to The Hoppin' Halloween Giveaway Hop
October 24-31

Thanks to Mama NYC for hosting this awesome hop!

Happy Halloween!
It's time to treat my readers!
I know you all love my blog already, right?
Well, you will really, really love my blog now.

You can enter to win a $50 Paypal gift card just for being a reader.

It's as simple as this, use the giveaway tools form below to enter to win:


Disclaimer: This contest will run through October 31st at  11:59pm EST. Must be 18 years or older to win. This promotion is in no way sponsored, endorsed or administered by, or associated with, Facebook, Twitter,etc. You understand that you are providing your information to Lauren Paints | a beautiful life and not to Facebook, I will not use your information other than to e-mail you a winning notification if you are the chosen winner. Enter using the Giveaway Tools form above. Void Where Prohibited. Please note that Lauren Paints | a beautiful life is not responsible for sponsors that do not fulfill their prizes.


Be sure to enter all of the other amazing giveaways:

October 21, 2014

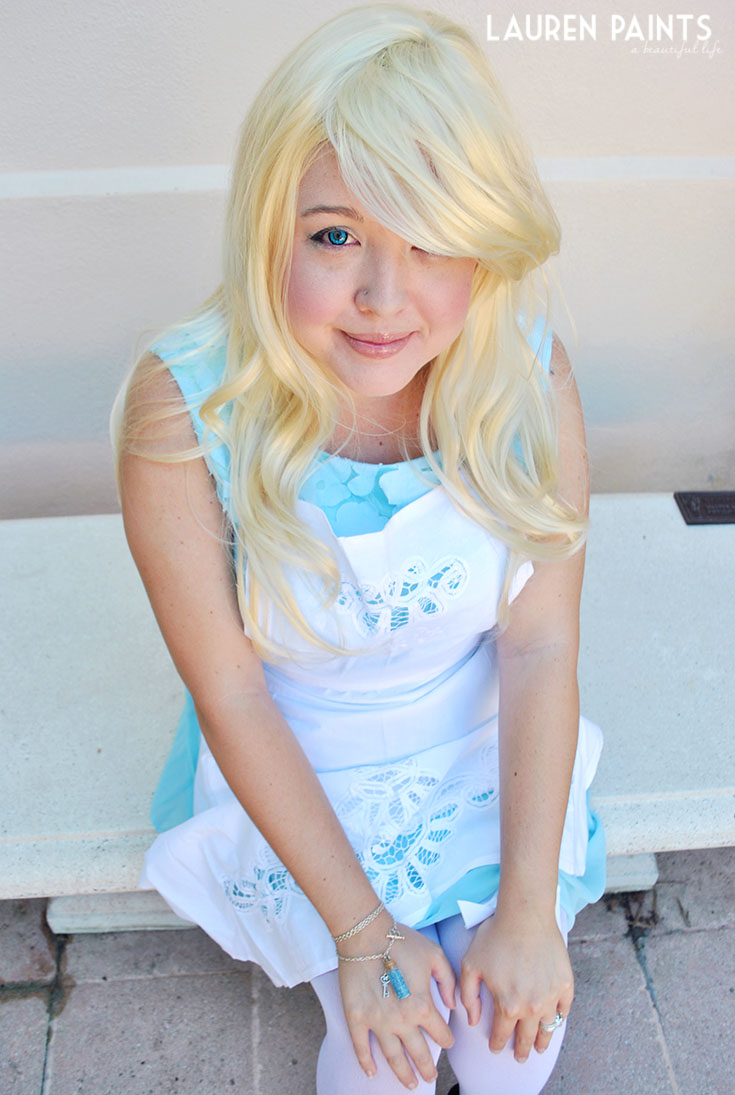
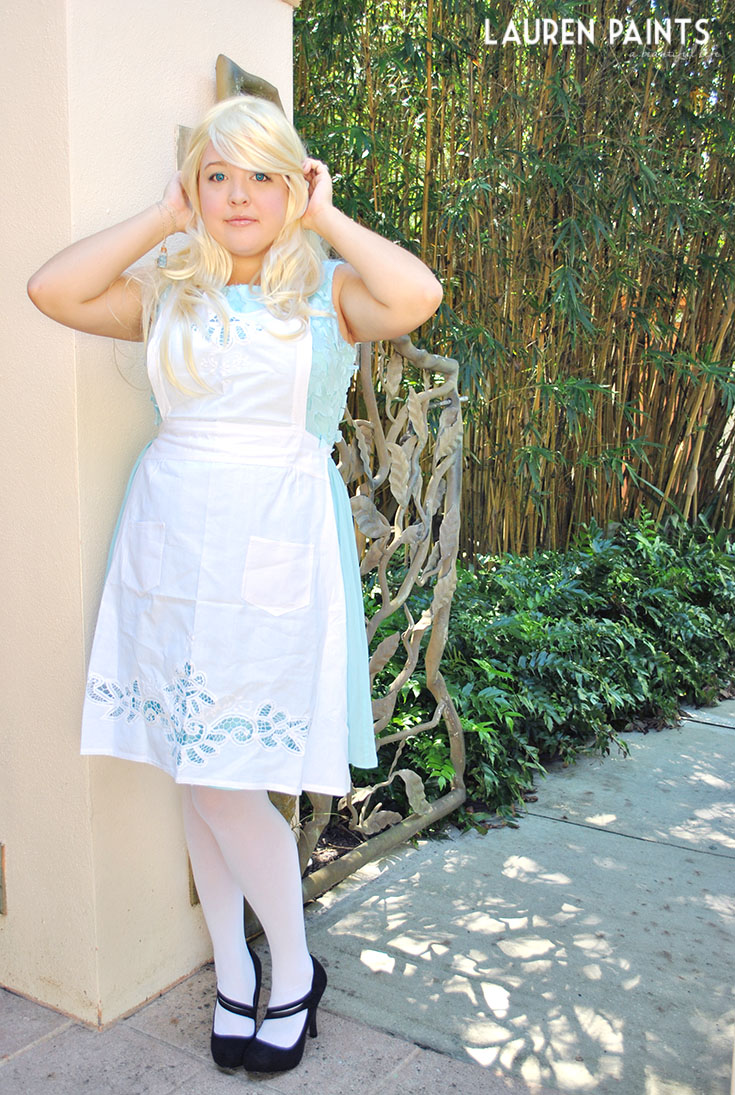
DIY Alice in Wonderland #Halloween Costume

I received a pair of Spooky Eyes contacts to facilitate this review, regardless I only recommend items I think my readers will love as much as I do.

I've always been a pretty big fan of Halloween: eating candy and just having fun with friends while playing dress up... this all makes for the perfect holiday in my mind! Over the years I've been everything from a pretty little princess to a circus ringmaster with a whip to a pretty sexy Cindy Lou Who; All of these costumes were amazing, if I don't say so myself... but my costume this year is going to blow every other costume out of the water or should I say down the rabbit hole. I'm going to be Alice in Wonderland for Halloween; I'm so excited about my costume I could burst so I have to share with you before the actual holiday!

DIY Alice in Wonderland Costume

I did a little dress rehearsal the other day to make sure my DIY Alice in Wonderland costume was as cool as I had imagined it and I'm so proud of the results. Hubby is going to dress in a costume that will pair with mine perfectly, I can't wait to reveal his costume later... This year is going to be so fun!

DIY Alice in Wonderland Costume

This years costume design started early, I've been hunting for the perfect items to pair together to make the perfect Alice costume for a few months now and when I was offered the chance to review the Spooky Eyes Wizard Blue contacts, I was so excited... Although it was hard to decide which pair I wanted since Spooky Eyes offers contacts in all kinds of different colors and crazy designs. Do you have a costume that needs an extra little something this year? Order a pair of Spooky Eyes to give your costume it's final touch!

While these contacts offer a great look, I feel the need to mention that they made my eyes so uncomfortable; this is probably because I don't typically wear contacts so I'm not used to the feeling of them yet. But I definitely wouldn't expect a child to wear contacts like these, they are a bit hard to see out of since the color is so deep - but they look amazing and really transformed me into Alice...

DIY Alice in Wonderland Costume

Now you're probably wondering where all of the awesome parts of my costume came from so you can transform into Alice as well... right? Well, you can find the wig, stockings, and apron on Amazon. The dress I'm wearing is a thrift store find, for a super low price of $4.99! The rocking Mary Jane pumps are from Pin-Up Darling... and  don't forget to snag a pair of Wizard Blue contacts from Spooky Eyes too!

DIY Alice in Wonderland Costume


So tell me,
who (or what) are you going to be for Halloween this year?


October 19, 2014

Kooky Spooky Frankenstein Green Smoothie with Googly Eyes

I'm green smoothie obsessed and this smoothie is one of my favorites, partially because it makes me laugh every time I drink it... You can make a Kooky Spooky Green Smoothie of your own super easily.


Blend together: 1 banana, 2 cups baby kale, 2 cups baby spinach, 3/4 cup coconut milk, 1/2 cup rhubarb, and 1 cup mixed frozen fruit blend.

Top this super sweet smoothie off with 2 fairly thin slices of banana and two chocolate chips for the perfect googly eyes and add a cashew for a cute little smiling mouth.


You've created a monster...IT'S ALIVE!

Not really, but it's a yummy smoothie with a cute little green Frankenstein face sure to make you happy while sipping. This kooky Halloween smoothie is a treat for "kids" of all ages, no tricks - it really tastes delicious! Plus, the green veggie boost is great for so  many reasons!