September 5, 2014

#EverybodyYoga Day 5: Side Plank Pose

Day FIVE
of the
#EveryBodyYoga Challenge


Day #5 -Side Plank Pose


Side Plank Pose is a powerful arm balance, it strengthens your wrists, forearms, shoulders, and spine!  Side plank also increases flexibility in the wrists, hello future balanced handstands! This pose also tones the abdominal muscles and improves balance, concentration, and focus.


This pose is super simple to get into: from a plank, lift your hips up just a bit, then shift your weight into one hand as you roll your whole body open to the side. Stack your hips, knees, and ankles vertically on top of each other.  Your shoulders, hips and ankles should be in one straight line. Reach your top arm straight up, forming a line from your planted wrist through your top fingers.

I hope everyone enjoys this stretch as much as I do,
it's a great simple stretch that really helps me feel connected.


Namaste.


Do you want to be a part of the Yoga Challenge?

It's never too late to join us...
{well, you can't win if you don't enter by September 30, 2014 but you can always practice yoga and win that way!}

You can find out the exact details on how to participate in the yoga challenge here.


Follow me and all the generous sponsors & be sure to tag us all in your photo submissions:

Lauren Paints | a beautiful life:

Instagram 
Twitter  |  Pinterest  |  Facebook 


Lush Cosmetics:
Instagram Twitter  |  Pinterest Facebook

Luna Jai:

Instagram Twitter  |  Pinterest  |  Facebook

Gaiam:

Instagram  |  Twitter Pinterest  |  Facebook

Spirit Lockets:
Instagram  |  Twitter Pinterest Facebook


Check out the poses everyday using the hashtag
#EveryBodyYoga on all platforms!


September 4, 2014

Advice from Stylist Erin Walsh + Beauty Tips from friend to friend: Dove Advanced Care Deodorant

Disclosure: I participated in an Influencer Program on behalf of Influencer Central for Dove. I received a product sample to facilitate my review and a promotional item to thank me for participating.


I've already shared my love for Dove in the past so when they asked me to spread the word about Advanced Care Deodorant by sharing the product with a friend, I was all for it.  I was super excited to share with one of my best friends - Michelle. We've been friends since we were kids in high school and we've been through a lot together, some pretty crazy memories and some pretty rough times. She's kind of like a sister to me, so we share pretty much everything - even little beauty secrets and personal stuff we just couldn't share with anyone else, anything goes! I can rely on the girl for anything so I knew she would be the perfect person to help me review this deodorant - plus sharing my beauty favorites with her is something I like to do on the regular.

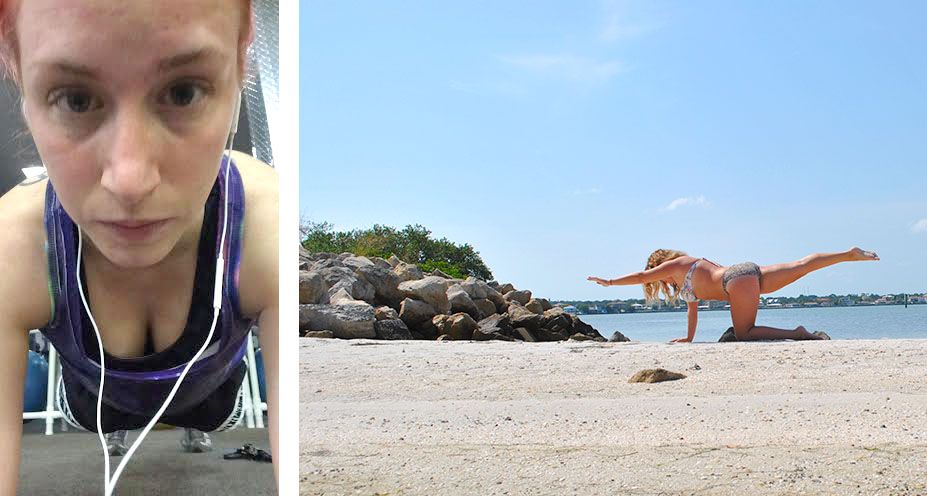
Not only is Michelle a good friend, she's a knock out - not just in the since that she is a total babe, the girl is training in the gym regularly and is super strong! With my Yoga practice out in the hot, humid Florida heat and her lifting in the gym regularly, we both need deodorant that works - Luckily, Dove Advanced Care Deodorant with NutriumMoisture keeps us dry and odor-free for a long-lasting 48 hours! When I asked Michelle for her opinion on Dove Advanced Care I knew she would love it... I was excited to hear how it stood up against her workout routines though. She reported to me Dove "keeps her dry all day long" and "it really works". Not to mention she said the Rebalance fragrance smells like "deliciousness". Perfectly put - Dove Advanced Care does work and it smells so incredibly good in a clean and refreshing way, the smell good secret for us active gals!


Dove recently teamed up with stylist Erin Walsh to share some awesome style tips and to host the #SleevelessSummerSweeps where they gave away a trip to NYC to one lucky Dove lover! Getting style tips from a professional is always fun and since so many of Erin's tips really resonated with me, I just had to share them with Michelle!
{Like the jewelry pictured above? Enter to win these pieces from my September Mialisia Collection here.}

Funny thing is, as I was sharing some of the style tips, we began discussing outfits we had worn recently and several of them went right along with Erin's tips; effortless style is what I call that. * says the girl typing this up in a paint stained pajamas and a messy bun.* Seriously though, I love that Erin shared simple style tips that every woman can pull off. I hope you find that you feel more stylish based on these tips and maybe you'll even be inspired to try a new style:


Advice from Stylist Erin Walsh
{and lovers of fashion - Lauren & Michelle}

1. Summer essentials should include: Sunscreen, Dove Advanced Care Deodorant (Erin likes the Nourished Beauty fragrance, Michelle and I like the Rebalance and Revive fragrance), and we all recommend a good, hydrating lip balm with an SPF.

2. We all agreed it is fun to experiment with sunglasses during the summer season. Sunglasses look good on anyone, and there are so many styles so you can buy them to match your personality - this picture is a throwback of when we lived closer to each other, but we've always been pretty big fans of experimenting with sunglasses together!

3.  When headed to the beach (or the pool for Michelle), we all think it is fun to pair lots of jewelry with swimwear. Erin suggested wearing Converse to the beach too and the instant I heard this, I knew Michelle would dig that style!

4.  It was a unanimous vote, it's nice to wear your hair up when you are wearing sleeveless pieces - it helps to show off your shoulders and arms. The most important part of style is just to project confidence though, so wear your hair how you feel comfortable.

5.  Some classic summer staples that every woman should have in her wardrobe include a crisp white blouse, a lightweight summer scarf, and a sundress that isn’t too tight fitting. Greek/Bohemian inspired sandals are on our list as well, they are such a fun way to add style to your look!

6. And lastly, a personal style tip - Shop with your best friends,  even long distance via skype/facetime. I love getting her opinion on things I'm on the fence about, I know my opinion counts the most but I like hearing her two cents as well.


 Thanks to Dove and Erin for providing us with some great style tips!

#EverybodyYoga Day 4: Side-Reclining Leg Lift

Day FOUR
of the
#EveryBodyYoga Challenge


Pose #4 - Side-Reclining Leg Lift | Sleeping Vishnu Pose

Side-Reclining Leg Lift may look relaxing but looks can be deceiving. This pose actually requires a tremendous amount of core activity... and  involves the obvious hip and hamstring stretch. It's all about balance, I mean you are resting on a fairly narrow part of your body - no matter your size. I think the benefits of this stretch compare to doing several crunches - a win for me since I hate doing real crunches. Sleeping Vishnu Pose is known to tone the abdomen and can also help reduce lower back pain. While maintaining balance in Side-Reclining Leg Lift is tough, it's only because it requires a calm and clear mind - once you master your mind this pose will help you reduce stress and anxiety! Another great reason to incorporate this little gem into your daily yoga routine!


Side-Reclining Leg Lift is pretty self explanatory but just in case - a quick explanation:
Lying on your right side, legs straight in line with your torso; extend your right arm comfortably and lay the right side of your head into your right hand. Allow your arm to stretch away from your torso to increase the stretch in your arm. Keep the outside of your right foot pressing into the floor. Bend your left leg at the knee and draw it in toward your torso. Clasp your left big toe with your first two fingers and thumb. Extend your left leg up toward the ceiling, reaching through your heel. Continue to breathe smoothly. Maintain your balance as much as possible without rolling one direction or the other. I typically try to hold this pose for about a minute.


Namaste.


Do you want to be a part of the Yoga Challenge?

It's never too late to join us...
{well, you can't win if you don't enter by September 30, 2014 but you can always practice yoga and win that way!}

You can find out the exact details on how to participate in the yoga challenge here.


Follow me and all the generous sponsors & be sure to tag us all in your photo submissions:

Lauren Paints | a beautiful life:

Instagram 
Twitter  |  Pinterest  |  Facebook 


Lush Cosmetics:
Instagram Twitter  |  Pinterest Facebook

Luna Jai:

Instagram Twitter  |  Pinterest  |  Facebook

Gaiam:

Instagram  |  Twitter Pinterest  |  Facebook

Spirit Lockets:
Instagram  |  Twitter Pinterest Facebook


Check out the poses everyday using the hashtag
#EveryBodyYoga on all platforms!

September 2, 2014

#EveryBodyYoga Day 3 - Wheel Pose

Day THREE

of the #EveryBodyYoga Challenge

Pose #3 - Wheel Pose | Upward Bow


If you've never attempted this pose before, be sure to only work within your own limits and abilities - I'm still learning and growing in this pose, therefore my form isn't perfect - keep that in mind.


With that being said, wheel pose is one of my favorites, partly because it makes me feel strong and partly because it's known to strengthen and lengthen the vertebrae in your spine - hello, great posture! Plus, wheel pose helps the nervous system function regularly and improves hormone secretions that keep your body in optimal health. In case you need another reason to get into wheel pose daily, it helps you remove fat buildup from your oblique area when practiced regularly. This pose is more advanced than some of the others in the challenge, so be sure to be cautious when attempting and don't force anything!

Start on your back with your knees bent and your feet on the floor.  Bend your knees and set your feet on the floor, heels as close to the sitting bones as possible. Bend your elbows and spread your hands on the floor beside your head, forearms relatively perpendicular to the floor, fingers pointing toward your shoulders. Lift your hips toward the ceiling drawing your tailbone up, keeping yout thighs and feet parallel, take a few breaths then firmly press your hands into the floor and your shoulder blades against the floor pushing yourself up and lift on the crown of your head. Breath again. Press your feet and hands into the floor, lift your head off the floor and straighten your arms. Lengthen the tailbone toward the backs of the knees, lifting yourself "from your belly button" is the simplest way I know how to put it into words - let your head hang and stay here for around 5-10 seconds, if you can. Repeat as many times as you want, I usually stick to about 2-3 times. I'll repeat this again, be sure to work within your own limits and abilities.


This challenge has brought so many amazing ladies into my life already, looking forward to getting to know all of you more... and hopefully we can get some guys in on the challenge with us! I'm loving seeing all of your photos and hearing about your experiences! I have some super exciting news to announce soon regarding my fitness series so be on the look out for that --- until then, let's keep rocking out our yoga practice and supporting our sponsors with some love!

Namaste.


Do you want to be a part of the Yoga Challenge?

It's never too late to join us...
{well, you can't win if you don't enter by September 30, 2014 but you can always practice yoga and win that way!}

You can find out the exact details on how to participate in the yoga challenge here.


Follow me and all the generous sponsors & be sure to tag us all in your photo submissions:

Lauren Paints | a beautiful life:

Instagram 
Twitter  |  Pinterest  |  Facebook 

Lush Cosmetics:
Instagram Twitter  |  Pinterest Facebook

Luna Jai:

Instagram Twitter  |  Pinterest  |  Facebook

Gaiam:

Instagram  |  Twitter Pinterest  |  Facebook

Spirit Lockets:
Instagram  |  Twitter Pinterest Facebook


Check out the poses everyday using the hashtag
#EveryBodyYoga on all platforms!

Weight Gurus Digital Body Fat Scale with Smartphone Tracking Review


I was give the opportunity to review this Weight Gurus Smartphone Tracking Digital Body Fat Scale recently and I'm absolutely in love with it. One of my favorite things about this scale is that it has the option to just see the amount of weight I've lost and not my actual weight - this allows me to stay focused on my loss and not on a specific weight, which I love. Not only does this scale allow me to focus on my loss over all, it helps me document my progress as I use it with the Weight Gurus app!

The image below is a screen shot of the app on my iPhone. The app is super easy to navigate and you scan your weight onto your phone using your camera and the bar code that pops up on the scale. I'm super excited to share that  I'm down 7.2lbs since I received the scale in early August; with 2.2lbs of the L-B's being lost in September, and .9lbs during this week specifically! That's huge progress thus far and I can't wait to see how Nutrisystem helps starting later this month!

I love that the app that accompanies the scale also has a percentage progress meter, I still have a long way to go but seeing that I'm already 15% to my goal is so motivating!


Now, I'm going to be honest and mention that the features that tell you your "water, muscle, and fat" percentage are somewhat untrustworthy. They seem to fluctuate way too much to be completely accurate... but the scale measures my weight accurately every time. Another thing I don't necessarily like is related to the app on my phone, it encourages me to weigh in daily... which for some may be okay, but for me it can lead to disappointment if I'm up a little one day. I feel like it's much healthier to weight less often so I don't pay attention to the part that encourages me to weight daily.

This scale is the perfect addition to our home to help me measure my weight loss goals and I look forward to stepping on it in the future and realizing I've hit my goal and I've accomplished 100% of my weight loss, until then I'll keep working at it!


Disclaimer: I received one or more of the products mentioned above for free using Tomoson.com. Regardless, I only recommend products or services I use personally and believe will be good for my readers.