Showing posts with label tutorial. Show all posts

October 9, 2015

DIY Painting Inspired by MARVEL's The Avengers: Age of Ultron

This shop has been compensated by Collective Bias, Inc. and its advertiser. All opinions are mine alone. #AvengersUnite #CollectiveBias


I was so inspired by MARVEL's The Avengers: Age of Ultron that I decided to share an awesome DIY Painting! Want to make one for your home? Follow the tutorial! http://cbi.as/7afs

When I heard that MARVEL's The Avengers: Age of Ultron is now out on disc, I knew I had to go out and buy a copy ASAP. See, if you didn't already know, we are pretty big fans of The Avengers in this house.
I was so inspired by MARVEL's The Avengers: Age of Ultron that I decided to share an awesome DIY Painting! Want to make one for your home? Follow the tutorial! http://cbi.as/7afs
While we were hunting down The Avengers: Age of Ultron on Blu-Ray, we ran into the costume section at Walmart! With every costume you can think of for so many different age groups, my hubby and I were like kids picking out candy! We saw all kinds of MARVEL character costumes at great prices but we finally decided that it'd be super fun to have Hubby dress up as the Hulk!

I was so inspired by MARVEL's The Avengers: Age of Ultron that I decided to share an awesome DIY Painting! Want to make one for your home? Follow the tutorial! http://cbi.as/7afs

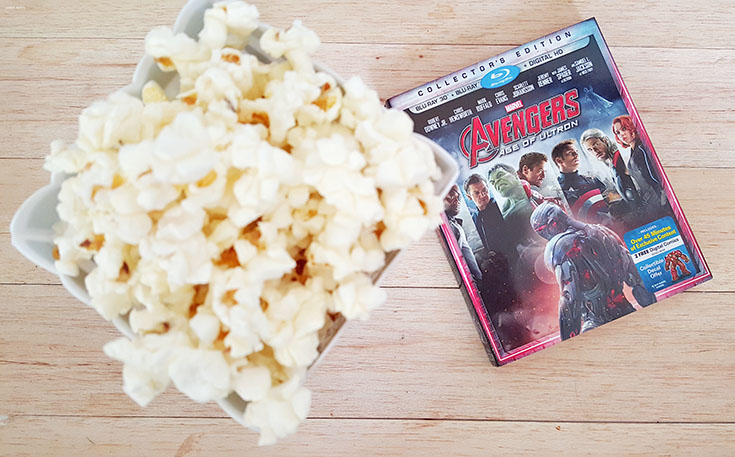
Once we chose a costume for him, we were on our way to the back of the store where we were able to buy a Blu-Ray 3D, DVD combo of The Avengers: Age of Ultron! We grabbed a few snacks on our way out the door and we were on our way home!

I was so inspired by MARVEL's The Avengers: Age of Ultron that I decided to share an awesome DIY Painting! Want to make one for your home? Follow the tutorial! http://cbi.as/7afs

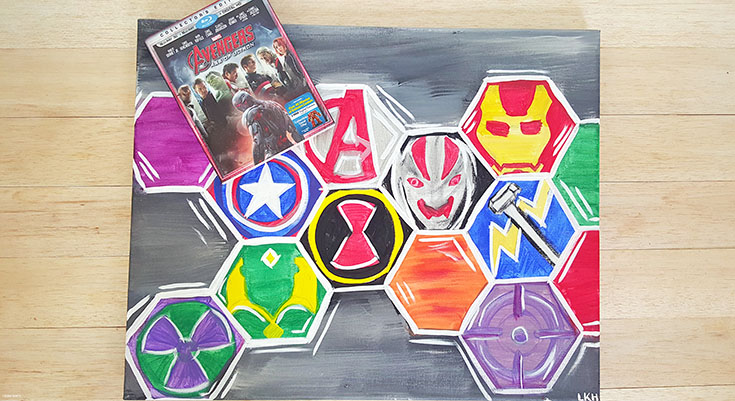
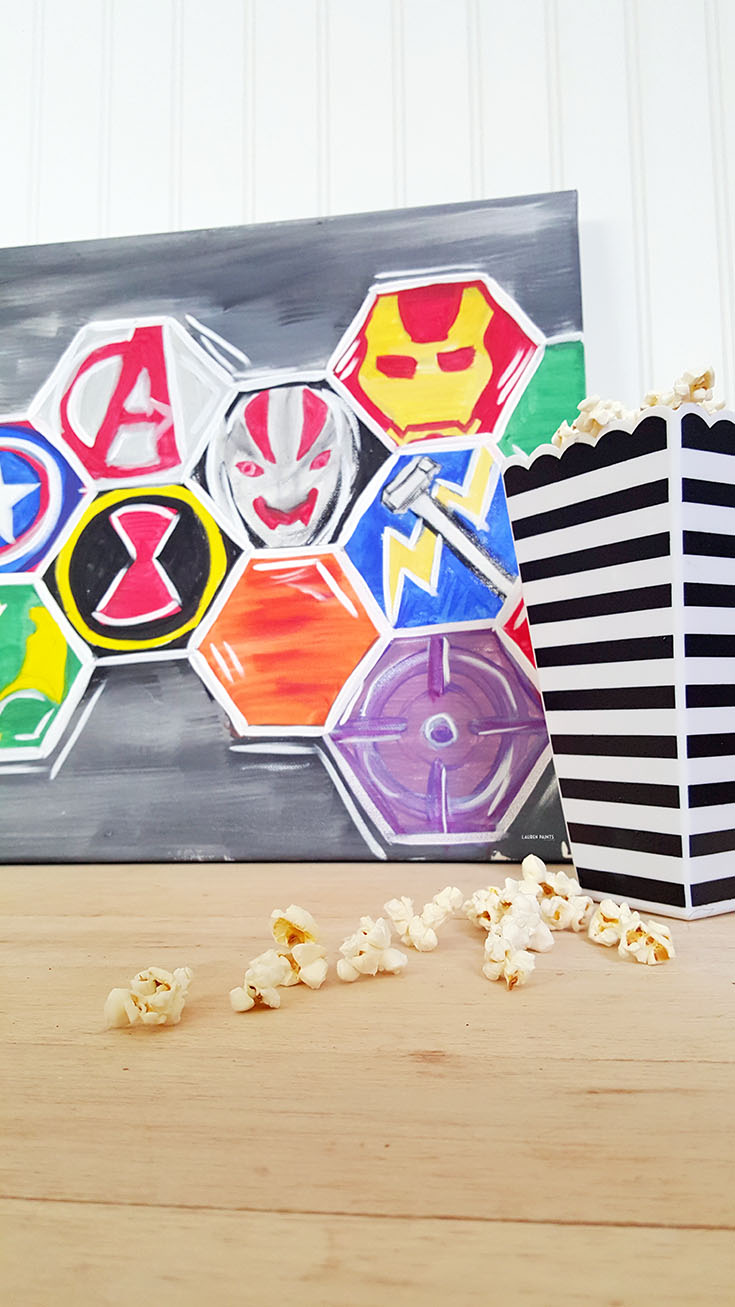
On the way home, I was having a closer look at the cover of the movie and I was inspired. Such great talent, such fun colors - I don't normally paint things like this, but I knew I had to let my creative juices flow... That's when my mind was made up, I wanted to make minimalist versions of "shields" for each of my favorite Marvel Characters!

I was so inspired by MARVEL's The Avengers: Age of Ultron that I decided to share an awesome DIY Painting! Want to make one for your home? Follow the tutorial! http://cbi.as/7afs

Good news, though! Not only did I decide to paint a MARVEL inspired piece of art for my home, I know there are other Avengers fans out there so I decided to share a step-by-step painting tutorial! Now you can make a MARVEL's The Avengers: Age of Ultron shield painting of your own!

I was so inspired by MARVEL's The Avengers: Age of Ultron that I decided to share an awesome DIY Painting! Want to make one for your home? Follow the tutorial! http://cbi.as/7afs

The first step is tracing a hexagon onto a canvas in pencil, with however many "shields" you want to make and maybe a few extra spots for color shields.

I was so inspired by MARVEL's The Avengers: Age of Ultron that I decided to share an awesome DIY Painting! Want to make one for your home? Follow the tutorial! http://cbi.as/7afs

Once your hexagons are traced, it's time to start sketching the minimalist versions of each character.
I chose to work with Hulk, Vision, Captain America, Black Widow, Ultron, Iron Man, Thor, and Hawkeye - basically the best characters!

I was so inspired by MARVEL's The Avengers: Age of Ultron that I decided to share an awesome DIY Painting! Want to make one for your home? Follow the tutorial! http://cbi.as/7afs

In case your wondering how I sketched each item, here's an example:
I was so inspired by MARVEL's The Avengers: Age of Ultron that I decided to share an awesome DIY Painting! Want to make one for your home? Follow the tutorial! http://cbi.as/7afs
Once each character is roughly sketched, apply a background layer of paint. I went with silver, black, and white and blended slightly - allowing for a tonal, textured background.

I was so inspired by MARVEL's The Avengers: Age of Ultron that I decided to share an awesome DIY Painting! Want to make one for your home? Follow the tutorial! http://cbi.as/7afs

After the background is painted, it's time to grab a smaller brush and work on the details of each character. Painting the simple Hulk sketch purple and green, making sure the Black Widow circle is painted around the logo, Captain America's shield needs to have a white star in the middle, etc. Slowly filling in each characters logo with the correct colors. Here's a collage of my step-by-step process...

I was so inspired by MARVEL's The Avengers: Age of Ultron that I decided to share an awesome DIY Painting! Want to make one for your home? Follow the tutorial! http://cbi.as/7afs
Once the entire painting is filled with color, you'll want to outline each shield with white and/or silver and add little details with white and silver paint. Adding little lines to make things feel textured, like the outside of the hexagon shields.

I was so inspired by MARVEL's The Avengers: Age of Ultron that I decided to share an awesome DIY Painting! Want to make one for your home? Follow the tutorial! http://cbi.as/7afs

Sign your name to the bottom of the painting and your creation is complete.

I was so inspired by MARVEL's The Avengers: Age of Ultron that I decided to share an awesome DIY Painting! Want to make one for your home? Follow the tutorial! http://cbi.as/7afs

Now sit back and re-watch The Avengers: Age of Ultron and feel free to admire your artwork anytime you please! 
I was so inspired by MARVEL's The Avengers: Age of Ultron that I decided to share an awesome DIY Painting! Want to make one for your home? Follow the tutorial! http://cbi.as/7afs

I was so inspired by MARVEL's The Avengers: Age of Ultron that I decided to share an awesome DIY Painting! Want to make one for your home? Follow the tutorial! http://cbi.as/7afs

August 28, 2015

A Simple Date Night at Home: A Starbucks Picnic & A Paired Painting!

A Big thanks to Starbucks for sending over a box full of goodies to help make this post possible.

Have a blast and drink some java with your bestie or your boyfriend with this super fun Starbucks Picnic & Paired Painting!

With school back in session, my blog and all kinds of fun projects in full swing, and my hubby working full time, things have been super busy lately and that means we've been neglecting date night. Since we haven't had the chance to spoil each other with a night out on the town recently, I decided to spoil hubby with my most recent package from Starbucks and a little impromptu date day inspired by the contents.

Have a blast and drink some java with your bestie or your boyfriend with this super fun Starbucks Picnic & Paired Painting!

You may remember me talking about becoming a Starbucks blogger a few months back and I was blessed enough to receive another awesome package full of goodies to share with you. This time my box included some of my favorite Starbucks items, frappuccino, espresso, coffee to-go; all of the essentials for a busy gal, as well as a picnic basket and a blanket perfect for picnicking. It's like the people over at Starbucks knew we needed a date and sent it to us in a box.

Have a blast and drink some java with your bestie or your boyfriend with this super fun Starbucks Picnic & Paired Painting!

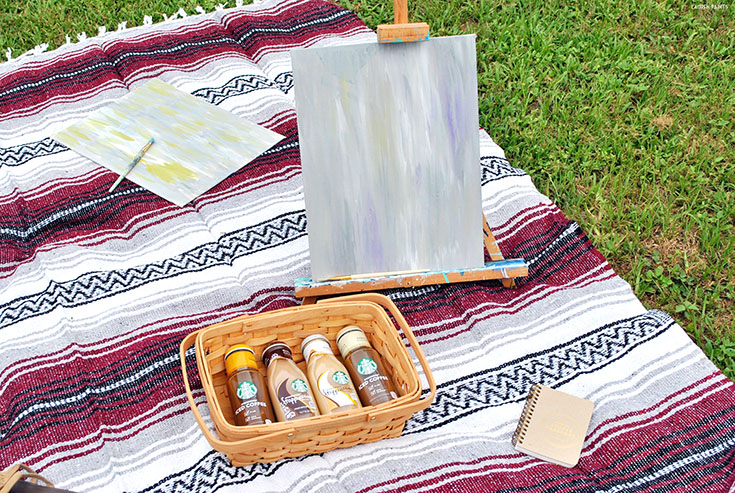
So I gathered our little picnic basket and all of our coffee together. I also grabbed my painting supplies and a few canvas' to paint on and lugged it all out in the backyard. I told hubby to take a break from studying for a few minutes; he needed some fresh air, so I decided to be a "good influence" and asked him to take a second to calm his mind while he drank some java and painted with me.

Have a blast and drink some java with your bestie or your boyfriend with this super fun Starbucks Picnic & Paired Painting!

A few hours later, we were finished painting the background for my upcoming creation, we just simply blended a few neutral-ish colors together and did short brush strokes.

Have a blast and drink some java with your bestie or your boyfriend with this super fun Starbucks Picnic & Paired Painting!

When it came time to painting a subject on the canvas, I knew I wanted to make a painting that depicts one of my favorite things in the world, other than my family - Starbucks s'mores frappuccino!

Have a blast and drink some java with your bestie or your boyfriend with this super fun Starbucks Picnic & Paired Painting!

You can see the step my step process in the photo below and I tried to make it easy enough that anyone can follow along and make this painting in just a few strokes of a brush! Follow the steps below and you'll have an artsy Starbucks painting of your own:

Have a blast and drink some java with your bestie or your boyfriend with this super fun Starbucks Picnic & Paired Painting!


Who doesn't love the little green mermaid and her magical frappuccinos though? If you love her as much as I do, then this painting is perfect for your home... I'm debating between hanging my painting in my kitchen or office, which do you think?

http://goo.gl/oKnrBV

Regardless of whether you love my art and decide to make your own, you'll want to grab a frappuccino, an iced coffee, or maybe one or two of each! Which flavor is your favorite? I think I'd go with a s'mores frappuccino or maybe the caramel iced coffee... it's a hard choice to make every time I'm grabbing for my caffeine fix!

http://goo.gl/oKnrBV


July 24, 2015

Share Funshine + Make DIY Designer Dog Shirt Collars

This shop has been compensated by Collective Bias, Inc. and its advertiser. All opinions are mine alone. #ShareFunshine #CollectiveBias

Share a little Funshine and make an adorable DIY designer dog shirt collar in minutes! #ShareFunshine

This summer I've been browsing thrift stores like crazy, I'm looking for new basic pieces to add to my wardrobe since I'm in a smaller size (YAY!) and I'm also looking for fun DIY projects.

Share a little Funshine and make an adorable DIY designer dog shirt collar in minutes! #ShareFunshine

I absolutely love turning something old into something new; whether it's a restored piece of furniture or a funky, inventive way to upcycle fabric, I can always come up with some crazy idea to make these thrifty finds into treasures!

Share a little Funshine and make an adorable DIY designer dog shirt collar in minutes! #ShareFunshine

So the other day when we were browsing one of my favorite places to shop second hand, we casually were walking by the children's section and I spotted some of the cutest collared shirts.We don't have any little one's (yet), but I brilliantly came up with the an idea that involved my furry children.

Share a little Funshine and make an adorable DIY designer dog shirt collar in minutes! #ShareFunshine

I wasn't going to subject them to wearing children's clothes, putting a collared button up shirt on my dog would be kind of funny but I don't think they would like that much. So I decided to spice up their current collars with a much more fun, fashionable spin on a collar.

Share a little Funshine and make an adorable DIY designer dog shirt collar in minutes! #ShareFunshine

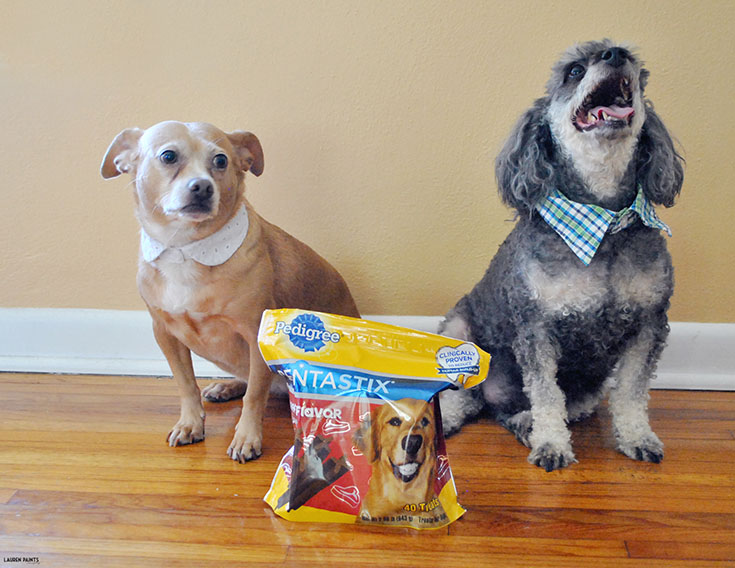
I call my creation DIY Designer Dog Shirt Collars, my little pooches seem to love their new cotton collars and they look absolutely adorable (and a little hilarious) on them!

Share a little Funshine and make an adorable DIY designer dog shirt collar in minutes! #ShareFunshine


Right after we made these cute new collars we had some friends come over (to share our delicious snack with) and we all agreed that these look like they were made for my dogs.

Share a little Funshine and make an adorable DIY designer dog shirt collar in minutes! #ShareFunshine

Well, they were made for my dogs, but they just fit them so well it looks as though they should have always worn shirt collars instead of "dog collars". I suppose you could say my dogs and I have elevated the idea of a collar, at least until it's time to put their harnesses on to go for a walk. 

Share a little Funshine and make an adorable DIY designer dog shirt collar in minutes! #ShareFunshine

If you want to elevate your dog's sense of fashion, it's super easy to make one of these cute new collars! Follow the directions below and if you need any help, feel free to ask me via social media or email!

Share a little Funshine and make an adorable DIY designer dog shirt collar in minutes! #ShareFunshine

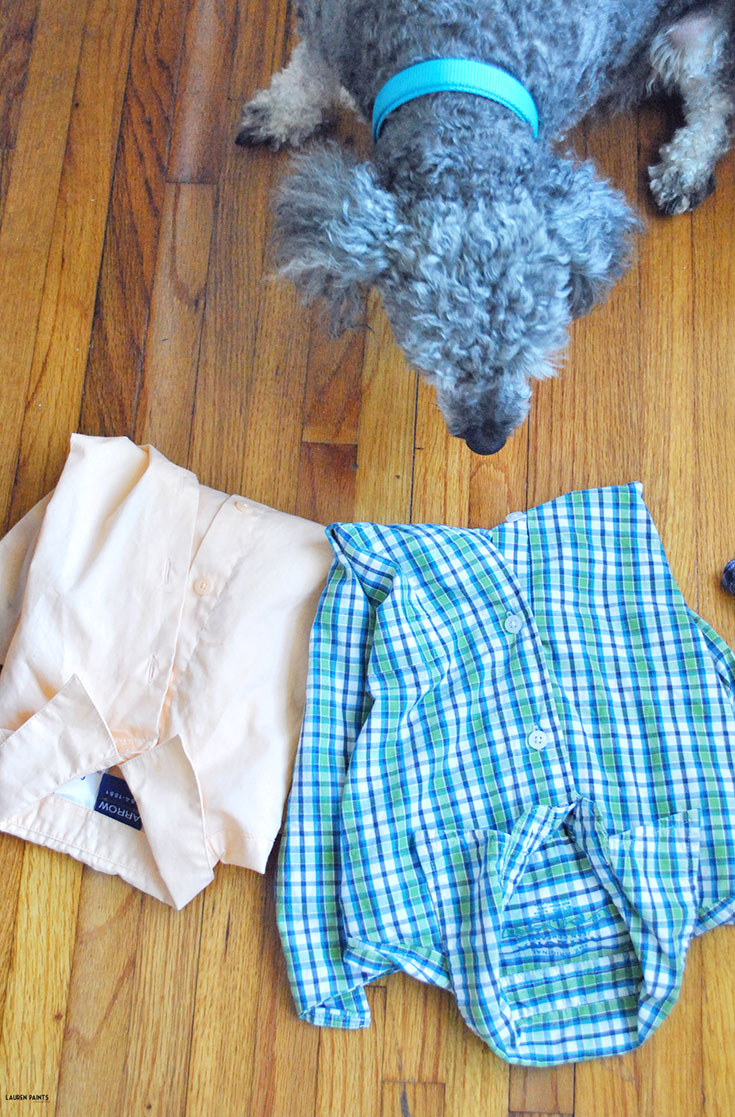
Step 1: Choose shirts that will fit your dog's neck and personality. It was easy to pick out a couple of shirts with collars for my pooches and I bought them for 50 cents a piece. I'm sure if you hit your local thrift store you'll be able to find some collared shirts that will fit your little fuzzy friends as well.

Share a little Funshine and make an adorable DIY designer dog shirt collar in minutes! #ShareFunshine

I suggest measuring your dogs neck before you go (or taking their current collar with you), so you know approximately what size shirt you should be looking for. You'll also want to look for collared shirts that have a button actually on the collar, this will actually be the clasp for your dogs collar!

Share a little Funshine and make an adorable DIY designer dog shirt collar in minutes! #ShareFunshine

Step 2: Wash all of the clothes you bought, just because a little clean laundry never hurt anyone. Plus, you are ensuring your dogs new collar is super clean and fresh! During this time, I highly suggest you all allow yourself, and your dogs, some delicious treats.

Share a little Funshine and make an adorable DIY designer dog shirt collar in minutes! #ShareFunshine

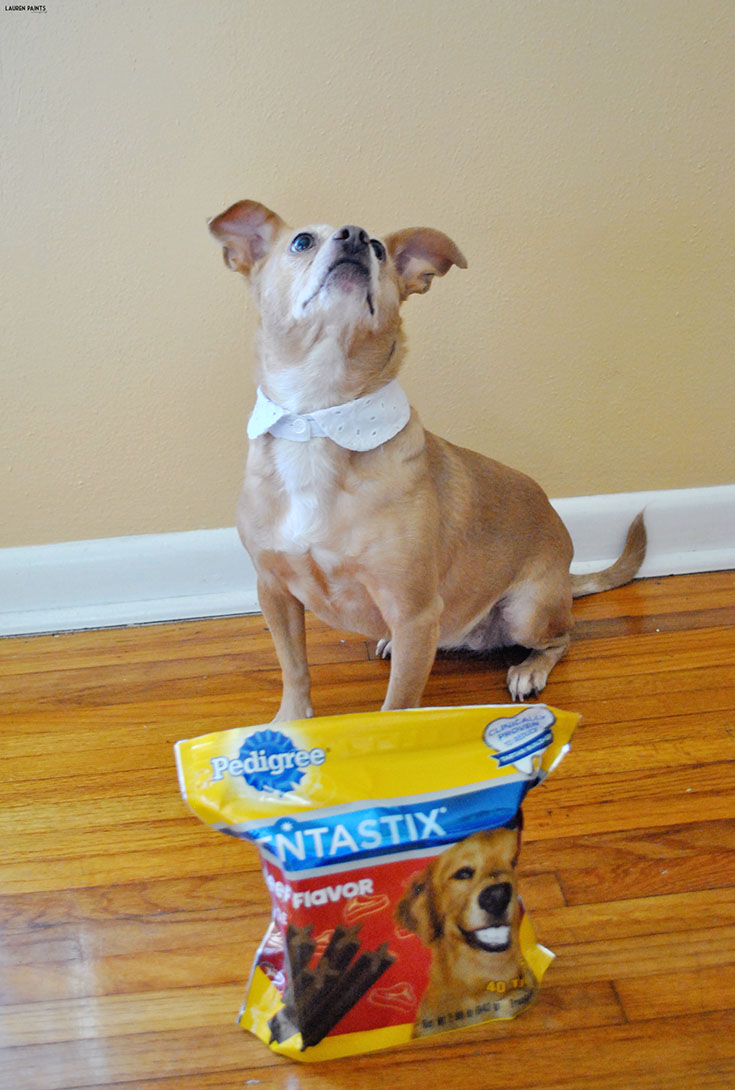
///Side note: We stopped at Walmart for a few things after we hit the thrift store and I saw a whole bunch of delicious candy and my dogs favorite treat, Pedigree Dentastix® Original.

Share a little Funshine and make an adorable DIY designer dog shirt collar in minutes! #ShareFunshine


That's when the decision was made, the rest of the day was all about crafting and treating the dogs and ourselves to all of our favorite things!

Share a little Funshine and make an adorable DIY designer dog shirt collar in minutes! #ShareFunshine

After all it's rained here almost every day in July, we all deserved a fun day and decided we would make our own "Funshine"!

Share a little Funshine and make an adorable DIY designer dog shirt collar in minutes! #ShareFunshine

I bought all my favorite candies: Starburst® Minis Unwrapped, Life Savers® Hard Candy, Skittles®, and M&M's® Peanut and we were on our way home to start crafting! Before you start crafting again, you should definitely enter to win the Share a Little Funshine Sweeps:

///

Share a little Funshine and make an adorable DIY designer dog shirt collar in minutes! #ShareFunshine

Step 3. After your the collared shirts are clean, you'll want to grab a pair of scissors and cut along the seam of the collar. Make sure to trim any remaining threads and then it's time to try your dog's new collar out for the first time.

Share a little Funshine and make an adorable DIY designer dog shirt collar in minutes! #ShareFunshine


Step 4. If you are anything like me, you'll want to share your new creation with the world and if your dogs are anything like mine they won't let you take a picture easily.

Share a little Funshine and make an adorable DIY designer dog shirt collar in minutes! #ShareFunshine

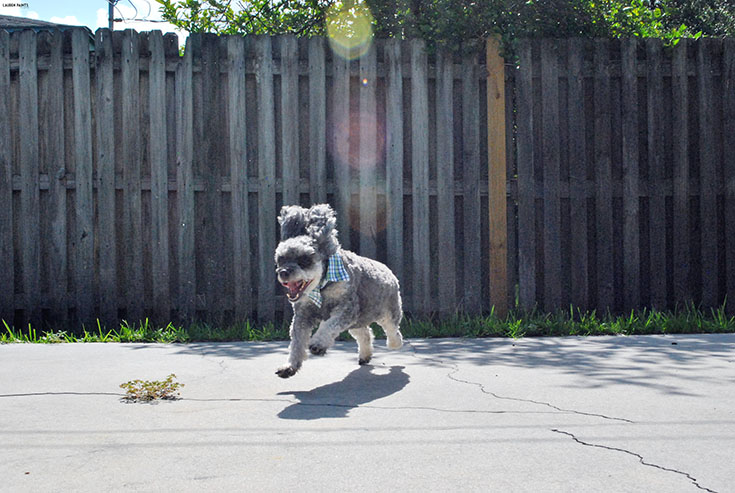
I don't have the most perfectly behaved dogs in the world, it's true. They get a bit wild and are like toddlers when I try to take pictures of them, they literally can't sit still.

Share a little Funshine and make an adorable DIY designer dog shirt collar in minutes! #ShareFunshine

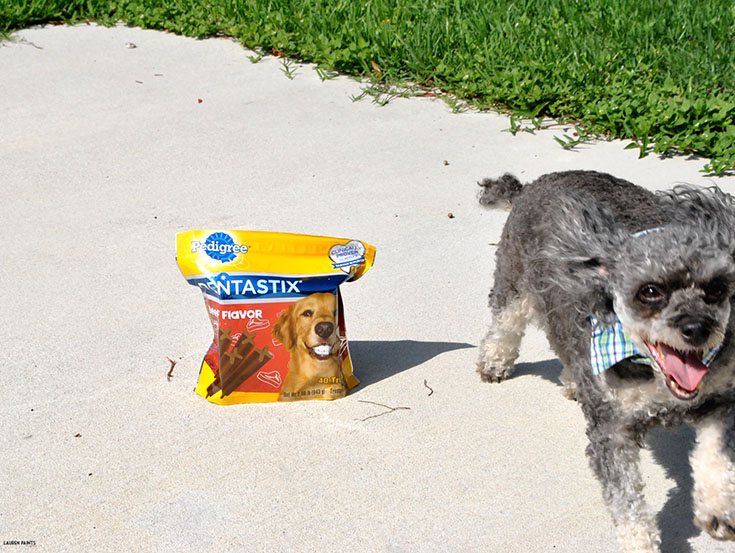
I've learned to snag photos to share, I need a little help from Pedigree Dentastix® Original and Pedigree Dentastix® Beef Flavor. All I have to do is show them that they'll get a Pedigree Dentastix® right after they pose and they are all set and ready to model!

Share a little Funshine and make an adorable DIY designer dog shirt collar in minutes! #ShareFunshine

Who knew it was so  I easy to convince "models" to pose properly?!

Share a little Funshine and make an adorable DIY designer dog shirt collar in minutes! #ShareFunshine

Share a little Funshine and make an adorable DIY designer dog shirt collar in minutes! #ShareFunshine

If you decide to make one of these adorable collars for your pooch, you must show me photo evidence! I'd love to hear how you plan on sharing "funshine" through out the summer?  I'd love to hear if you have any creative activities planned with your kids, dogs, husband this summer? Tell me all about it in the comments below! If you want to treat your dog and yourself, click here to save on M&M's®, SNICKERS® Ice Cream Bars, Dr Pepper® Cherry, Skittles®, Pedigree Dentastix®, and more!  Download the Blippar app from your Apple or Android store to scan your package and receive exclusive content.

July 20, 2015

Funk Up Your House with Quirky Functional Home Decor

I'm all for decorating a house with all kinds of adorable, eclectic goodies but I also know hectic it can begin to look if you don't know how to organize your decor appropriately. I am currently trying to organize all of our collections and lusting over all of these super quirky DIY projects and products and just have to share them with you. From creative uses for a trunk to a stool made of old magazines, there's something just quirky enough for everyone and the storage these pieces offer is just what every home needs!


Which project will you take on first? I think I want to give hubs a to-do list that includes each of these projects and then some!

Check out Funk Up Your House with Quirky Functional Home Decor
by Lauren Paints at Mode

March 11, 2015

DIY Dog Silhouette Painting Tutorial and Finding the Formula Right for Your Dog with Purina® Pro Plan®

This shop has been compensated by Collective Bias, Inc. and its advertiser. All opinions are mine alone. #ProPlanPet #CollectiveBias

http://cbi.as/4b29

So I'll be the first to admit, my dogs are two of my best friends. While they may not be able to speak to me, we have quiet the unspoken bond. They both are super expressive and with completely opposite personalities our house if full of entertainment and fun...

DIY Dog Silhouette Painting Tutorial

PowPow, originally named Miley - but renamed when we had a daycare in our home years ago by one of the children, is our little rebel. Although she can be hardheaded at times, she is the biggest sweetheart you'll ever meet. She will be the first to protect her family but also the first to cuddle up in the lap of a complete stranger. We really aren't sure what she is, other than an adorable dog... She's fast, she's funny, and she loves her family and we love hearing what breeds people think she may be. She was adopted at only a few months old from an animal shelter, where they told us she was found wondering along the highway. Her past is a mystery but her heart is full of love and loyalty.


DIY Dog Silhouette Painting Tutorial

Gnarly, our little "talkative" troublemaker is always getting into something michevious but is as smart as a whip. He's a ham when he hears the words treat, walk, or bye-bye and we are pretty sure he's even figured out how to spell treat now. He knows every trick in the book and is eager to learn whenever we try to teach him something new. He was adopted when a lady on Craigslist said she had to give him up, we were told he was six months old and a toy poodle... Well, he must have been six weeks old because he was itty, bitty when we adopted him but has since ballooned into an adorable miniature poodle. He always has been a super loving little guy and although he can be a little too talkative at times, it's truly a blessing to have a dog that can pretty much tell you what he wants/needs.


As you can probably tell, I brag about my dogs as if they are my children... These two are my fur babies! We've always kept photos of the babes around the house, like most people do with their family members. But lately I've been feeling extra creative and I decided I want to make a piece of art that represents them, then it came to me...

DIY Dog Silhouette Painting Tutorial

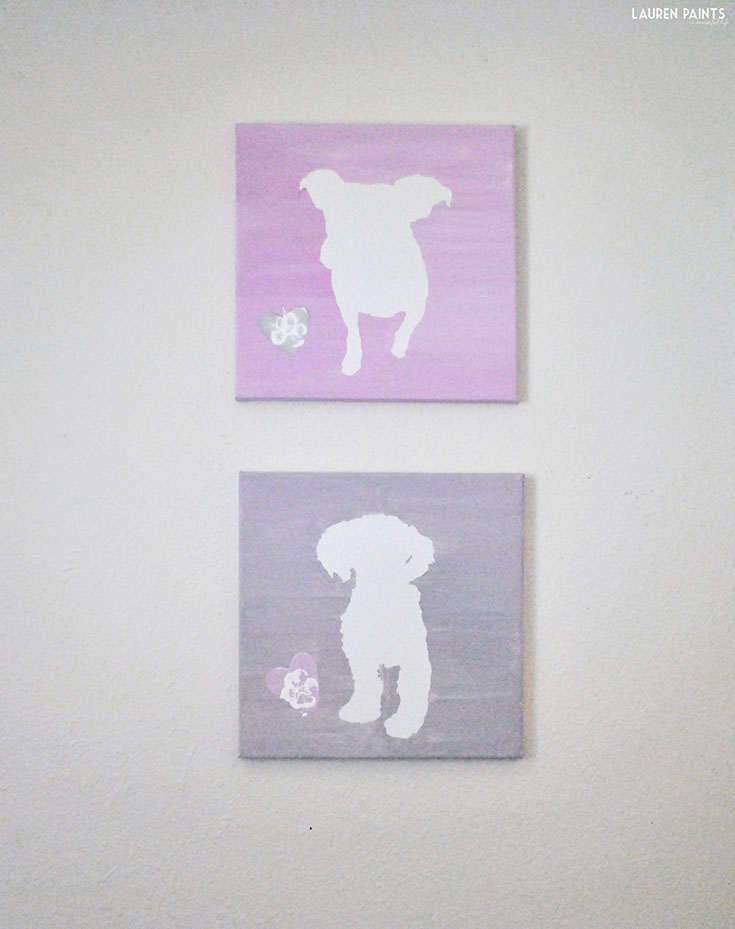
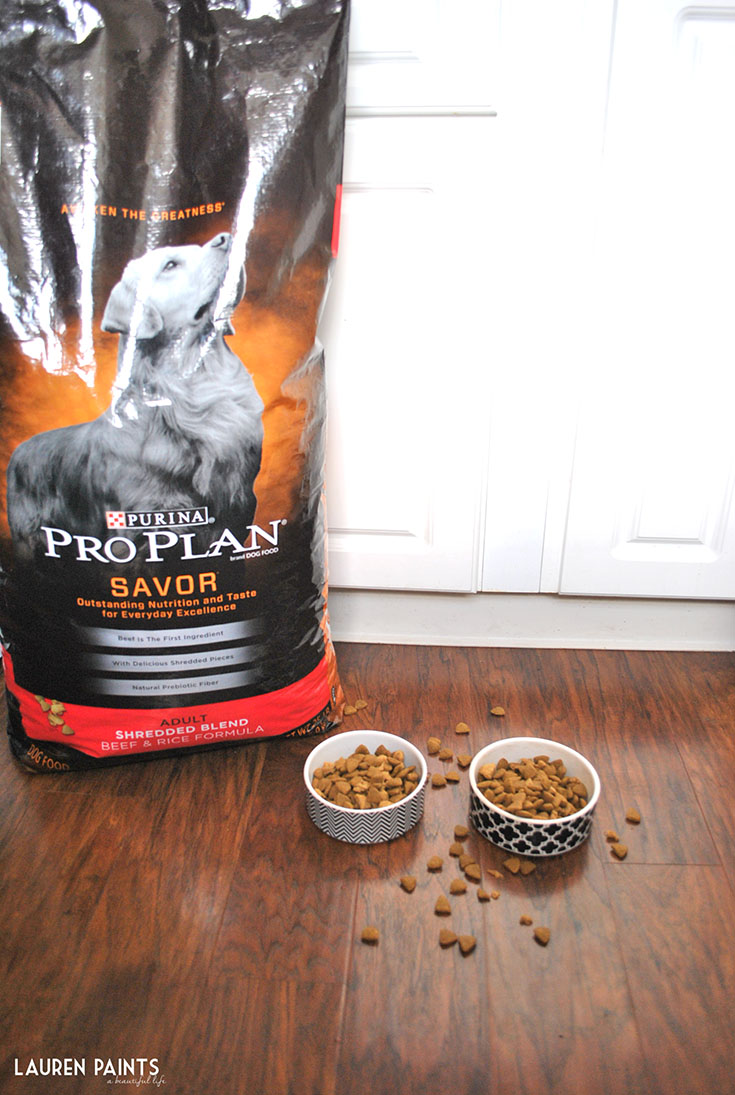
Silhouettes are a super easy and inexpensive way to capture their likeness without a whole bunch of technical work! I decided to make a day of it, I created a doggie silhouette piece of pop art and then treated my fuzzy little helpers to a savory bowl of Purina® Pro Plan®, a new food full of nutritious ingredients! We had the best day ever and my picky little eaters gobbled this food right up! So I guess you could say I'm a pretty happy dog-mom right now, especially because the paintings turned out adorably!

DIY Dog Silhouette Painting Tutorial

I just couldn't keep this fun DIY project to myself so today I'm sharing how I made these adorable one-of-a-kind doggie paintings.

Take a photo of your dog at whatever angle you want to capture in your silhouette, a side angle is fun. Just get creative and try to imagine just the outline of your dog, so you have an idea of what your gorgeous piece of art will look like. 


After you have your photo, you'll want to begin by editing the picture of your furry friend. Make sure you change the image size to fit your dog's image perfectly on the canvas. I made my pictures 9 inches in height to fit on a 12x12 canvas. You can easily just use the original image of your dog and begin cutting out the image manually, at this point. But I wanted to use an actual silhouette to paint over. So I "cut" my dog from the original image using photoshop and made both pictures into silhouettes  using blending effects,. Print your photo of your dog, cut your dogs shape out from the paper, and now the real fun begins.

DIY Dog Silhouette Painting Tutorial


You'll want to tape the image of your pup down to your canvas so that it doesn't move around while you are painting around it. Use enough tape (or scrapbooking stickers) to ensure that your photo is held down well.

DIY Dog Silhouette Painting Tutorial

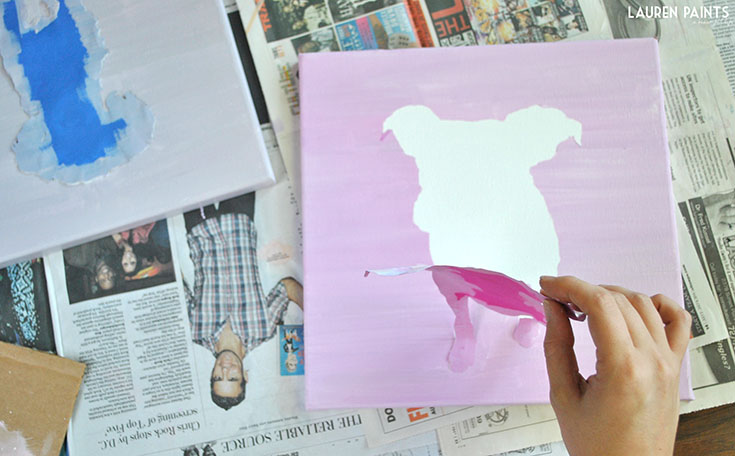
Once your image is taped down, choose a paint color and use a decently sized brush to paint around the silhouette. Paint with brush strokes that are only in a direction heading away from the silhouette, allowing the outer edges of the silhouette to really be in stark contrast with the white silhouette you are creating.

DIY Dog Silhouette Painting Tutorial

After your paint has dried, remove the paper photo from the canvas and stand in awe while you admire your work.

DIY Dog Silhouette Painting Tutorial

Add a little heart with a paint brush and call over your dog, it's their turn to get crafty!

http://cbi.as/4b29

Dip your pups paw into a non-toxic, acrylic paint and then place the paw over the heart you painted. Remove additional paint on paws with a baby wipe or a wet paper towel!

DIY Dog Silhouette Painting Tutorial

Ta-da! You have an adorable creation that you and your doggy made together, something you can cherish forever and a truly one-of-a-kind work of art.

DIY Dog Silhouette Painting Tutorial

Now that you have a special piece of art, it's time to treat your dog to something tasty to thank them for helping you out! My pups and I took a trip to PetSmart and found everything we were looking for! We found treats that make them smile from ear to ear, a new bone that'll be perfect for chewing when they need something to entertain themselves, and we even found a food that had everything I was looking for nutrition-wise while it still offers a taste they absolutely love! Our trip to PetSmart was a total WIN!
DIY Dog Silhouette Painting Tutorial

Purina® Pro Plan®'s goal is to give your dogs the nutrition they need to be their absolute best, while helping them to be energetic and resilient. They also provide them with the nutrients they need to maintain an ideal body condition, healthy skin, and a stunning coat - a dog's diet is so very important to their health & well-being. Purina® Pro Plan® is made with real chicken, beef, lamb, or salmon and that real meat is the #1 ingredient found in all their dry formulas, something that my poodle has been singing about since we picked up a bag!

DIY Dog Silhouette Painting Tutorial

I love that all the ingredients are high quality and each and every ingredient is chosen for a specific purpose, no filler ingredients means that my dogs can live healthier and happier lives! They want the best for every dog and since every single dog is different, Purina® Pro Plan® products can be found in five specialized platforms. Each one containing products formulated for a dog's taste preferences, age, dietary considerations, and activity level.

DIY Dog Silhouette Painting Tutorial

Your dog deserves to have the food he's been day-dreaming about so don't forget to visit the Purina® Pro Plan® MyPLAN website to get your dog's MyPLAN recommendation and a rebate offer for a free bag of Purina® Pro Plan® Dry Dog Food (4-6lbs, up to $18.99.) This offer is only good in U.S.A. A.P.O's, F.P.O's. Void where taxed, prohibited, restricted. Allow 6-8 weeks for shipment. LIMIT ONE REQUEST PER INDIVIDUAL, ADDRESS, or EMAIL ADDRESS. Offer expires 04/30/2015. See full terms.


Gnarly wants you to treat your pooch to something delicious today!

http://cbi.as/4b29

December 22, 2014

Disney Planes Dusty Crophopper DIY Ornament Tutorial + Rollback Deals!

This shop has been compensated by Collective Bias, Inc. and its advertiser. All opinions are mine alone. #PlanesToTheRescue #CollectiveBias


I keep talking about it, but I'm super excited to see my family over the holidays! I can't wait to see all my nieces and nephews and spend time crafting and playing with them! We have so many awesome kids in our family, it's hard not to get excited to see them! This year I'm surprising them with something I made from the heart. We're all big Disney fans so when I heard that Planes Fire & Rescue came out in early November, I knew we would spend some time together watching our favorite Plane (Dusty Crophopper)!

I just couldn't help myself though, I had to make them something to make this holiday extra special! I'm that Aunt, I show up with things I painted, crafted, baked, etc for them...and well, we all know gifts that are handmade mean the most so I tried my hardest to make a Dusty ornament that will put a smile on their face!


Once I was finished with him, I knew I had to share how I made him with you guys and I wanted to showcase him in my house... I decided that this year instead of having a traditional "big kid" tree, we were going with a unique theme. This year our tree is decorated with characters from Planes Fire & Rescue and Cars - two of our favorite movies to watch with our nieces and nephews!

I'm just in love with how Dusty turned out, so I made two so I can still give one to my family... But as promised, I'm sharing how you can create a Dusty Crophopper Ornament of your own super easily, using items you most likely already have around your home! I'm also sharing some awesome deals on Planes toys - because what's better than good prices on Disney toys?!


Disney Planes Dusty Crophopper DIY Ornament


Items needed:

Toilet Paper Roll
Orange Foam Cards (Dollar Store toy/craft aisle)
White Poster Board
Cardboard (you could always sub poster board)
Black Scrapbooking Paper
Silver Cupcake liner (or paper)
Silver Paper Fastener
Paint - Orange, White, Blue
Polyester filling
Glue (I use hot glue) & Tape


I decided to dive right into this project, gathered everything up and it was on! I started by forming the easiest part of the ornament - the cloud! I'm thinking a whole tree full of these little cloud puffs and snowflakes may be in our future next year. All you do to form the cloud is simply pull at it until you develop the shape you want. After forming the cloud, I started making Dusty's "nose" using the cupcake liner (you could always use scrapbook paper). You simply just fold the circle to make a cylinder using your own hand to form it.


Once your cylinder is formed, cut the tip off the top, making sure it is large enough to get the paper fastener through. Next you'll trim three equal propellers from black construction (or scrapbook paper) and glue these to the paper fastener.

Next step is easy, officially glue the propellers, nose and fastener together and tape it onto the toilet paper roll.

Now you'll glue your orange foam pieces (or orange construction paper) onto your toilet paper roll, allowing it to start to transform into Dusty! The next step is making his cabin body, you'll want to cut a piece of orange foam or paper into a square and fold it to look like the photo in the bottom right and then secure the sides by gluing it together.
Once it's all glued together and it's cut down to size, it's time to start working on Dusty's wings! I just decided to use a white cardboard box I happened to have from a recent gift I received. You could use poster board or normal cardboard and paint it. I simply cut his wings about the length of his body and 3/4 an inch wide. I went ahead and cut out Dusty's tailplane as well. These are easy cuts again, just a thin rectangular piece about 2 1/2 inches long and a trapezoid about an 1 1/4 inches in size.

Now it's time to add the details, I painted the edge of Dusty's wings orange to match his body, his tail stabilizer longer piece blue, and the smaller piece orange. I then added the details to the wings and took a break to let these dry!

Once the paint dried on Dusty's wing, it was time to start putting all his pieces together. I cut a hole in the smaller stabilizer piece using an exacto blade and then slid the longer piece through. I then cut a hole for the stabilizer to go on Dusty's backside and started to make holes for his wings. This is definitely part of the project an adult needs to be a part of, better safe than sorry at any age!

The next step is making sure Dusty's rocking his lucky number 7 on his sleeve! I decided the best way to get a clean circle was to trace a paint bottle. I then just sketched a 7 into the circle, colored it in, and Dusty's starting to resemble himself already!
The next is another detail piece, one of the most important! Dusty's gorgeous little baby blues. I cut them from a small piece of white poster board and snipped out two small little hills and then started drawing his eyes.


I outlined the black in his eyes almost  all the way around with blue and left a little white "shine" to make his eyes look bright. I then went ahead and used some hot glue to attach his eyes to his "face" and then his face to the body of the plane!
He's nearly done now, all you have to do is glue him onto his cloud and use a needle to get a piece of thread through the top so he is able to hang from your tree.


And it's official, you now have created a Planes ornament of your own! I think Dusty turned out adorably and the best part is, this is a craft you can do with your littles. You can let them do most of the work and just help with gluing and cutting - the perfect way to spend time together and make something you'll be able to admire year after year! I love making crafts and can't wait to attempt this with my nieces and nephews soon.


I have another great surprise in store for my nieces and nephews, I grabbed a few of the awesome Rollback deals on Planes toys at Walmart! I went ahead and kept a pack of the Die-Cast 3 pack vehicles to help decorate my tree but Walmart has so many awesome toys on Rollback specials right now, I was able to grab some toys for the kids, and even grabbed a pack to donate!


The Disney Planes Flight to Finish Speedway is on Rollback for $24.97, the Disney Planes Fire & Rescue Die-Cast Vehicles, 3-Pack is on Rollback for $14.97, the Disney Planes Fire & Rescue Deluxe Talking Vehicle Assortment is on  Rollback for $19.97, and lastly the Planes Character Assortment die-cast set and the Disney Planes: Fire and Rescue Character Assortment die-cast set are both on rollback for $4.97! With so many awesome deals on everything Planes, which toy will you be grabbing to surprise your little with?