Showing posts with label tutorial. Show all posts

June 13, 2020

The BEST Way to Make Homemade Bubbles


This year we've spent a ton of time at home, like many people. That means we've been trying to find ways to keep our little wild child occupied... and that involves lots of time spent outdoors, chasing bubbles through our backyard and sometimes even having competitions to see who can make the biggest bubbles.


We used to be the type to buy bubbles from the store...then we experimented and started making our own. Want to make your own...? Here's how:


August 9, 2016

A Simple DIY Dog Toy Tutorial + an Update on Beneful! #FriendsofBeneful

Thanks to Beneful for choosing my pups and I to be part of the #FriendsofBeneful ambassador program, regardless all opinions expressed below are my own.

Changing up your dog's life doesn't have to be a stressful thing... Find out more about Beneful's NEW formula and get the directions to make your pup a toy out of materials you likely already have in your home! #FriendsofBeneful

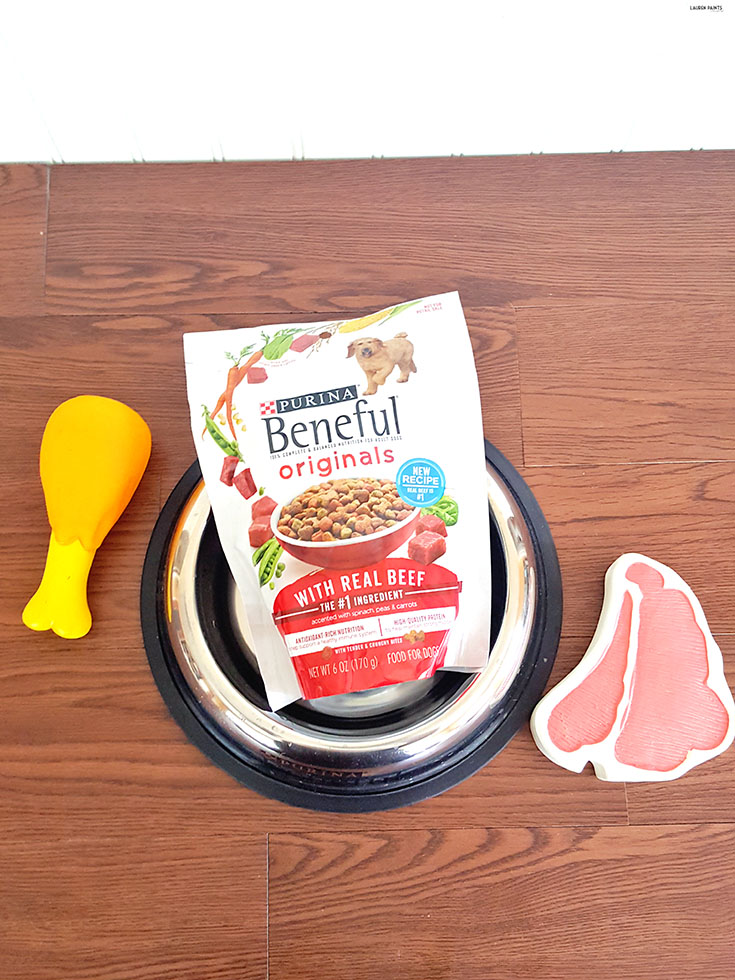
I've already shared the fact that my dogs and I are pretty big fans of Beneful and we were overjoyed to recently share the news about the Dream Dog Parks that are in the works this year, but today's news may take the cake. While Beneful was already an incredible food, in my dog's eyes and my own (for obviously different reasons), I'm excited to share that it's gotten even better recently!

Changing up your dog's life doesn't have to be a stressful thing... Find out more about Beneful's NEW formula and get the directions to make your pup a toy out of materials you likely already have in your home! #FriendsofBeneful

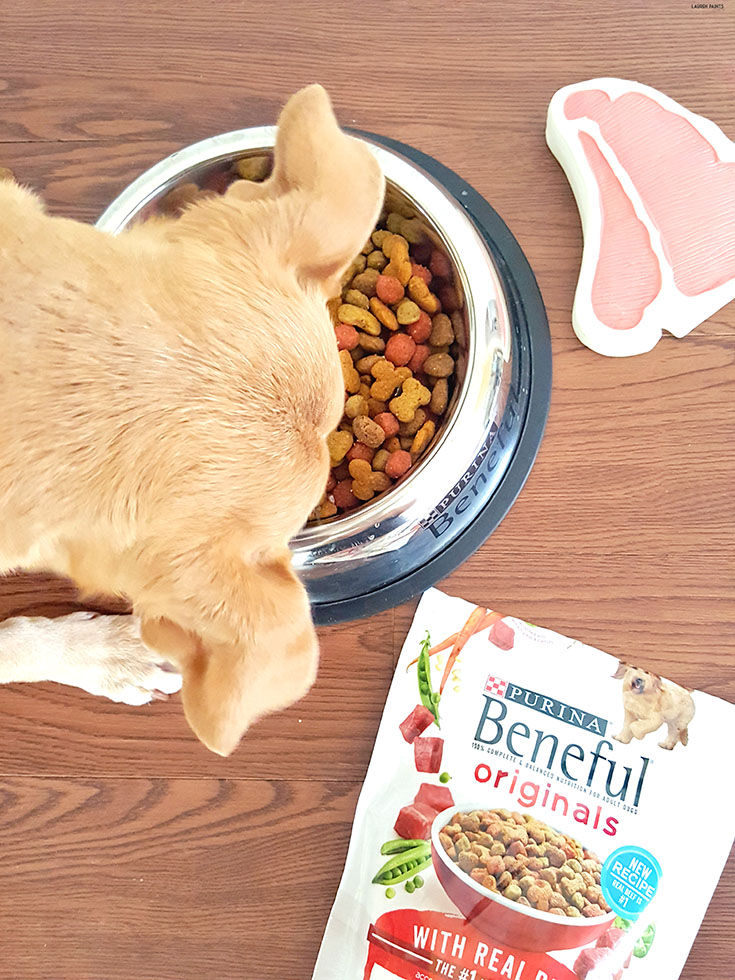
The Beneful team has been working to evolve their food into the perfect food from a dog owner's perspective for the past two years and it's official, they've mastered their craft and my dogs love the new recipe.

Changing up your dog's life doesn't have to be a stressful thing... Find out more about Beneful's NEW formula and get the directions to make your pup a toy out of materials you likely already have in your home! #FriendsofBeneful

With meat as the #1 ingredient in both the beef and chicken dry Beneful foods and Salmon hopefully joining the extra meaty-train soon, it's obvious why my dogs are totally gaga over the new formula... and why I'm a happy dog owner knowing I'm feeding my pups something they love and something that provides nourishment for their little canine bodies. Not only did they adjust their formula to include more meaty goodness, there's no added sugar in any of the recipes so your dog can eat without a worry.

Changing up your dog's life doesn't have to be a stressful thing... Find out more about Beneful's NEW formula and get the directions to make your pup a toy out of materials you likely already have in your home! #FriendsofBeneful

The best part of the news I'm sharing with you today is this: Beneful is so proud of their new formula, they are offering you the chance to sign up for a free sample for your canine friend! Once the new formula of Beneful has received two "paws" up approval from your doggy, be sure to share a review on Beneful's website letting the world know how much your furry friend enjoys the new food.

Changing up your dog's life doesn't have to be a stressful thing... Find out more about Beneful's NEW formula and get the directions to make your pup a toy out of materials you likely already have in your home! #FriendsofBeneful

While the change in Beneful is a good thing, I suppose I should note that you can't just switch your fuzzy friend's food first thing. You'll want to transition your dog to the new food, to ease their tummies smoothly. Want to master the art of changing your dog's food? Check out other helpful feeding tips and tricks from Beneful here.

Changing up your dog's life doesn't have to be a stressful thing... Find out more about Beneful's NEW formula and get the directions to make your pup a toy out of materials you likely already have in your home! #FriendsofBeneful

Speaking of change, my dogs are going through quite a bit of change lately... we're moving furniture around and getting things ready for our daughter's arrival next month and so far, they've been so very good about all of the new-ness and adapting perfectly. While they've been adapting well thus far, I've been trying to think of fun ways to reward them and remind them we love them since a BIG change is coming soon, which led me to make them a new toy this weekend. I figured we could buy a load of toys, but making one out of stuff that already has our scent, would be a more significant reward.

Changing up your dog's life doesn't have to be a stressful thing... Find out more about Beneful's NEW formula and get the directions to make your pup a toy out of materials you likely already have in your home! #FriendsofBeneful
I'm super excited to say that their new toy is easy enough for anyone to make and the best part is you most likely you have the materials laying around your house to put it together right now, if you want!

For this project you will need:

Changing up your dog's life doesn't have to be a stressful thing... Find out more about Beneful's NEW formula and get the directions to make your pup a toy out of materials you likely already have in your home! #FriendsofBeneful

a water bottle
an old shirt or dress
an old pair of pants
scissors

To get this project started you'll want to remove the label from the water bottle and the cap as well. 
Next you'll want to trim the bottom hem of the dress or shirt off, this will be your ties for the ends of the toy.

Changing up your dog's life doesn't have to be a stressful thing... Find out more about Beneful's NEW formula and get the directions to make your pup a toy out of materials you likely already have in your home! #FriendsofBeneful

Following this step, you'll want to use the water bottle and measure enough fabric on the pant leg to cover the entire bottle and tie the ends, then cut the pant leg as needed.

Changing up your dog's life doesn't have to be a stressful thing... Find out more about Beneful's NEW formula and get the directions to make your pup a toy out of materials you likely already have in your home! #FriendsofBeneful

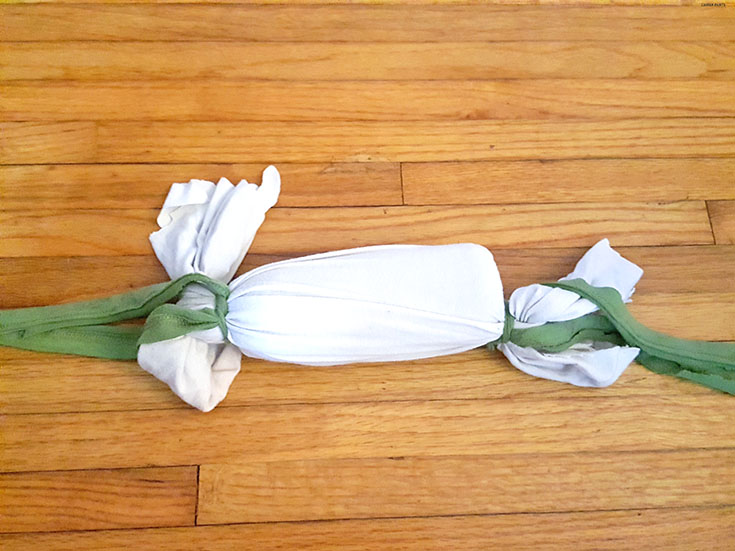
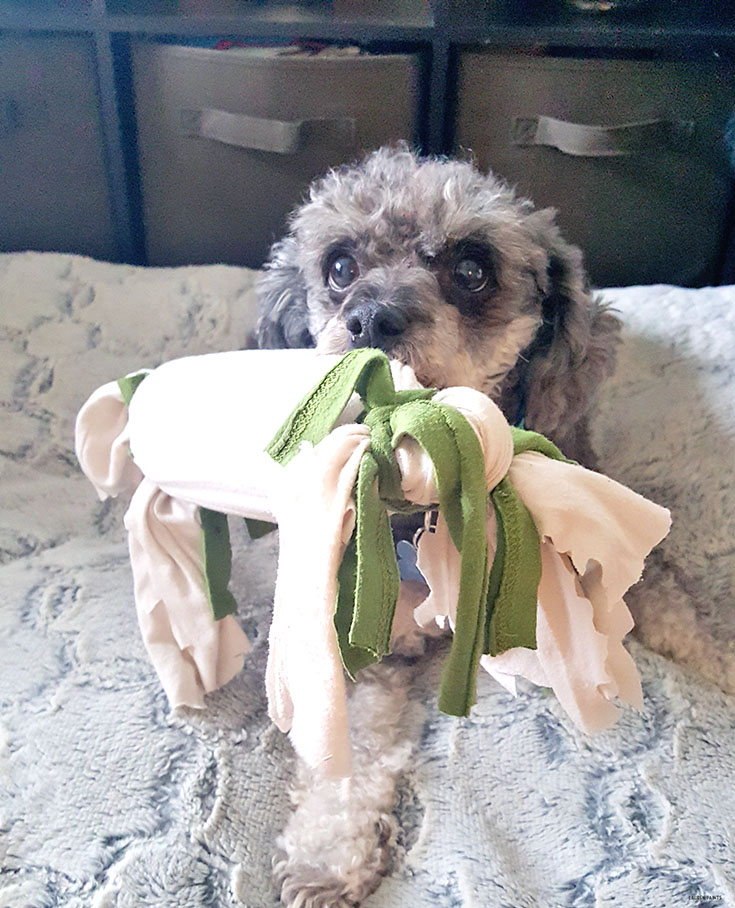
After your fabric is "measured", cut one slit into each end of the pant fabric and tie the bottle inside with a double knot on each end. Cut the dress or shirt hem into pieces and tie them around each double knot of the bottle.

Changing up your dog's life doesn't have to be a stressful thing... Find out more about Beneful's NEW formula and get the directions to make your pup a toy out of materials you likely already have in your home! #FriendsofBeneful

Since my pant legs were choppily cut anyways, I went ahead and added a few extra slits to the pant fabric to make for some frayed ends, if you would like you can do the same to add some texture and make it easier for your pup to grab.

Changing up your dog's life doesn't have to be a stressful thing... Find out more about Beneful's NEW formula and get the directions to make your pup a toy out of materials you likely already have in your home! #FriendsofBeneful

Now's the fun part for you and your pup, hand this cute little tied fabric toy over to your fuzzy best friend and let them enjoy!

Changing up your dog's life doesn't have to be a stressful thing... Find out more about Beneful's NEW formula and get the directions to make your pup a toy out of materials you likely already have in your home! #FriendsofBeneful

It's that easy to give your dog something they'll adore... and it's all made with stuff that would likely end up in the trash or recycling anyways! The best part of this toy is the fact it smells like me somewhat... so while we're at the hospital next month this will be a great way to remind them of me. If I don't say so myself, this is a great toy for a dog going through a transition... and I think my poodle friend agrees!

Changing up your dog's life doesn't have to be a stressful thing... Find out more about Beneful's NEW formula and get the directions to make your pup a toy out of materials you likely already have in your home! #FriendsofBeneful

So tell me, have you changed anything major in your dog's life before? Thinking it's time for a change? Don't forget to snag a free Beneful sample here, then let me know all about your doggy's life changes in the comments below.


November 22, 2015

EASY DIY Photography Wooden Backdrop


You can make this beautiful wooden back drop in minutes without breaking the bank & it's perfect for capturing a gorgeous photo of anything!

It probably comes as no surprise to you, I love having pretty surfaces to take photos of my crafts, recipes, and other little tidbits... while my house has a few counter tops, I'll admit they aren't the most beautiful so I've had to resort to getting crafty to make beautiful backdrops for my photos.  As you've probably noticed if you look at the photos here, I've had an old light wooden board for a while now... but recently I decided I want to "upgrade" to something more fitting for fall and decided to make a new photo backdrop with dark "wood", but this time I want to share how I made it in case you want to make one too!

You can make this beautiful wooden back drop in minutes without breaking the bank & it's perfect for capturing a gorgeous photo of anything!

The last time I made one of these boards, I did it blindly and spent WAY too much on materials. I bought everything from Michael's and while I love the store, their wooden boards are too expensive without a coupon. I still get my thick white poster board from Michael's and I always, always, always shop for props while I'm there... I mean you never know when you'll need a gold charger plate or clear "gems".

You can make this beautiful wooden back drop in minutes without breaking the bank & it's perfect for capturing a gorgeous photo of anything!

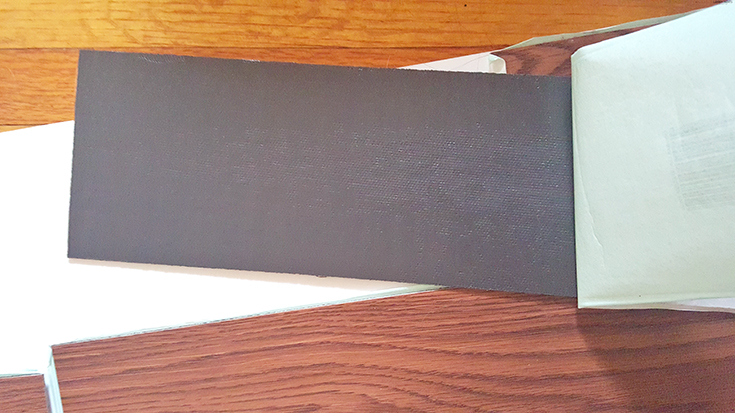
This time I bought my "wooden" boards from Home Depot, but I'm certain you could find them at most big box home improvement stores! I bought a stack of about 8 laminate pieces of wood, to cover the entire board with some staggering. Each board costs about 1/3 less than they do at Michael's and you don't have to pay for glue because these come with a sticky coating on the back that works like magic!

You can make this beautiful wooden back drop in minutes without breaking the bank & it's perfect for capturing a gorgeous photo of anything!

So once you have those two items and a pair of scissors, you can get down to business making your board. I love that this project is so easy, it's basically like a cut & paste worksheet from elementary school - I want to make a million boards now!

You can make this beautiful wooden back drop in minutes without breaking the bank & it's perfect for capturing a gorgeous photo of anything!

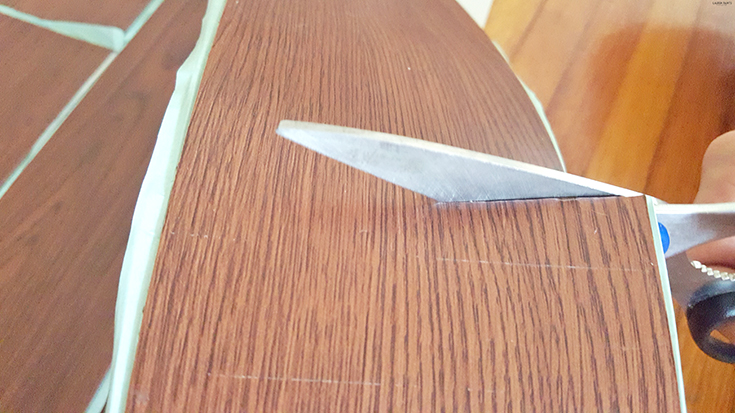
First you'll want to begin by laying your thick poster board flat, then place each plank approximately where you want them to be glued. Begin with the boards cloest to you, trimming the excess off the edges and peeling and sticking each piece.

You can make this beautiful wooden back drop in minutes without breaking the bank & it's perfect for capturing a gorgeous photo of anything!

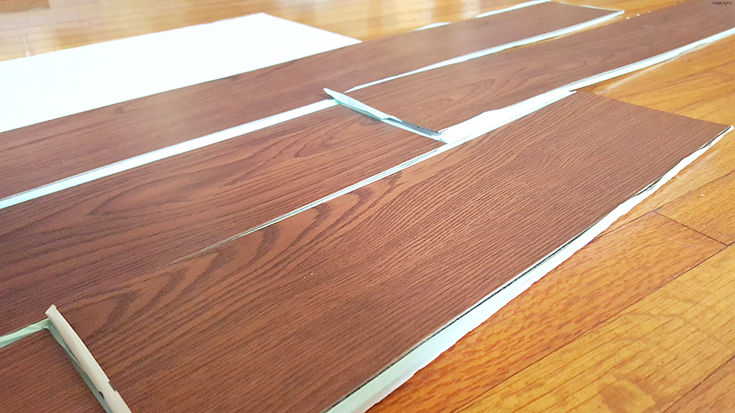
Continue strategically placing each board, using ends of other pieces to fill in the gaps. Laying the board without any gaps or white spots showing and pressing firmly for at least 20 seconds per board.

You can make this beautiful wooden back drop in minutes without breaking the bank & it's perfect for capturing a gorgeous photo of anything!

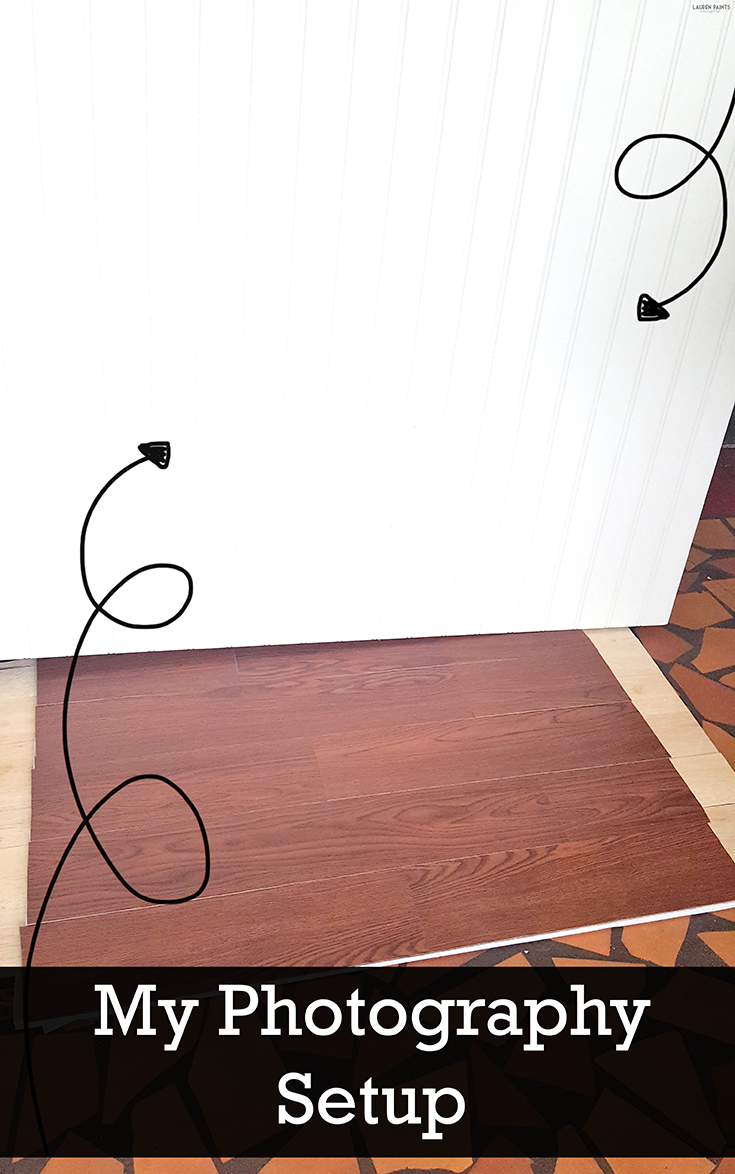
Once completed, make sure to trim to excess off the edges and your new photo prop board is complete! This project can be done, with a store run & all, in less than an hour - it's that easy to have a beautiful backdrop for photos! I set mine up with a gorgeous piece of white bead board and I always have the perfect spot to capture a photo of anything!

You can make this beautiful wooden back drop in minutes without breaking the bank & it's perfect for capturing a gorgeous photo of anything!

The cool thing about these backdrops is that I can paint them at some point if I want, or they can age just like a wooden floor would... Plus, I see lots of wall hanging projects being made from the backdrops I use real wood on! I love all the different ways I can use these "backdrops" and with the simplicity of this project, there are a TON of possibilities!

You can make this beautiful wooden back drop in minutes without breaking the bank & it's perfect for capturing a gorgeous photo of anything!

So tell me, what's your favorite thing to take pictures of? Do you have a favorite spot in your house to take pictures? I love hearing all about other people's photography habits & styles and I can't wait to hear all about yours in the comments below!

November 16, 2015

How to Achieve A Golden Glow for The Holidays with Milani + a CVS Gift Card Giveaway!

This shop has been compensated by Collective Bias, Inc. and its advertiser. All opinions are mine alone. #LookByMilani #CollectiveBias
Check out how you can get a golden glow all winter long with this #LookByMilani!

I've always been a makeup junkie, I love trying out new products and experimenting with new looks so when I found all kinds of fun Milani products I hadn't tried before at CVS, I knew I had to invest and add a few new items to my makeup collection.

Check out how you can get a golden glow all winter long with this #LookByMilani!

I grabbed a handful of everything Milani, from Eyeshadow Primer to Black Gold Foil Eyeliner. That's why I love shopping the little Milani area at CVS, they carry everything this makeup lover could want or need!

Check out how you can get a golden glow all winter long with this #LookByMilani!


With a whole new look in my bag, I was on my way out the door and ready to start experimenting with the new products... If you're a makeup junkie like me, you know the excitement of getting a whole new line up of makeup products.

Check out how you can get a golden glow all winter long with this #LookByMilani!

I've been trying to figure out how I was going to do my makeup for our upcoming Christmas photoshoot, plus I've just been wanting to give a "new look" a try so trying out a new line of makeup was a great way to mix things up for me!

Check out how you can get a golden glow all winter long with this #LookByMilani!

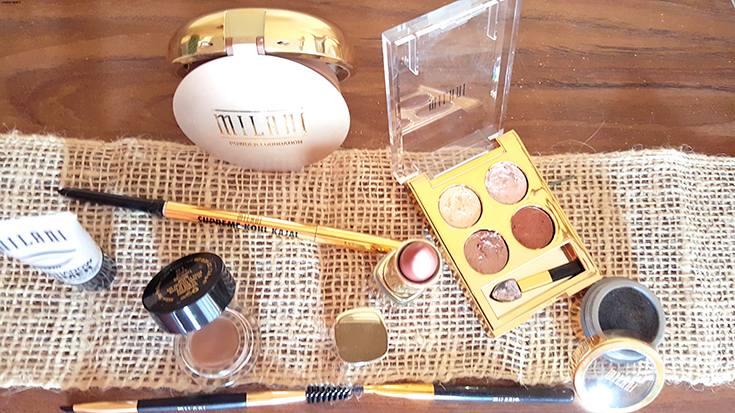
The Fierce Foil eyeliner is actually new to everyone, not just me. It's hopping right off the Milani runway and into the hands of makeup lovers everywhere. Blackened jewel tones with a beautiful, shiny foil finish add the little extra pop you need when used as a liner or the fierce foil can really make your eyes have depth if used as an eyeshadow. I'm loving the gold flecks mixed with the darkness, it's perfect for a smoky eye effect with some glimmer!

The next item on my list of goodies is the Milani Supreme Kohl Kajal eyeliner. It's so super soft and easy to apply, yet it doesn't smudge like other brands tend to do. Plus, it's waterproof and laced with hydrating, nourishing ingredients... I've always been a heavy eyeliner user, so I'm more than happy to have finally found a drugstore brand eyeliner that won't smudge!

Check out how you can get a golden glow all winter long with this #LookByMilani!

The Stay Put Brow is something that I wouldn't normally use, but I'm so glad I decided to give it a try. I love makeup, but I've always felt my brows were satisfactory, until recently. I want to give my brows the extra oomph they deserve so I've started filling them in some with Stay Put Brow from Milani and boy, what a difference good eyebrows can make with a full face of makeup!

The Eyeshadow Primer is one of those makeup items that everyone should own, especially if you love bold eyeshadow looks. It's amazing how easy the primer was to apply and it definitely helped my eye makeup last longer and made the colors more bold!

Check out how you can get a golden glow all winter long with this #LookByMilani!

The Milani foundation powder is a definitely going to be a new makeup staple in my collection. I loved how silky smooth it went on and the color matches my skin to a T. Plus, it provides just the right amount of coverage without looking cake-y!

Check out how you can get a golden glow all winter long with this #LookByMilani!

The Golden Eyeshadow Palette includes four gorgeous shades of brown/gold tones that are absolutely dreamy. It has a creamy texture which means it won't flake off onto your cheek and it goes on smooth as butter! I'm a HUGE fan of Milani eyeshadows now and will be buying every color palette they make!

Check out how you can get a golden glow all winter long with this #LookByMilani!

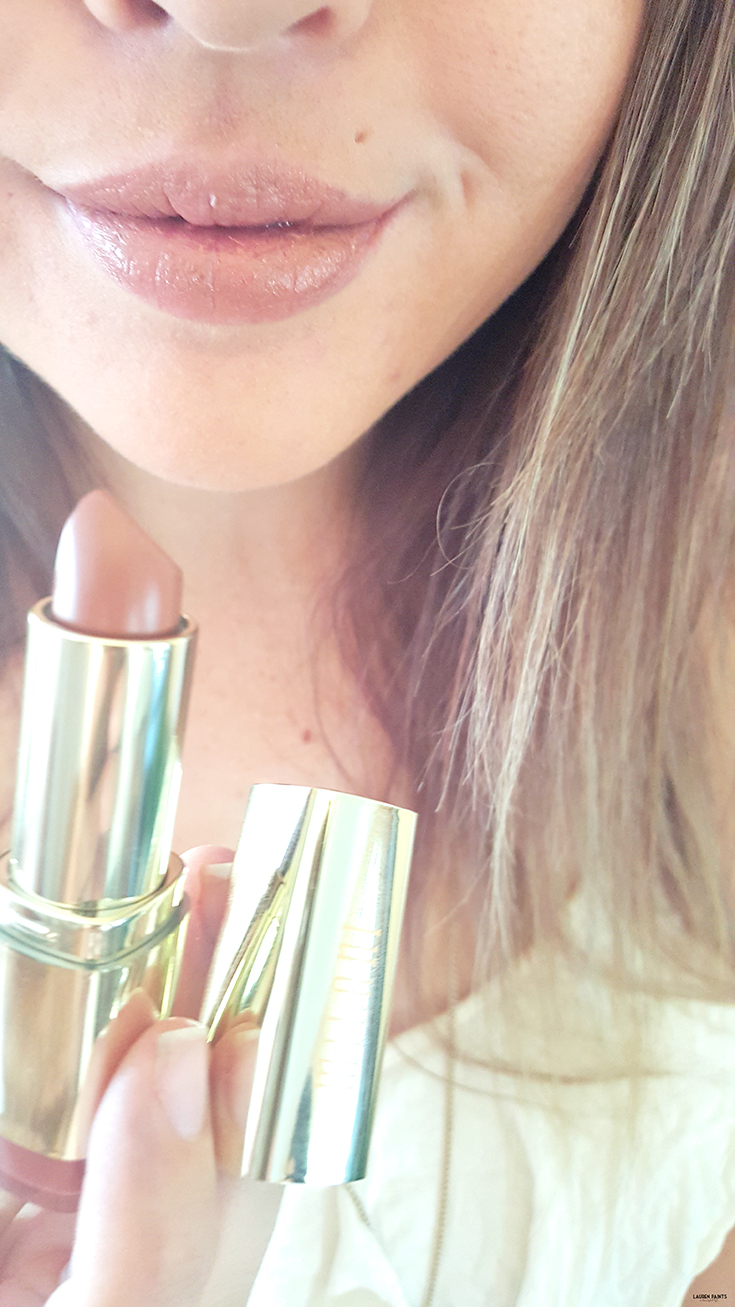
The last item I grabbed was a Color Statement Lipstick and it is stunning! I'm a huge fan of adding a pop of color to a fairly neutral face and vice versa so I grabbed a shade that I think will look good no matter what. Laced with vitamins A and C to hydrate and nourish my lips, the Bahama Beige is another new staple in my makeup collection! Next I'll be adding the Brandy Berry to my collection I think, although all the colors are beautiful!

Check out how you can get a golden glow all winter long with this #LookByMilani!

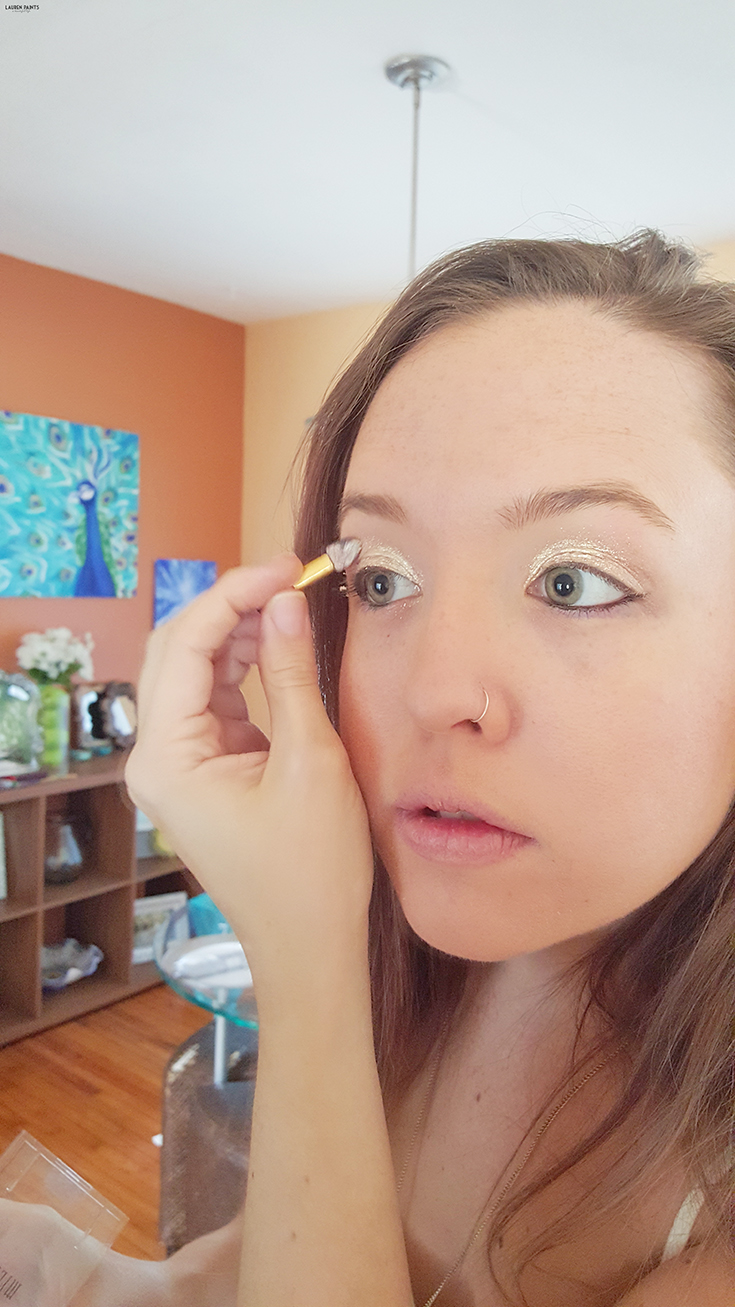
Now how did I apply it all? Here's a super quick video of my application... But I started with the Milani powder, leaving a gorgeous base for me to work with. Then I added some of the eyeshadow primer to my eyelids, followed by a heavy line of Fierce Foil eyeliner. Next, I lined my lower eye with the Supreme Kohl Kajal eyeliner.

Check out how you can get a golden glow all winter long with this #LookByMilani!


Then I added a heavy helping of the light tan/gold eyeshadow all over my lid, with a little bit of the medium color on the corners of my eyes. Followed by applying a small amount of white eyeshadow on the inner part of my eye and smudge it a tiny bit so it blends into your eyeshadow - this really makes your eyes pop! Next I line my brows, if I'm feeling fancy... and lastly, I apply blush and mascara and out the door I go!

Check out how you can get a golden glow all winter long with this look by Milani!

It's easy to achieve this makeup look, I promise anyone can do it if I can! It's my new favorite look to rock and I imagine I'll feel that way all Fall long!

Check out how you can get a golden glow all winter long with this #LookByMilani!

Check out how you can get a golden glow all winter long with this #LookByMilani!

Now that I've shared how I achieve my golden glow, I want to reward you with something super awesome! You can enter to win 1 of 3 gift cards from CVS, one lucky reader will win (1) $500 CVS Gift Card and two lucky readers will win (1) $250 gift card! Use the giveaway form to enter to win:


All of this makeup talk has me thinking maybe I should do more makeup tutorials! I'd love to hear what celebrity looks or makeup trends you are digging this year, I'll do my best to find creative, simple ways to achieve these looks and share them with you! Leave me a comment telling me which look you want to try and achieve the most this season...
November 12, 2015

A Modern, Rustic Holiday Set Up Inspired by Hallmark + a Simple DIY Holiday Card Holder


Love this little set up? Find out how you can make a super cute (and simple) DIY holiday card holder today! #Hallmark: https://ooh.li/660e5d9

Did you know that Christmas is only SIX weeks away? That means it's time to start getting your Christmas decor ideas pinned and the craft materials to make it all... and it's probably a good time to start buying Christmas gifts for the one's you love while you're at it!

Love this little set up? Find out how you can make a super cute (and simple) DIY holiday card holder today! #Hallmark: https://ooh.li/3f728a0

I cant wait to share all kinds of awesome gift ideas over the next few weeks in my Holiday Gift Guide, but today I want to share how I'm decorating for Christmas and how I'm using the holiday cards I've received in the mail as cute Christmas Decor this year!

Love this little set up? Find out how you can make a super cute (and simple) DIY holiday card holder today! #Hallmark: https://ooh.li/3f728a0

I was shopping at Hallmark for decor inspiration, they always have the cutest items so it's easy for me to find pieces that I want to center my whole holiday decor around and this year I found so many amazing and adorable ways to decorate for the holidays, I had trouble deciding what I wanted to do in our entry way.

Love this little set up? Find out how you can make a super cute (and simple) DIY holiday card holder today! #Hallmark: https://ooh.li/3f728a0

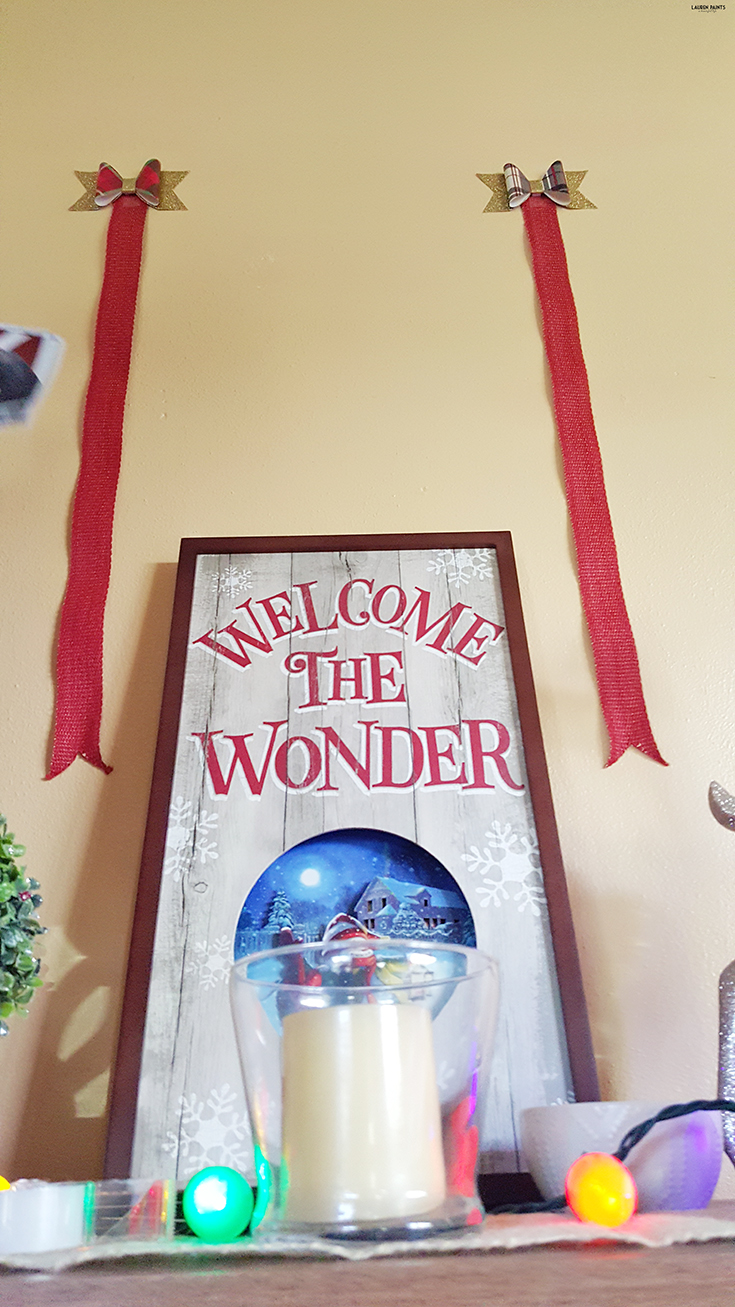
I had a handful of mugs and some adorable cake plates in my hands at first but then I decided I wanted to get those items later when it's time to decorate the kitchen. Then, I had a caboodle of stuffed animals and itty bitty's but that just didn't feel right. Finally, I decided I wanted to keep things simple and do something that involved a modern take on rustic decor and it was all inspired by the Welcome the Wonder Enchanted Art Decoration! With an adorable little snow man in the center of a winter wonderland, I wanted to bring some of that "chilly goodness" into my Florida home and I'm so glad I did.

Love this little set up? Find out how you can make a super cute (and simple) DIY holiday card holder today! #Hallmark: https://ooh.li/3f728a0

With so many locations nearby me, I'm always stopping in to Hallmark, and I constantly find cute stuff that inspires me, but I'm really proud of the way my house is decorated this year... it's just too cute! The way the cards from my family members hang and the adorable bow accents centered around the most wonderful sign, I'm just so excited for Christmas I can't stand it! I'm waiting for more Christmas cards to roll in and I can't wait to see more of our family and friends smiling at us when we walk in our front door! Do you want to have the same little set up? I can't wait to help you make this super simple craft!

Love this little set up? Find out how you can make a super cute (and simple) DIY holiday card holder today! #Hallmark: https://ooh.li/3f728a0

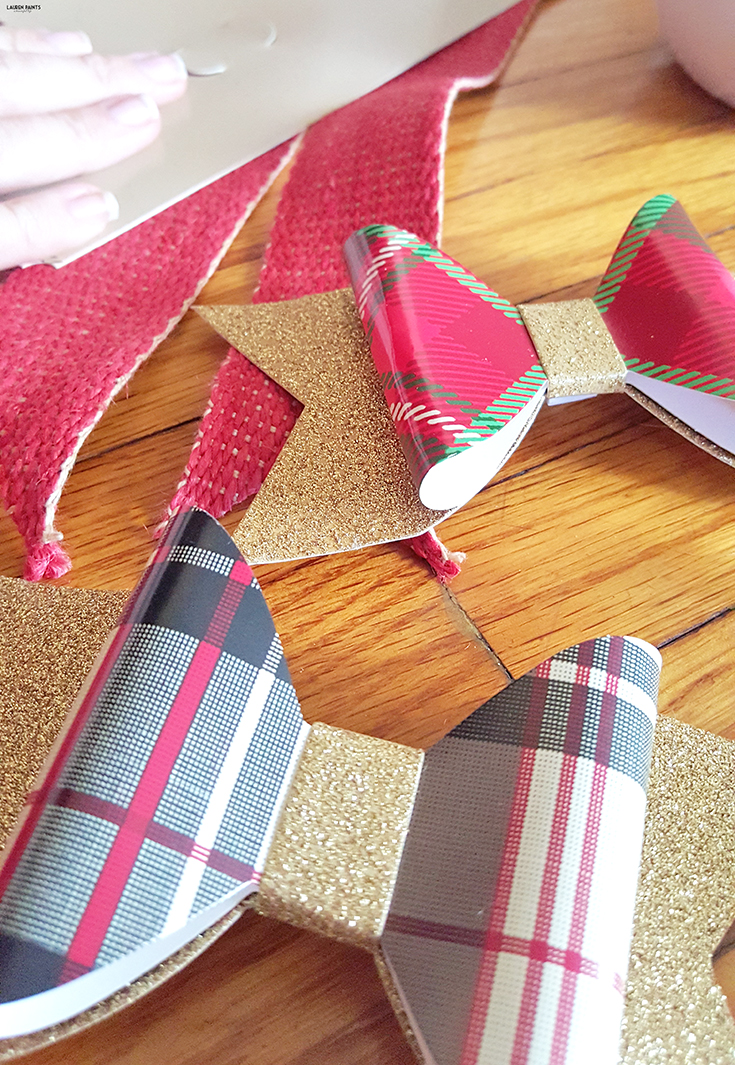
It's easy to make a card display like mine! Make a trip to Hallmark for red burlap ribbon, tape, and the most adorable pre-made Christmas bows! Don't forget to grab one of the adorable Enchanted Art pieces or some of the cutest sweater covered mugs you've ever seen... and as I mentioned, gifts are always a good idea while out shopping for craft supplies so grab some holiday cards to send out or a candle or two from the Crafters & Co line while you're at Hallmark!


If you want you can watch the video above for a visual tutorial or I've included the step by step process in text/photos below!

Love this little set up? Find out how you can make a super cute (and simple) DIY holiday card holder today! #Hallmark: https://ooh.li/3f728a0

Once you have the supplies, you'll begin by cutting two pieces of the red burlap ribbon to equal lengths. Then cut out a small triangle on ONE end of each of the pieces of ribbon.

Love this little set up? Find out how you can make a super cute (and simple) DIY holiday card holder today! #Hallmark: https://ooh.li/3f728a0

Tape the ribbon to the wall, with one piece at the top and one piece folded into a tube and taped onto the back. Take off the sticky part of the pre-made bows and press them gently on top of the piece of tape at the top of the ribbon.

Love this little set up? Find out how you can make a super cute (and simple) DIY holiday card holder today! #Hallmark: https://ooh.li/3f728a0

Place cards onto the ribbon with tiny clothespins, paperclips, or even a piece of tape. Now show off all the love you've been sent and smile in delight!

Love this little set up? Find out how you can make a super cute (and simple) DIY holiday card holder today! #Hallmark: https://ooh.li/3f728a0

With the Welcome the Wonder Enchanted Art sign and the simple little craft I made, as well as a plain wooden Christmas tree, a bright golden deer, a little bit of burlap, some christmas lights, a few candles, a couple of gold glittery gift tags, and a plant or two - I think my entry way looks just spirited enough and perfectly rustic with a modern twist.

Love this little set up? Find out how you can make a super cute (and simple) DIY holiday card holder today! #Hallmark: https://ooh.li/3f728a0

So tell me, have you been into Hallmark yet this season? They have SO many amazing items, I'm certain you'll fall in love - go ahead and check out the site and let me know which item is your favorite!

Love this little set up? Find out how you can make a super cute (and simple) DIY holiday card holder today! #Hallmark: https://ooh.li/3f728a0

As I said, I can't wait to share some awesome gift ideas over the next month in my holiday gift guide - make sure to subscribe to my social media channels so you can stay in the know on upcoming giveaways for all kinds of companies over the holidays!

November 8, 2015

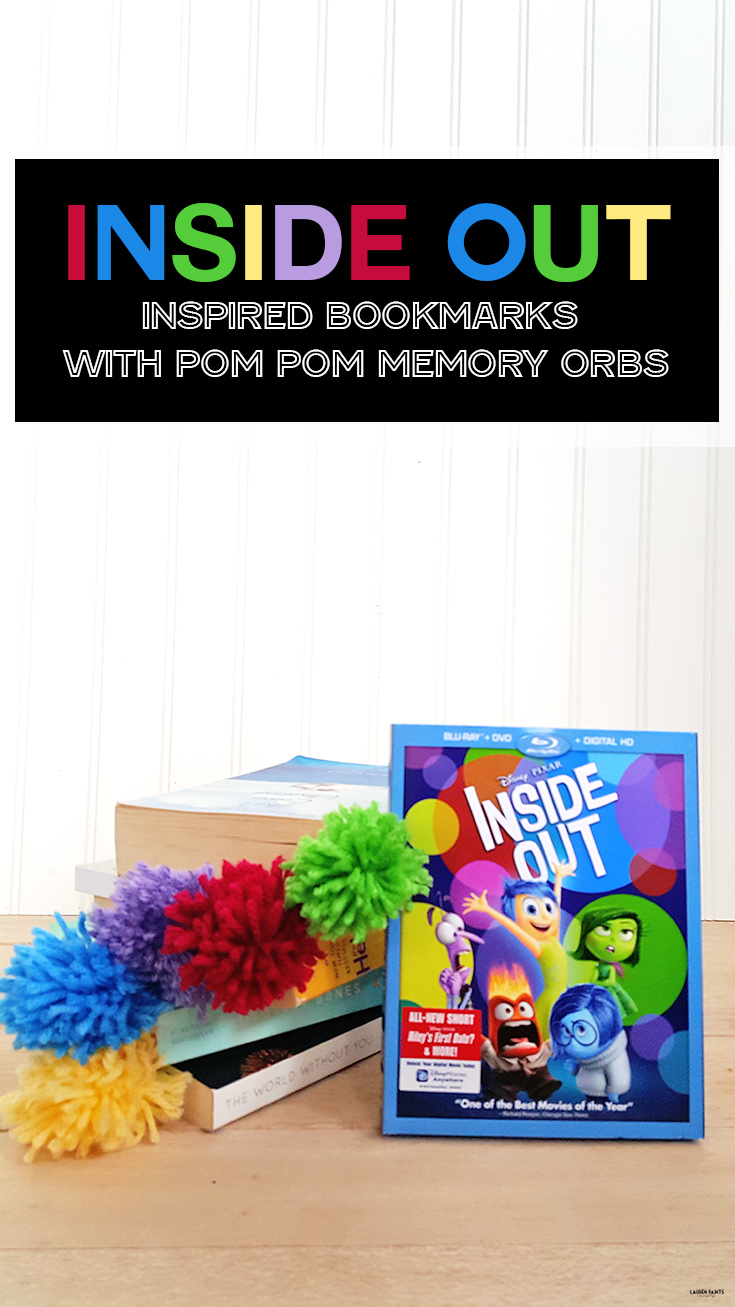
DIY "Inside Out" Inspired Bookmarks with Pom Pom Memory Orbs

This shop has been compensated by Collective Bias, Inc. and its advertiser. All opinions are mine alone. #InsideOutMovieNight #CollectiveBias


With the release of Inside Out on disc, you better believe I'm crafting up something awesome! Check out how you can make these cool and emotional bookmarks with poofy pom-pom memory orbs! The perfect way to bring a part of your favorite movie into your reading fun!

I'll be the first to admit, I'm a total kid at heart. I love cartoons and I often discuss my favorite Disney flicks on my blog, but today I want to talk about one of my all time favorite cartoon movies - Inside Out. If you've seen it, then you know why I love the movie so much!

With the release of Inside Out on disc, you better believe I'm crafting up something awesome! Check out how you can make these cool and emotional bookmarks with poofy pom-pom memory orbs! The perfect way to bring a part of your favorite movie into your reading fun!

With humor and discussions about some of the harder lessons to learn in life all tied into one precious little movie, it's easy to see why it's such a favorite across the nation - especially in our house! My nieces and nephews all seem to be pretty big fans of Inside Out as well, so when I heard it was coming out on video I knew that we had to add a copy of it to our library.

With the release of Inside Out on disc, you better believe I'm crafting up something awesome! Check out how you can make these cool and emotional bookmarks with poofy pom-pom memory orbs! The perfect way to bring a part of your favorite movie into your reading fun!

Luckily, I just happened to be wandering around Target on the day it was released and into my cart it went; along with all the "essentials" that I decided I needed while I was browsing the aisles - like a new book, snack foods, a couple knick-knacks for our living room, a cozy blanket to snuggle up with, and some new clothes... Target does it to me every single time, I know I'm not the only one!
With the release of Inside Out on disc, you better believe I'm crafting up something awesome! Check out how you can make these cool and emotional bookmarks with poofy pom-pom memory orbs! The perfect way to bring a part of your favorite movie into your reading fun!

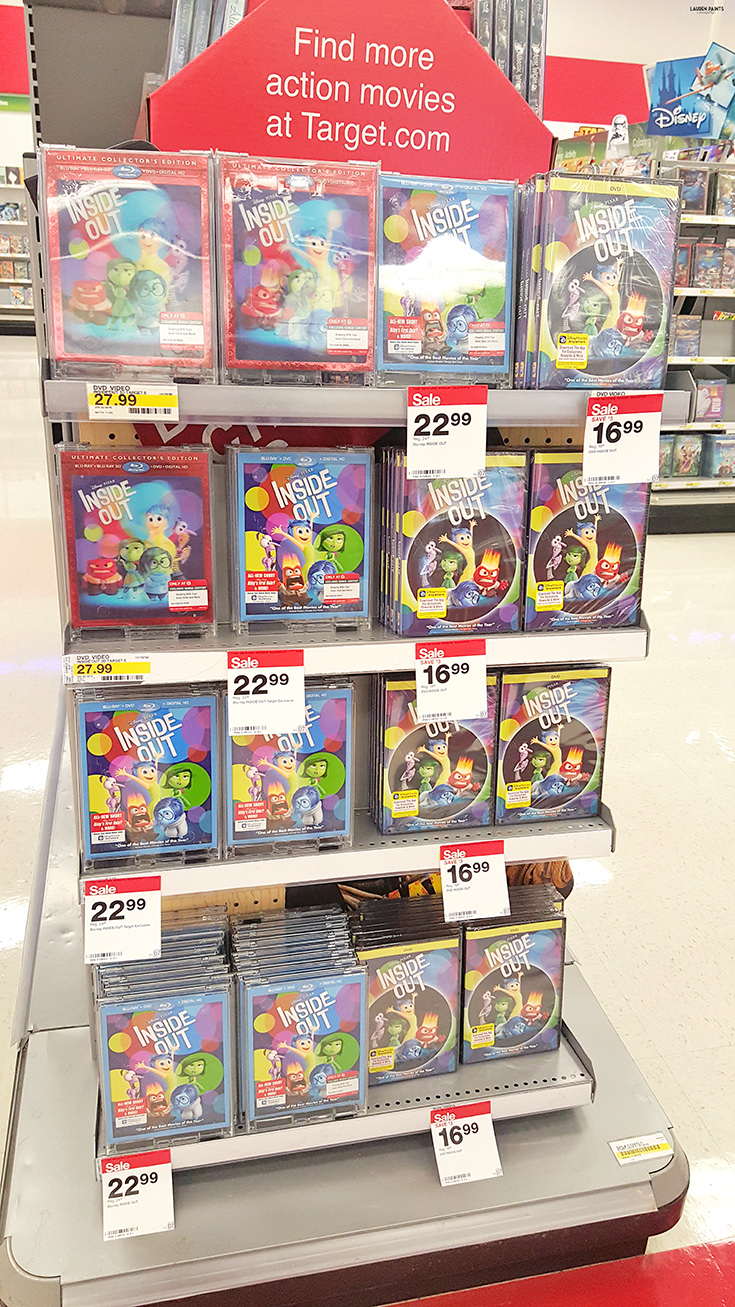
Regardless of my "anger" toward my inability to control my shopping addiction while at Target, I was excited to see they not only had Inside Out for sale, but on sale! SCORE, I love finding a bargain! Plus, I noticed that my copy is better since I bought it at Target! Why is it better? Inside Out DVDs and Blu-Rays purchased at Target include 20 minutes of exclusive bonus content and deleted scenes! How cool is that?

With the release of Inside Out on disc, you better believe I'm crafting up something awesome! Check out how you can make these cool and emotional bookmarks with poofy pom-pom memory orbs! The perfect way to bring a part of your favorite movie into your reading fun!

After filling my cart full of all kinds of goodies, I knew it was time to head home and start coming up with a craft I could do while watching the movie... because let's face it, I'm one of those people that's constantly fidgeting so I figured I might as well multi-task while watching one of my favorite flicks!

With the release of Inside Out on disc, you better believe I'm crafting up something awesome! Check out how you can make these cool and emotional bookmarks with poofy pom-pom memory orbs! The perfect way to bring a part of your favorite movie into your reading fun!

Since I had the new movie, a new book and a new fuzzy blanket, I turned to them for inspiration and I instantly knew that I needed some super colorful, fun, and funky bookmarks themed after my favorite movie - a mixture of all 3 of my new favorite items!

With the release of Inside Out on disc, you better believe I'm crafting up something awesome! Check out how you can make these cool and emotional bookmarks with poofy pom-pom memory orbs! The perfect way to bring a part of your favorite movie into your reading fun!

Making these little pom pom Inside Out bookmarks isn't hard at all, follow this DIY tutorial and you'll be able to express your emotions every single time you open a book.

With the release of Inside Out on disc, you better believe I'm crafting up something awesome! Check out how you can make these cool and emotional bookmarks with poofy pom-pom memory orbs! The perfect way to bring a part of your favorite movie into your reading fun!

First we'll start with making the pom-poms.... You'll wrap a piece of yarn, repeatedly around your pointer and middle finger, leaving a little tail in between those fingers.

With the release of Inside Out on disc, you better believe I'm crafting up something awesome! Check out how you can make these cool and emotional bookmarks with poofy pom-pom memory orbs! The perfect way to bring a part of your favorite movie into your reading fun!

Once you have your fingers throughly surrounded with yarn, you'll want to tie the two lose ends into a lose knot. Then use a short string to tie around both sides of the yarn, making it into a little donut like ball of sorts.

With the release of Inside Out on disc, you better believe I'm crafting up something awesome! Check out how you can make these cool and emotional bookmarks with poofy pom-pom memory orbs! The perfect way to bring a part of your favorite movie into your reading fun!

Once your donut ball is made, you'll want to cut evenly through each little piece of yarn. Allowing it to turn into a "poof". Go ahead and cut off excess yarn and your poofy little pom-poms are ready! I actually left ONE piece of yarn longer so that I could easily tape my pom pom to my bookmark, I suggest you do the same for easier assembly!

With the release of Inside Out on disc, you better believe I'm crafting up something awesome! Check out how you can make these cool and emotional bookmarks with poofy pom-pom memory orbs! The perfect way to bring a part of your favorite movie into your reading fun!

Next you'll want to print this FREE printable on cardstock, then cut each word out with a pair of scissors.

With the release of Inside Out on disc, you better believe I'm crafting up something awesome! Check out how you can make these cool and emotional bookmarks with poofy pom-pom memory orbs! The perfect way to bring a part of your favorite movie into your reading fun!

With the release of Inside Out on disc, you better believe I'm crafting up something awesome! Check out how you can make these cool and emotional bookmarks with poofy pom-pom memory orbs! The perfect way to bring a part of your favorite movie into your reading fun!

Attach your pom-pom to the top of each word with a piece of tape and your bookmarks are ready to use! It's that simple!

With the release of Inside Out on disc, you better believe I'm crafting up something awesome! Check out how you can make these cool and emotional bookmarks with poofy pom-pom memory orbs! The perfect way to bring a part of your favorite movie into your reading fun!

Now that I've shared how I made my super cute Inside Out emotion inspired bookmarks, I'd love to hear your opinion on the movie? Are you a huge fan of "Joy" and her crew or does the movie "Disgust" you? Tell me all about your favorite character in the movie and your favorite scene, I can't wait to hear which emotion you feel you can relate to the most!

With the release of Inside Out on disc, you better believe I'm crafting up something awesome! Check out how you can make these cool and emotional bookmarks with poofy pom-pom memory orbs! The perfect way to bring a part of your favorite movie into your reading fun!